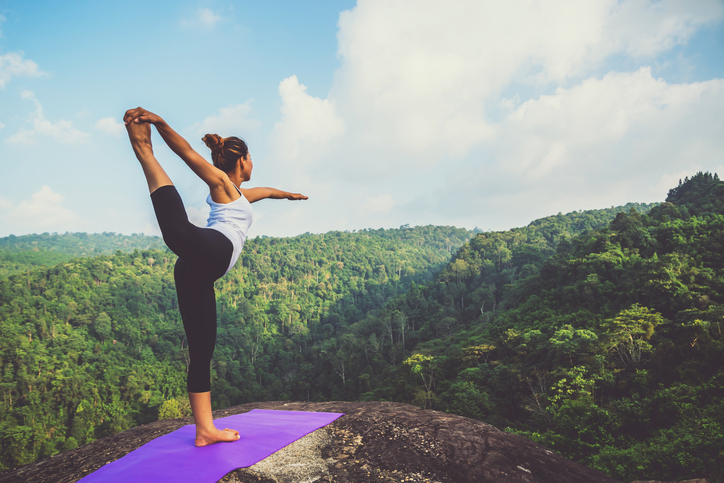
Whether you’re going on an all day, strenuous hike or a short, flat easy hike, getting into some yoga asanas (poses) for a few minutes can be incredibly beneficial. Hiking presents a unique blend of challenges and rewards, pushing your body and mind through different terrains and elevations. As a hiker, embracing yoga asanas and some yogic concepts can enhance your experience, making each step steadier and each breath deeper.
Why Yoga on a Hike?
Before setting out, it’s important to prepare your body for the demands of hiking. Yoga can be a powerful tool for this, addressing key areas such as the chest, legs, hips, and back while also cultivating mental focus and respiratory efficiency. By checking in with yourself on the mat at home or right outside in nature before your hike, you can improve flexibility, strength, and mindfulness on the trail.
Yoga and Nature
Incorporating yoga into your hiking routine strengthens your body, calms your mind, and deepens your connection to the environment around you. Once you begin incorporating yoga into your life more and more, you’ll find that both hiking and yoga each enhances the other, leading to a richer, more fulfilling outdoor experience. Simply practicing a pose or two before you get on the trail can help prevent injuries and also help you release whatever you may have on your mind before you head full out into nature.
Some Reminders When Hiking & Doing Yoga
You know your body better than anyone else. Make sure you are aware of your limitations, injuries (past or present), and overall energy level before practicing yoga or heading out on a hike. Just like you are the only one who can decide what level yoga class you should attend, you are also the only one who can decide what level of difficulty you want to face on a hike. Remember, everyday is different and every body is different. What felt great last week may not feel great today.
If you are a regular practitioner of yoga, you are already in tune with your breath and aligned with how your body feels for you right now. Remember to keep this wisdom with you on any hike and during any physical activity you move through. Don’t forget to have fun and enjoy each moment because that’s really what’s at the heart of hiking, moving, breathing, and living!
Prasarita Padottanasana (Wide-Leg Forward Fold)
When you’re preparing for a hike, Prasarita Padottanasana, or Wide-Leg Forward Fold, can be a great addition to your pre hike prep. Regardless as to the length or difficulty level of your hike, stretching the legs is always helpful. Prasarita Padottanasana is performed with your feet wide apart and your hands down in the ground or up on something. This pose helps in stretching the hamstrings, calves, and the majority of the back body.
It’s especially beneficial as it helps open the hips and strengthens the legs without putting any pressure on the wrists, making it ideal if you’re recovering from a wrist injury or simply want to avoid aggravating any wrist pain. Approach this pose mindfully, ensuring you move slowly into the it to avoid any sudden movements that might strain your legs or back. This asana enhance overall body awareness, and also contributes to mental readiness for any challenges a hike might present.
How to get into Prasarita Padottanasana:
- Begin somewhere where you can step your feet wider than shoulder’s width apart. Ideally, when you stand tall and open your arms into a “T” shape, you try to being the edges of your feet beneath the tips of your fingers, but you can certainly take the legs closer together. You might put a backpack down in front of you or even use the back of your car or a tree trunk as you move into this asana.
- Bring your hands to your hips and start to fold forward between your legs. If you need to, you can bend your knees to control your descent down.
- Reach your hands down to the ground (or your backpack, car, or tree in front of you), and take a look at your toes. Try to have all toe tips facing the same direction or you can play with turning them slightly inward.
- Release the weight on your head to elongate your neck and either keep your hands where they are or walk them forward like a Downward Facing Dog with wide legs.
- As you breathe in, engage your thighs. As you breathe out, release your chest towards the earth.
*Reminders: Pay attention to the sensation you feel through the backs of your legs and your whole back body. Avoid going to deeply into this asana if you are feeling tight from a car ride or from anything that you did prior to preparing for your hike.
Skandasana (Wide Leg Squat Over One Leg)
Your hips and knees are important for hiking, often bearing all of the activity’s demands. Skandasana is particularly beneficial in preparing these key joints and surrounding muscles for the trails. In Skandasana, you transition into a deep squat that targets one leg at a time, allowing the other leg to stretch out. This asana helps in opening up the hips, stretching the hamstrings and calves, and strengthening the quadriceps and glutes.
If you find yourself needing to take modifications don’t hesitate to adjust your stance or slow down to ensure proper alignment, which can significantly enhance the effectiveness of the pose while protecting your hips and knees. Remember, yoga is about fostering a nurturing relationship with your body, and when approached with care, Skandasana can be a powerful tool in preparing for a hike, enhancing your stability and endurance on the trails.
How to get into Skandasana:
- Begin in Prasarita Padottanasana and notice where your hands are. If you need to, grab your backpack or a water bottle, or brace yourself using the bumper of your car or a tree stump.
- Begin to bend one knee while keeping your hips facing the same side. Do your best to keep the heel of the bent knee rooted to the earth and the bent knee bending right over the second and third toes.
- Reach your sitting bones back in space and extend your chest forward.
- Release your hands to the ground or onto something. You may move your hands a bit more forward of your pelvis or towards one leg or the other.
- As you breathe in, flex the foot of the extended leg to make sure your toes turn towards the sky. As you breathe out, relax your jaw and shoulders.
- Repeat on the left side.
*Reminders: You are as unique as every plant and flower and leaf you see on your hikes! This means you should always listen to your body, notice your breathing, and work with your inhale and exhale to inform you of your limitations. Pay attention to what feels tight and what’s feeling open. Let that inform your pace of the hike.
Purvottanasana (Upward Plank/Reverse Plank Pose)
Hips and shoulders are key players in maintaining balance and stability while hiking, and they can often be areas of tension due from wearing a backpack or uneven terrain. Purvottanasana, or the Upward Plank Pose (also known as Reverse Plank), is beneficial for strengthening these areas in preparation for hiking adventures. In Purvottanasana, you lift your body into a reverse plank position, which engages the muscles of the shoulders, back, core, and legs.
This pose not only strengthens but also stretches the front of the shoulders and the chest, providing a counterbalance to the forward-leaning posture often adopted during long hikes. Remember, yoga encourages a harmonious relationship with your body, and Purvottanasana can be a key part of preparing both physically and mentally for the demands of hiking.
How to get into Purvottanasana:
- You may want to find some grass, use a towel, blanket, or yoga mat for this one. Begin seated and step your feet to the ground in front of you and your hands to the ground behind you with your fingers facing your feet or facing outwards.
- Stretch your legs out in front of you and point your toes.
- Press into the earth with your hands and use the strength of your upper back to lift your chest towards the sky.
- Mindfully point your toes as you drive your hips to the sky.
- Continue to point your toes towards the earth and either look directly upwards to slightly back, being mindful of the sensation in your neck.
- As you breathe in, reach your hips skyward. As you breathe out, press the earth away from you.
*Reminders: You can always have your feet flat on the earth and your knees bent for this one so it resembles more of a reverse table top than a reverse plank pose. This can also be a helpful ally for your body post hike, too! Sometimes carrying a backpack or any other gear will cause the chest and shoulders to tighten up or even close off more than you’d like. This asana is a great way to open the chest after your hike or even while taking break!


