“We must learn to stand on our feet before we stand on our head.” ~ B.K.S. Iyengar
I love this quote from Yoga Master B.K.S. Iyengar because it’s a great reminder of the importance of Standing Poses in the practice of asana. The fundamental movements and precision we learn in standing poses directly relates to how the human body moves in everyday life as we sit, stand, walk, and run. These
Although they may seem simple, they provide a strong foundation for many yoga practitioners. Standing poses provide strength and mobility in the feet, ankles, legs, hips, torso, arms, shoulders, and neck. In essence, standing poses work the entire body and much of the alignment and movement necessary to practice advanced postures are learned in the standing poses.
Supporting Pose 1: Supported Fish with arms overhead (Matsyasana)
Firming in the upper back, aka the thoracic spine, is a key component when we want to lift our chest. Using the blocks in this posture helps make an impression in the upper back that is needed later when we practice Warrior 1. The arms extending overhead alongside the ears is also a key component in Warrior 1
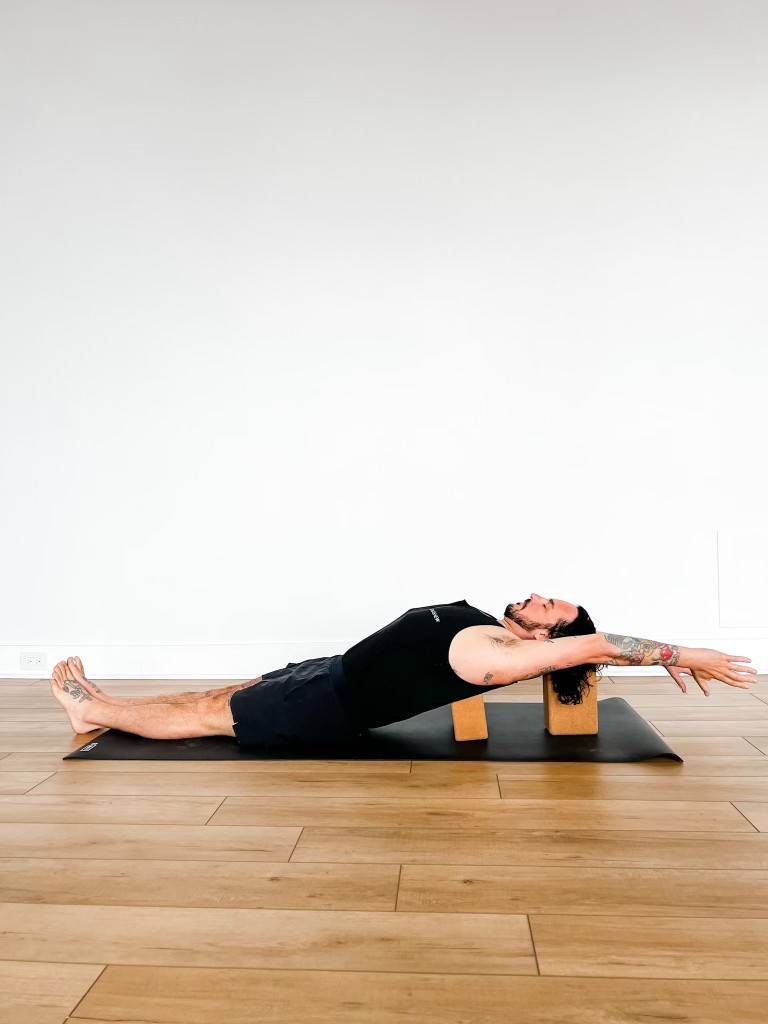
How to get into supported fish pose:
- Set up your blocks with one block on the horizontal medium height and the next block on the vertical high height.
- Use your hands to hold the horizontal block in place as you lie back, starting with your knees bent. The horizontal block should be positioned at the bottom tips of your shoulder blades which helps firm in the upper back.
- Now lift your arms up and hold the vertical block as you place the back of your head on it. Your face should be parallel to the ceiling with your chin slightly tucked towards your chest.
- Lift your arms to the ceiling, palms facing each other, and extend your arms over your head right next to your ears. Imagine you are holding a block between your hands and you extend your arms fully.
- Reach the legs long towards the front of the mat, no wider than hip distance and stay for 1 to 2 minutes.
Supporting Pose 2: Crescent Lunge (Anjaneyasana)
Crescent lunge is a great pose to help open up the psoas muscle (think back leg in Warrior 1). Lifting the arms alongside the ears with the head back and gaze upward is also the same action needed in Warrior 1
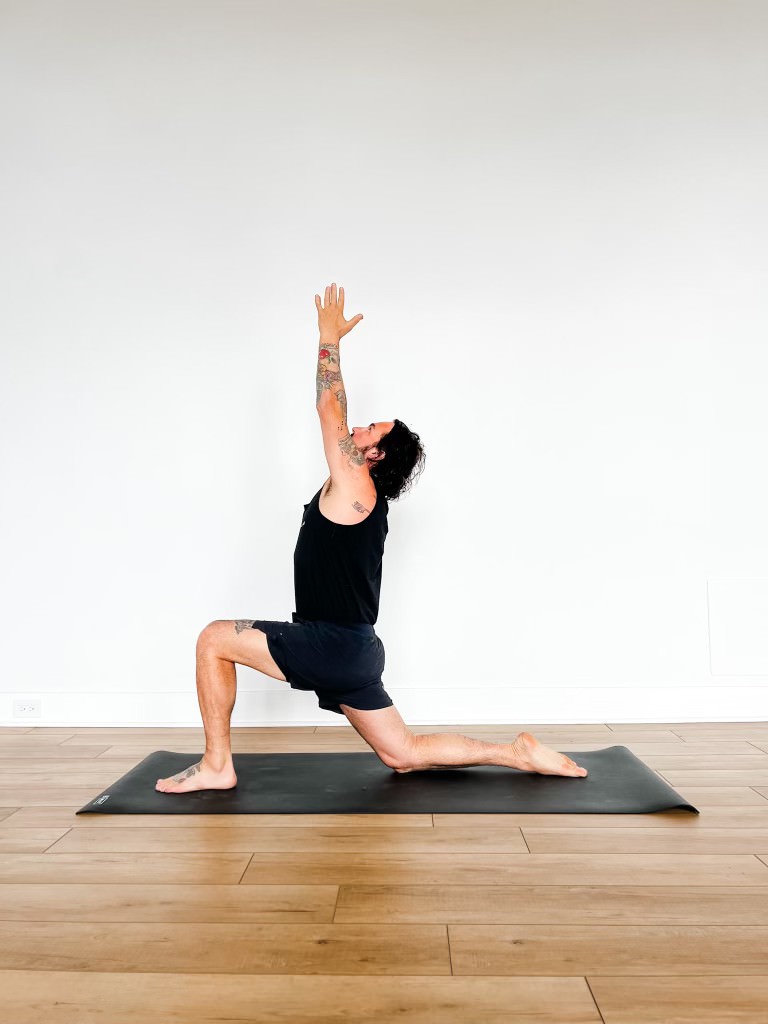
How to get into crescent lunge:
- Bring your back knee to the floor and uncurl your toes.
- Have your front knee deeply bent and placed over your front heel.
- The back of your pelvis should move down (away from your low back) and your sacrum and tailbone should move inward. This provides space and stability to your lumbar spine.
- Lift your arms up alongside your ears. Take your head back and bring your palms together. Use your arms to help lift your chest up off your pelvis.
Supporting Pose 3: Tree Pose (Vrksasana)
Tree pose is a great standing balance that teaches strength and flexibility in the foot, ankle, and lower leg. WIth the arms lifted overhead it also helps lengthen and lift the torso.
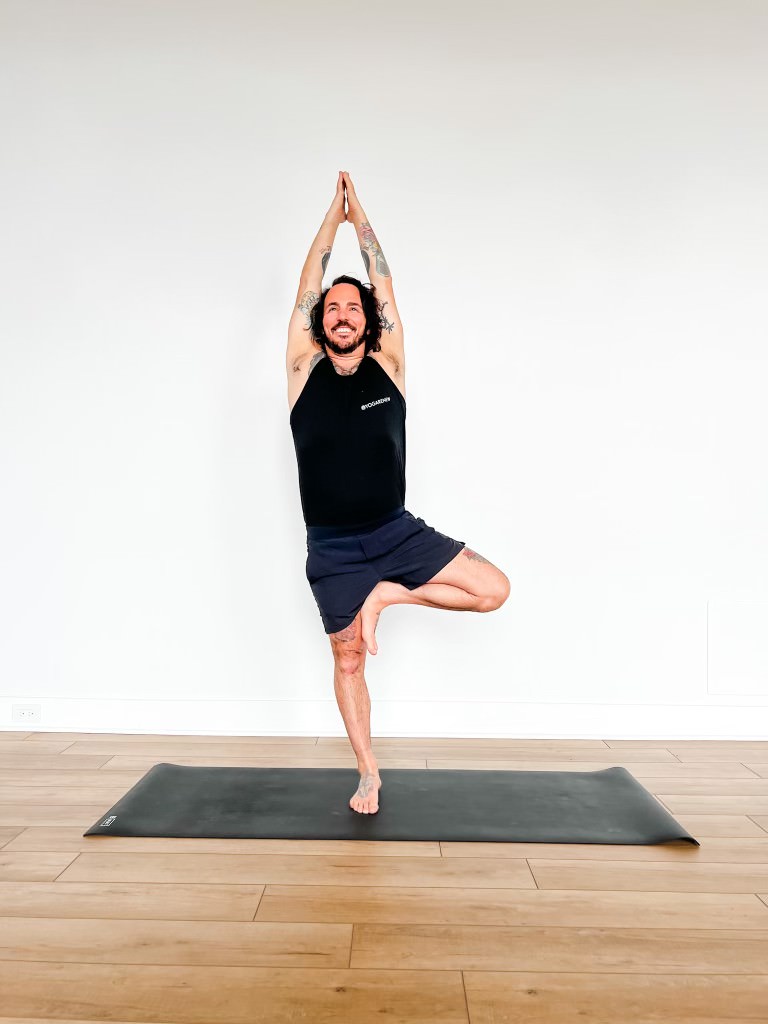
How to get into tree pose:
- Start standing in Mountain Pose.
- Lift one leg and bend it. Now rotate it out to the side and place the sole of your foot on your upper inner thigh. If your foot doesn’t lift that high you can place it on your lower leg. Be sure not to place your foot on your knee joint however.
- Take your arms upward alongside your ears, bringing your palms together. Look straight ahead.
- Stand into your bottom foot and standing leg and dynamically reach up through your palms.
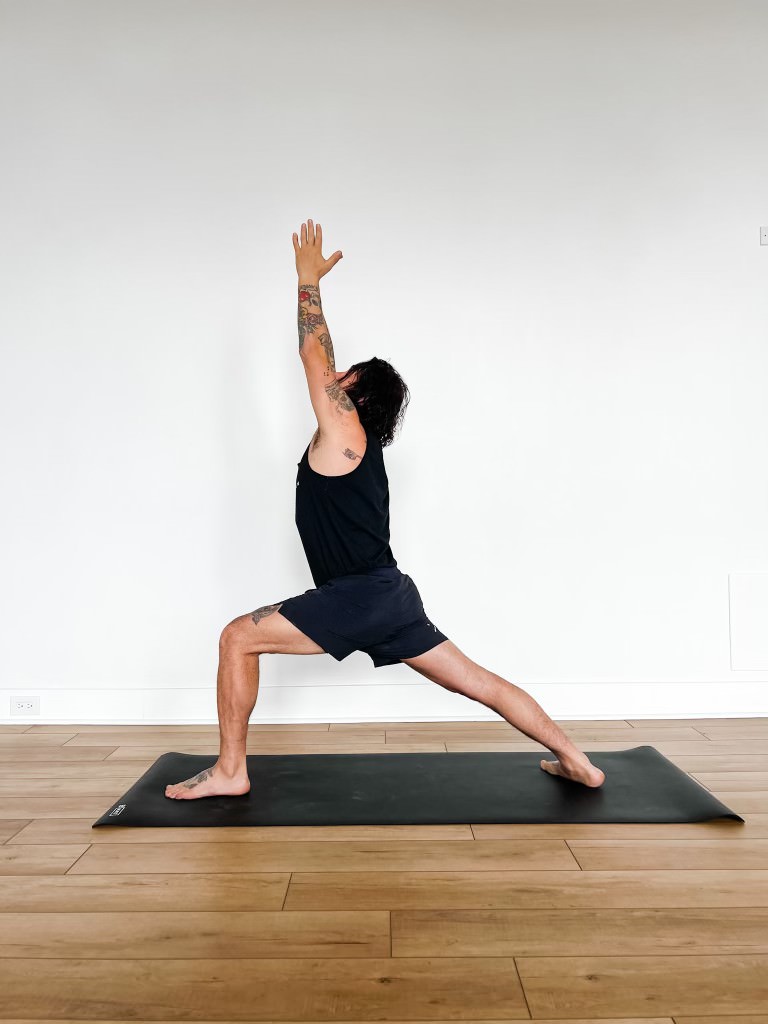
Peak Pose: Warrior 1 (Virabhadrasana 1)
Warrior 1, as its name implies, is a strong and rigorous pose. It’s dynamic and energizing, built from the ground up with a strong foundation. Its an invigorating pose that is great for all levels of students and a foundational posture.

How to get into warrior I:
- Start standing in Mountain Pose.
- Step one leg back about 3 to 4 feet with your back toes pointed at a 45 degree angle. Press firmly through the outer edge of your back foot and keep your back leg straight
- Bend your front knee until it is over your front knee.
- Just like in crescent lunge, the back of your pelvis should move down (away from your low back) and your sacrum and tailbone should move inward. This provides space and stability to your lumbar spine.
- Lift your arms up alongside your ears. Take your head back and bring your palms together. Use your arms to help lift your chest up off your pelvis.


