200 hour ytt journey header image of a hands-on assist being done on a 200 hour ytt student

200 Hour YTT Journey

By Yoga, Yoga Teacher Training

You’re probably wondering what “ytt” stands for. At least I did when I first started publishing pieces about the yoga practice. This acronym, I noticed, was also placed after numbers often. I started to ask the yoga teachers around me, “What does E-RYT 500 mean?” and, “What is 200 hour versus 300 hour versus 500 hour?” Here’s what I learned…

YTT stands for Yoga Teacher Training

A 200 Hour YTT is the first certification along your journey. A 200 hour ytt sets you up with the foundation of a strong understanding of the ancient practice. In a 200 hour yoga teacher training, you will most likely learn about the physical practice (yoga asana), ancient yogic texts (the yoga sutras), Ayurveda (a relative science to yoga), and other branches and elements within the yogic sphere. This varies from training to training, but most yoga teacher trainings will at least touch on these subjects.

A 300 Hour YTT is a continuation of your 200 hour studies. A 300 hour yoga teacher training builds upon the 200 hours to fully certify you at the maximum amount of hours, 500. A more in-depth look at the practice is what the 300 hour is for, and you’ll usually go a layer deeper into anatomical phrasing, further into Ayurveda and how it intertwines with yoga, and learn more about how this practice made it ways over to the west. It’s not always a continuation of a 200 hour yoga teacher training, but a 200 hour ytt is recommended before enrolling – however you complete the hours is up to you.

A 500 Hour YTT is the final amount of hours necessary to register through Yoga Alliance as a RYT 500. If you continue to enroll in more trainings (i.e. specialized trainings in the different “genres” of yoga such as: restorative, yin, hatha, yoga nidra) your hours will count towards being an E-RYT 500. However, you can only obtain the status of E-RYT if you continue to have 2,000 hours of experience teaching yoga.

What does a 200 hour ytt typically look like?

Well, for starters, you must complete 200 hours of yoga. This is typically broken up through modules on the weekend days (given most modern day people have jobs they tend to throughout the week). Usually, the different topics throughout the training are segmented into different weekends. For example, the first weekend may take a look at yoga asana, the physical practice. In this module, you’ll probably be responsible for looking at the poses and determining where the alignment and structure of the pose come from. Depending on which lineage you choose to study (Iyengar, Jivamukti, Bikram, Ashtanga, etc.), you’ll learn the foundations of the poses, their Sanskrit names and meanings, and what to focus on physically when teaching classes (or even taking classes – completing a 200 hour ytt can be solely to advance your personal yoga practice and not to even teach at all).

They’re all so expensive… why?

A lot goes into a fully baked yoga teacher training, and to put it simply: You need to pay the teachers in the training for their time and wisdom. The price of a yoga teacher training is usually dictated by the quality of the training and the overhead it costs to stack up a fire staff to teach you about each respective area they are an expert in.

Over the pandemic, yoga teacher trainings became popular online (hello, us!) and some of that accessibility has remained. Though not ideal if you’re really looking forward to hands on adjustments and physical assistance throughout your learnings, an online yoga teacher training still gives you all of the benefits of an in person training at a fraction of the cost (because the teachings are recorded).

Other costs that are factored into the training (online or in-person):

  • Physical handouts & items to track your work — Sometimes the school will gift you with a binder full of information. The binder will house important info and act as a calendar to move through the modules, annotating anything you find important.
  • Special workshops — You’ll have access to fellow teachers who the leader of the ytt thought were imperative to your learning and potential networking
  • General maintenance of the studio & access to props — The yoga studio becomes your home, and that home usually comes with yoga mats, bolsters, blocks and other items necessary to learning about the yoga asana practice
  • General maintenance of digital course materials — A lot of online yoga teacher training platforms will continue to improve their training material. They will assess what works well & what doesn’t and find ways to cater to the yogi student in the best ways possible.

To 200 hour ytt or not ~ that is the question

To put it simply: You’ll never regret taking a 200 hour yoga teacher training. We’ve had thousands of students all over the world, and some of them don’t even start the program until they’ve had it for a bit, but one commonality we find is that no one ever completes the studies and says, “Wow, I wish I never learned all of this quality information about yoga.”

Chances are, if you’re a dedicated practitioner, or even slightly interested in furthering your yoga practice, there will be at least something you will take away from enrolling in a training. The amount of information that is covered spans out far across the landscape of yoga, and you may even find that a lot of the material can assist other aspects of life. Whether it’s a deeper appreciation for meditation or a better understand of how your bones work and function in your body, a yoga teacher training will give you that insight. From there, you can choose what you do with that information.

What does a 200 hour graduation look & feel like?

Every 200 hour yoga teacher training will look and feel different — but the journey is the same. The path towards understanding yoga, its roots and the many avenues it spans across is truly a gift ~ and each studio/online yoga program will treat that in their own special way.

I’ve seen huge celebrations with tons of flowers and incense and comfortable meditation pillows. I’ve seen online certifications with warm language centered around the program they’ve completed and a repost to LinkedIn on how they plan to share their studies and learnings. All in all, the way you celebrate this huge accomplishment deeply personal, but also part of a strong community. It is imperative to find a way to honor both as you set out into the world with your new insights and profound knowledge.

I’ve completed my 200 hour ytt journey, now what?

The choice is yours! Either continue on to a 300 hour training to obtain your RYT 500 or take some time to ruminate in your learnings. You can look into specialized trainings in the areas that ignited something in you and sparked a specific interest, or you could let everything from your 200 hour marinate and let that be enough for your yogic journey.

If you are trying to become a teacher — look for places to teach! Having a 200 hour certification is a great way to get started leading classes. You’ve learned an immense amount about the practice, and there are so many veins within the “yoga umbrella” that are sure to find something that resonates. Overall, let yourself be proud of your accomplishment ~ you’ve accumulated 200 great hours of one of the world’s most ancient studies! That is something to be happy with.

Online Yoga Teacher Training Courses:

200 Hour Online Yoga Teacher Training

200 Hour Online Yoga Teacher Training

300 Hour Online Yoga Teacher Training

300 Hour Online Yoga Teacher Training

500 Hour Online Yoga Teacher Training

500 Hour Online Yoga Teacher Training

How to Become a Yoga Instructor (The Ultimate Guide + FREE PDF)

By Yoga Teachers

I’m always surprised at how many people enroll in one of our yoga teacher training programs because they were unsatisfied with another course they started or completed elsewhere.  If you’re looking to become a yoga instructor, do yourself a favor and take a look through this guide first. 

Whether you’re looking to teach online yoga classes, in a studio, gym, corporate environment or anywhere else – everything is covered. I promise it will help clear up anything you might be confused about and will save you a ton of headaches so you’ll know exactly how to become a yoga instructor with minimal stress.  If you still have any questions by the end of this guide (and we doubt you will) you can reach out to us directly and we’ll get them answered for you. Clear and simple.

The secret on how to become a yoga instructor

There’s a TON of noise out there about becoming a yoga instructor and sometimes it seems like each piece of information conflicts with the rest. It might be poor information, or it might be poor communication but it sure seems like there’s a drought of clarity sometimes. For example, did you know that you actually DON’T need a certification to teach yoga? Probably not, but we’ll explain more on that later. We figured it was time to finally put together a guide on everything you need to know about becoming a yoga teacher. Let’s dive in!

Table of Contents:

  1. What are the requirements?
  2. What do studios look for?
  3. What is Yoga Alliance?
  4. How many hours are needed for accreditation?
  5. Can I become certified online?
  6. What should I look for in an online training?
  7. How long is a Yoga Teacher Training?
  8. Will my certification expire?
  9. Do I need insurance?
  10. What’s the cost of a YTT?

What are the requirements to teach yoga?

In the U.S. and most western countries, there is no ‘accreditation’ or governing body that you need to register with to teach yoga. This also means that you don’t need a specific certification to roll out a mat and lead a class, but don’t roll out that mat just yet.

There’s A LOT of reasons why you don’t see yoga teachers all over town without any training. First of all, most places won’t let you teach without a certificate. You’ll also need insurance for most studios. Even if you teach online or in a park, you are putting yourself in danger without insurance.

Students also want to know that their teacher has been trained properly. A yoga teacher training is more than simply learning a few postures. You learn important aspects of safety, anatomy, business and other areas important for any yoga instructor to have. Without proper training, trying to lead yoga classes isn’t just dangerous for you but it’s dangerous for the students as well.

What will a yoga studio look for in a yoga instructor?

Since the government doesn’t set the requirements for a yoga teacher, it’s really up to a studio to set those requirements. While each studio will have their own hiring criteria, generally speaking, they will want their students to have completed at least a 200 hour yoga teacher training. More frequently, studios are also looking for teachers with a 500 hour certificate.

One helpful tip is that studios will often run their own teacher training programs and look to hire students from within those programs. If there’s a specific studio you’d like to work with, stay late after class one day and ask them what they look for in their teachers. Oftentimes, you’ll hear a studio mention Yoga Alliance – but what is Yoga Alliance?

What is Yoga Alliance?

Yoga Alliance logo

It’s helpful to get certified through a yoga company that is registered with Yoga Alliance for added credibility.

Yoga Alliance is a registration body for yoga schools and yoga teachers. There are a number of other registration bodies all over the world, but Yoga Alliance is the largest and most common.

As mentioned on their site, Yoga Alliance does not certify schools and they are not an accreditation body like you’d see with universities or in other industries. While they don’t actually certify the schools, they do sort of behave like an accreditation body in some ways. In order to register with Yoga Alliance, you’ll need to attend a training by a school registered with Yoga Alliance and the training will need to be conducted by teachers who are registered with Yoga Alliance.

The way a training will work is that Yoga Alliance has a set of standards that each school needs to follow, and each school will submit their curriculum to Yoga Alliance in order to have their training approved. For example, they will ask for a certain number of hours to be completed for anatomy, practice, or technique, etc. Yoga Alliance has a few different types of registration credentials which are aligned with the way training is typically conducted and you can read more about becoming a yoga instructor on their website.

Yoga Alliance requires a certain level of synchronous learning during a training program. For online courses, this means you’ll need to have a certain number of hours logged over live calls. A 200 hour course will require 30 hours of live calls, so if you are in an online course from a school that only has 1 live call/week you would need to stay in the course for at least 30 weeks to complete your Yoga Alliance requirements.

If Yoga Alliance is important to you, you’ll want to find a school with a lot of calls at times you’re available to attend them.

What is the difference between a 200, 300 and 500 hour yoga teacher training?

I’ve seen many people get confused with these trainings, so let’s clarify quickly: A 200 hour yoga teacher training needs to be completed before anything else. Many people think you can start with either a 200 hour training, or a 300 hour training, but a 300 hour yoga teacher training should only be completed AFTER a 200 hour yoga teacher training has been completed. A 500 hour certification is a combination of a 200 and 300 hour yoga teacher training.

Typically, students will finish a 200 hour course before anything else. The 200 hour program might be focused on a specific area such as Vinyasa, or Hatha yoga or it might be a multi-style yoga teacher training course. If the school is registered with Yoga Alliance, it doesn’t really matter whether there is a specific area of focus for the training. Yoga Alliance will only recognize a ‘200 hour’ training (they won’t differentiate between a Vinyasa training and a Hatha training). Let’s take a look at the credentials that Yoga Alliance uses because those draw up a lot of questions as well.

What’s a RYT 200, RYT 500? (or E-RYT 200, E-RYT 500)

RYT = Registered Yoga Teacher

It is a credential specific to Yoga Alliance and in order to list yourself as a RYT-200 you’ll need to complete a 200 hour yoga teacher training that’s been registered with Yoga Alliance. If somebody is an RYT-500, that means they’ve completed a 500 hour program. Or it could mean that they’ve completed a 200 hour course, and then afterwards they completed a 300 hour course. 200 + 300 = 500!

E-RYT is a newer credential by Yoga Alliance

There is an E-RYT 200 and E-RYT 500 and you become eligible for E-RYT 2 years after completing a training. In addition to completing a training, you will also need to complete 1,000 hours of teaching with a RYS-200 registration. Outside of RYT, you also might see the designation CYT. What does CYT mean? Funny you should ask…

What’s the difference between RYT and CYT?

RYT stands for Registered Yoga Teacher and is specific to Yoga Alliance, while CYT stands for ‘Certified Yoga Teacher’ and is a general designation. If somebody is listed as a CYT-200 then it would mean they have completed a 200 hr yoga teacher training, but they aren’t necessarily listed in Yoga Alliance’s directory.

In short, RYT and CYT are similar except that RYT is for people specifically registered in Yoga Alliance’s directory.

Are there any requirements or qualifications I need to complete before I enroll in a yoga teacher training?

No. A yoga teacher training is where you’ll gain a certification, so there aren’t really any qualifications that you’ll need to complete before enrolling. Students will typically come with quite a bit of experience though. A 200 hour training is not a walk in the park, so it’s good to have a sense of what you love about yoga and what you’re looking for out of a training before you commit to one. That will be helpful for you to determine which course is the best for you.

A lot of times, teacher trainings are broken out by the specific amount of hours it takes to complete the course, or they’re focused on a specific genre, or type of yoga. Here are some examples of teacher trainings and they all are completely separate (you don’t need to complete one before advancing to the others except for the 300 + 500 Hour (it is recommended you start with your 200 and the 300 + 500 build upon that).

Can I complete a yoga teacher training online?

Girl researching how to become a yoga instructor on a laptop, sitting on a yoga mat

The first step towards becoming a yoga instructor through an online program is doing your research!

Yes, you can! Even before COVID-19, schools like YogaRenew had conducted yoga teacher trainings online. 200 hours is a large commitment. Most people can’t realistically complete such a large commitment unless it’s self-paced and online. This allows students to work at their own pace in between work, children, and other responsibilities. Many people also live in remote locations that make attending an in-person training difficult, so online training has made it more accessible than ever. Especially for those without a local studio who are unable to travel to attend a studio in-person.

What’s the difference between an in-person yoga teacher training and an online yoga teacher training?

There’s going to be quite a few differences between attending a training in-person and online. Each will have pros and cons also. Every studio will have their own format and structure but we can provide some general insight based on the format of online vs in-person training.

An online training will typically provide much more flexibility because you will often have recorded material that you can review at your convenience in addition to any live or in-person sessions. Sometimes, you’ll even have lifetime access to all the recorded material. Many schools will have a limit on how long their students can access the content, so double check with the school first.

An in-person training is going to have a much different interaction than an online course, however. You can imagine that the way you’d interact with somebody in person is going to be different than the way you’d interact with them online. The same applies for a yoga teacher training. Both an online training and an in-person training should have live interaction with the trainers so that you can gain feedback from the instructors and ask questions through-out the course. If a training does not offer interactive elements and feedback from the instructors, it’s a red flag.

Online and in-person trainings can have a social element, but, as we’ve discussed, each is handled a little differently. Online trainings might have social elements during live sessions as well as through online groups, study buddies, and social media. In-person trainings will not typically offer online groups, or social media interaction since all of the interaction is handled on-site. It can certainly be helpful to have the online resources so that you can come back to them after completing your training, (again, double check whether the studio provides lifetime access to the material).

7 things to look for in an online yoga teacher training

There is a multitude of aspects to consider when selecting which online program to sign up for. Hopefully the considerations below can help prevent some headaches for you so that you know what to look for with an online yoga teacher training.

Here are a few items you’ll want to evaluate before enrolling in an online course:

  1. A proven program: Most schools should have some feedback or testimonials from their students. This gives you a good sense of whether it’s a good program for you. If the school is registered with Yoga Alliance, students will provide a review on the YA site when they register their certificate. The yoga instructors should have years of experience teaching as well. Take a look at the background of your instructors before enrolling. Each studio will have different trainers and styles of yoga. Find a studio with instructors that align with your interests.
  2. Teacher feedback & interaction: Whether the school is online or in-person, you’ll want to join a course that has some feedback and interaction between the students and teachers.
  3. Live calls: In addition to feedback, you’ll also want the opportunity to join live calls with the instructors. Some online schools will have calls that you can attend at different times so that you have flexibility to work at your own pace but the availability of live sessions. For a 200 hr course, Yoga Alliance requires 30 hours of live calls. If a school only offers 1 or 2 calls/week it could take a very long time to complete those requirements. We offer around 30 live calls each week in our 200 hr course from experts in different areas like anatomy, philosophy, business, class management, sequencing, etc. We also have recordings that students can watch if they miss a live call as well. Some studios will have ‘office hours’ which is nice, but different from live training where you can actually ask questions on the spot as the training is being conducted.
  4. Community: One thing that’s important for me is to drive the sense of community in our training programs. Live calls definitely help with this, but our groups are where people really connect with each other. Either way, becoming a yoga instructor is an exciting journey and a big commitment. You’ll want to experience it with other people in a community setting. Find a course that offers an active community that you can stay with even after the training is completed.
  5. Accountability: With more online training programs becoming available, accountability has become more important than ever before. You need to know that you’re on the right track, and that you’re actually learning. I’ve seen students come into my studio quite confused after attending a training that didn’t have any accountability. Testing and feedback are important ways to stay accountable. Testing isn’t just about memorizing information and passing a quiz. You have to also make sure to give each student feedback on how they cue and run their classes.
  6. Resourceful information: One of the major benefits of attending an online training is that you can gain access to a TON of resources. I’d suggest finding a course that gives you lifetime access to the resources, but you also want to make sure that you have some good material that you can take with you into your training.
  7. Support: This one is obvious, but it’s a good idea to test out support with a school before enrolling. It might be as simple as sending over an email to see how quickly you get a response. Email support is really the bare minimum you’ll want to look for though. For example, we offer our live calls for students to interact in real time, and our community provides a place for students to connect locally or online. We provide a place for students to connect with each other to form ‘study groups’ as well. Feedback is provided to each individual as well. General feedback in a group setting is nice, but individualized feedback is even better.

Research the company online

A great online teacher training will be continually adding new resources into their training programs, so even if you graduated a couple years ago you might still find some helpful sequences or resources that you can bring into the classroom as an instructor.

Here’s a short video we created for when it does come time to start teaching your own classes:

For additional information, you can check out this article: What To Look for in a Yoga Teacher Training

Be sure to also check out articles that help you weigh different online yoga teacher training prices and options: Best Online Yoga Teacher Training Programs

How long is a yoga teacher training (YTT)?

Well, a 200 hour yoga teacher training should take 200 hours and a 500 hour program should take 500 hours. In-person training courses will typically have a start date and end date. Online programs will usually allow students to work at their own pace but some might have a start date and end date. Self-paced schools sometimes have an expiration date as well. Students enrolled in our courses have lifetime access to all of the material, and we don’t charge anything if it takes a little bit longer for somebody to finish a course. Some students might take 40 days and others might take 400 days to go through a 200 hour program online. It really depends on how much availability you have and how quickly you’re able to work through the material.

Does a yoga teacher training certificate expire?

A yoga teacher training certificate will not typically expire. While we can’t speak for every school out there, it’s rare to see certificates that expire. Once you complete a 200 hour course, you have a 200 hour certificate. It is like a college degree – you’ve earned it and it is yours to keep.

Once you complete a 500 hour course, you have a 500 hour certificate. While your certificate probably won’t expire, there are options for continuing education. Yoga Alliance and certain registration bodies have some continuing education requirements to encourage ongoing learning. They’ll ask you to take continuing ed classes to stay registered with them but you don’t technically need to register with Yoga Alliance in order to teach. Most studios will be okay with hiring you if you’ve already completed a 200 or 500 hour training.

Do I need insurance to teach yoga?

beYogi insurance logo

beYogi is the most well-known yoga insurance program

Yes, insurance is critical for any yoga instructor. First of all, you’ll need insurance to teach at any physical location. At a yoga studio, the teacher will be the one who purchases the insurance. A yoga studio will have their own insurance, but typically they’ll require teachers to bring their own insurance as well. This puts responsibility on the teacher to ensure that the class is conducted in a safe manner. Even if you want to rent your own room, the building will typically ask to see some insurance in order to use the space. This is to protect themselves from lawsuit and is standard.

We have a partnership with BeYogi insurance for our students to gain insurance at a discount. Studios will often have some insurance that they offer to their students or graduates that makes it easy to find a provider.

What is a yoga teacher’s compensation structure?

Yoga teachers are compensated in a number of different ways, but in a studio setting there are usually a few different ways that teachers are compensated. They might be compensated a flat rate, a flat rate plus an additional rate per student, or they might simply be paid a flat rate per student.

If you’re interested in learning more about yoga teacher compensation and how to earn money as a yoga instructor, check out our blog: How Much Do Yoga Teachers Make?

Is it possible to complete a 200 hour yoga teacher training for under $500?

Yes. Online training has enabled students to become a certified yoga instructor for decent prices and there are some incredible courses at great prices now. I’ve seen plenty of students spend thousands of dollars and attend a training they were unhappy with, so price is not always an indication of quality.

A yoga teacher training is incredibly important, so you don’t want to sacrifice quality – and you don’t need to either. Make sure that there are regular zoom or live sessions that you can attend to interact with instructors. You should be able to ask questions, get feedback, and have trainers available to interact with.

Good schools will have some reviews and testimonials on trusted sites, like TrustPilot, that you can check out before you enroll also.

In conclusion (and don’t forget your FREE guide!)

Do. Your. Research. The more you know before jumping into any yoga teacher training, the better prepared you’ll be. The yoga sphere is constantly shifting as well, so staying up-to-date with resources and information will be extremely helpful on your journey towards potentially becoming an instructor.

Download Your Guide!


Yoga Teacher Training Guide
Header image of Kate Lombardo in front of a laptop in a city building resting her chin on her fist for the article: How to create a viral content plan for your wellness business

How to Build a Viral Content Plan for Your Wellness Business

By Lifestyle & Wellness

Building a content plan that resonates with your audience and propels your wellness business into the spotlight requires a strategic approach. By identifying your audience, diversifying your content, and nurturing your audience across various channels, you can create a viral content plan that not only gains traction but also converts followers into loyal customers.

Identify Your Audience

Understanding your audience is the cornerstone of any successful content strategy. Your core demographic should dictate your messaging, tone, and the type of content you produce. Additionally, your audience might differ slightly across platforms, so it’s essential to refine your approach for each channel, such as Instagram, YouTube, X (formerly Twitter), and your website.

How to Identify Your Audience:

  • Analyze Demographic Data: Use tools like Google Analytics, Instagram Insights, and YouTube Studio to gather information about your audience’s age, gender, location, and interests.
  • Conduct Surveys and Polls: Ask your current audience directly about their preferences, challenges, and what they hope to gain from your wellness content.
  • Review Competitor Strategies: Look at competitors in the wellness niche. What type of content resonates most with their followers? This can provide valuable insights into your own potential audience.

Monitor Audience Behavior Over Time:

  • Regularly review your platform analytics to track shifts in audience demographics or interests.
  • Engage with your followers through comments, DMs, and community posts to stay in tune with their needs.
  • Use A/B testing to identify which types of content generate the best engagement and conversion rates.

Diversify Your Content

Keeping your content dynamic and engaging is vital to maintaining audience interest. Wellness businesses benefit from leveraging multiple content formats to cater to different preferences and learning styles.

Types of Content to Consider:

  1. High-Quality Videos: Tutorials, behind-the-scenes footage, or guided wellness sessions.
  2. Interactive Formats: Quizzes, polls, and surveys to engage your audience.
  3. Infographics: Shareable visuals packed with valuable wellness tips.
  4. Blog Posts: In-depth articles on trending wellness topics.
  5. Podcasts: Conversations on health, mindfulness, or lifestyle practices.
  6. Live Sessions: Host Q&A sessions, yoga classes, or meditation workshops.

By experimenting with different formats, you can discover what resonates most with your audience and continually refresh your content strategy.

Create Unique Content Across Social Channels

Your social channels serve different purposes and attract slightly different segments of your audience. Tailoring your content to fit each platform’s unique strengths ensures maximum engagement.

Tips for Platform-Specific Content:

  • Instagram: Focus on visually stunning imagery, short-form videos (Reels), and carousel posts.
  • YouTube: Share long-form content like tutorials, success stories, or expert interviews.
  • X: Post quick, thought-provoking insights or participate in trending wellness discussions.
  • Website: Publish evergreen content, detailed guides, and resources that drive organic traffic through SEO.

Engaging, platform-specific content should entice your audience to interact with your brand, share your posts, and explore your offerings further.

Nurture Your Email List

Email marketing remains one of the most effective ways to maintain a direct connection with your audience. For a wellness business, it’s essential to provide consistent value through your email campaigns while growing your subscriber base.

How to Grow Your Email List:

  • Offer Freebies: Create downloadable content like meal plans, meditation guides, or fitness trackers.
  • Host Challenges: Encourage sign-ups for exclusive wellness challenges delivered via email.
  • Leverage Social Media: Promote your lead magnets across your social platforms.

Tips for Email Engagement:

  • Send personalized emails with actionable tips, inspirational stories, or exclusive offers.
  • Provide reusable content, such as printable wellness trackers or mindfulness exercises, to keep subscribers engaged over time.
  • Use segmentation to tailor your messages to different audience interests and demographics.

Create High-Converting Content

Every piece of content you create should have a clear objective. Whether you’re aiming to collect emails, sell products, or drive website traffic, your content must be optimized for conversions.

Strategies for High-Converting Content:

  1. Use Strong CTAs (Call-to-Actions): Encourage your audience to take the next step, whether that’s downloading a guide, signing up for a webinar, or making a purchase.
  2. Optimize for SEO: Ensure your website content includes targeted keywords, meta descriptions, and alt text to improve visibility on search engines.
  3. Incorporate Testimonials and Case Studies: Showcase success stories to build trust and credibility.
  4. Track Performance Metrics: Monitor key metrics like click-through rates (CTR), conversions, and engagement to refine your strategy over time.

By tracking your analytics, you’ll gain valuable insights into what resonates with your audience and how to replicate that success.

Creating a Viral Content Plan for 2025

Building a viral content plan for your wellness business is a journey that requires strategic planning and consistent effort. By identifying your audience, diversifying your content, and nurturing your connections through various channels, you can create a content strategy that not only goes viral but also drives meaningful engagement and growth for your business. Stay creative, authentic, and responsive to your audience’s needs, and watch your wellness brand thrive.

Online Yoga Teacher Training Courses:

200 Hour Online Yoga Teacher Training

200 Hour Online Yoga Teacher Training

300 Hour Online Yoga Teacher Training

300 Hour Online Yoga Teacher Training

500 Hour Online Yoga Teacher Training

500 Hour Online Yoga Teacher Training
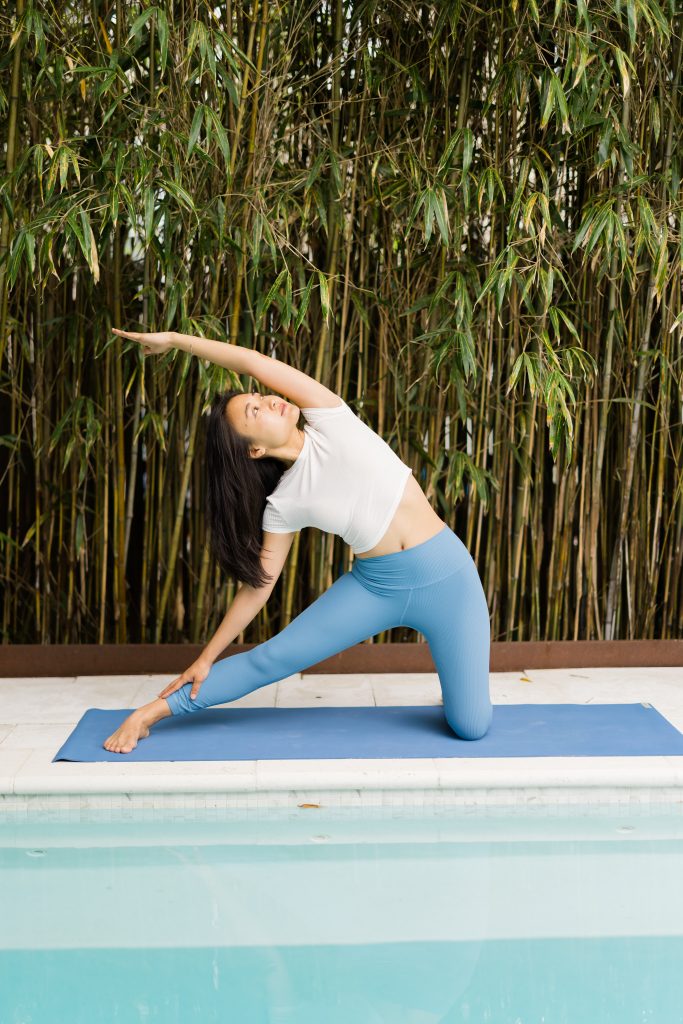
Young yogi on a blue yoga mat in front of bamboo by a pool in gate pose

Restful Yoga Flow

By Yoga Asana

As each new year visits us, we are called to visit practices that feel whole, inviting, welcoming, and often times, soft. Let this be your signal to unwind, roll out your mat and move through a flow that feels intentional and restful.

Here is a practice to keep you returning to the mat when you need a little extra relaxation…

Begin with seated stretches

Starting in a seated posture is a great way to get grounded and into your body. Here is a mini warmup that will release tension and help you start to relax.

Seated Side Bends

  • Begin in Sukhasana (easy seat) and lift your arms up by your ears
  • Extend through your fingertips and root down through your seat
  • Start to let your left hand come down to the ground as your right arm bends up and over alongside your right ear
  • Come back to center with both arms up
  • Switch the crossing of your legs and repeat the same motion on the other side

Seated Twists

  • Sitting in Sukhasana, reach your arms up alongside your ears and extend towards the sky
  • Twist over your right knee and let your left hand come down onto your right knee as your right hand meets the mat or blanket behind you (you have the option to prop yourself up on a blanket)
  • Switch the crossing of your legs and repeat on the other side

Seated Forward Fold

  • Start in Sukhasana and crawl your arms out in front of you just enough so that your seat doesn’t lift
  • Switch the crossing of your legs and repeat the same motion

Start your gentle flow

Come forward to your hands and knees for a table top position and move through a couple rounds of cat/cow: inhaling as you drop your belly and lift your gaze and chest for cow, and exhaling as you round your shoulder blades, tucking your navel toward to the back of your spine.

Come back to a neutral position with your wrists stacked under your shoulders and knees under hips. Find child’s pose (for however long you wish) and then tuck your toes behind you, send your hips up and back for downward facing dog.

Move through a mini vinyasa

  • Inhale come forward to plank
  • Lower all the way down
  • Walk your palms forward and wide
  • Press yourself up for cobra pose
  • Lower back down
  • Downward facing dog

Inhale lift your right leg up high and step in between your hands for a lizard lunge. You can lower your forearms down to the mat or onto blocks. Take a few rounds of breath here, letting your body get used to the deep stretch in your psoas.

Bring your palms down inside your foot (remove them from blocks if they were on blocks) and crawl your way to parallel your feet into prasarita padottanasana. Tent your fingertips, lift your chest, breathe in and as you breathe out start to fold, letting your neck and head hang heavy as you stay sturdy in your feet. Now begin to crawl yourself to the back of your mat for pigeon pose.

After pigeon pose at the back of your mat, move through another slow vinyasa – starting in downward facing dog, coming forward to plank, lowering all the way down, and pressing up to cobra. Lift your left leg and repeat the same motions, where you’ll end up at the front of the mat.

Add some seated postures

After you’ve done lizard and pigeon along with your slow vinyasas on either side, you can begin to build on that. So, the next time you come to pigeon pose, lean onto the sit bone of the leg that is bent and swing the leg that is long behind you around so you can cross your ankle over the knee that is bent for half lord of the fishes. After you unwind (untwist), you can incorporate the following seated postures:

  • Janu Sirsasana
  • Revolved Janu Sirsasana
  • Baddha Konasana
  • Tarasana
  • Paschimottanasana

Supported bridge for winding down

Come to lie down on your back with your knees bent and the soles of your feet planted on the mat. Lift your hips and send them over to the left while you let your knees fall over to the right. Cactus or “T” your arms out and gaze over your left shoulder. Repeat this on the other side. After you’ve twisted to neutralize everything, you can find a nice supported bridge.

Grab a block if you have one and set it under your seat. Keep your knees bent and feet on the floor. Feel free to lift your legs up into the air if that feels good, but if you’re enjoying being still and supported by the block with your feet rooted, then just remain there. Let your breath come back to its natural rhythm.

Don’t forget the most important pose: Savasana

Give yourself enough time to move through a 5-6 minute Savasana. This is our “peak pose” for today, as we honor a restful, gentle flow. I hope you’ve enjoyed this mini restful yoga flow and if you need any playlist recommendations to go along with these classes, find us on Spotify! ✨


Online Yoga Teacher Training Courses:

200 Hour Online Yoga Teacher Training

200 Hour Online Yoga Teacher Training

300 Hour Online Yoga Teacher Training

300 Hour Online Yoga Teacher Training

500 Hour Online Yoga Teacher Training

500 Hour Online Yoga Teacher Training
New Year's yoga flow image of Patrick Franco with a harmonium writing out his yoga sequence, looking at a laptop

New Year’s Yoga Flow

By Yoga Asana

As we enter a new ✨ era ✨ perhaps so does our yoga practice! Let’s craft a class for the new year ahead with the same, timeless YogaRenew framework we know and love…

Designate a Peak Pose

For our New Year’s Day yoga flow this year, we chose handstand and wheel ~ technically a double peak, but with supporting actions focusing on the arms and legs, we can weave together motions that complement one another. Here’s what we would include in our sequencing for a yoga class with handstand and wheel as the peak poses, we’ll break it down by section:

Puttering

For this class, we’re focusing on shoulder mobility, and straightening the arms and legs. Here are some movements and postures you can include in puttering:

  • Shoulder flossing
  • Gomukhasana arms
  • Crescent lunge
  • High lunge
  • Prasarita Padottanasana (wide legged forward fold)
  • Thread the needle
  • Child’s pose with hands elevated on blocks (shoulder opener)

Sun Salutations – Variations for Handstand + Wheel

You can teach either Surya Namaskar A or B. We typically stick to Surya A for vinyasa yoga classes and in this instance, we’ll focus on the straightening of the front leg and bending of back knee to spring forward to fold over the legs. You also have the option to include a twist here at any point, or add in crescent lunges or any motion you feel would further support the actions of the peak pose.

Standing Poses, Balance & Twists

For your open hip standing poses, warrior II is a classic. You could also incorporate poses like bound extended side angle (for the engagement of the shoulders), triangle, Prasarita, peaceful warrior, etc. Any poses you decide to piece together should have cues that signify and action needed for the peak pose. For example, in Prasarita Padottanasana, the two straight legs.

In the balance and twist section, it might be nice to include revolved triangle (two straight legs), revolved extended side angle, warrior 3 (basically handstand with one leg down), Parsvottanasana, devotional warrior, etc.

Peak Pose: Handstand + Wheel

Be sure to demo the peak pose and then guide them through it so they can first see what it looks like and have clear direction when getting into the poses. You could even offer the option to have them hop into handstand a couple of times from Parsvottanasana to get the feel for it so when it’s time to do the peak pose they feel a little warmed up.

Wind Down Section of Class

It is always wise to include a forward fold at the latter half of class… and don’t forget a twist to even things out! We recommend poses like:

  • Baddha Konasana
  • Tarasana
  • Janu Sirsasana
  • Paschmiottanasana
  • Supine twists
  • Supported bridge
  • Happy baby

Give This New Year’s Yoga Flow a Try!

You can follow our sequencing skeleton from Kate and Patrick’s Vinyasa Sequencing Lab to plug and play your own poses for this class, but these are the basics if you want to teach a class with using handstand and wheel (urdhva danurasana) as your peak poses! Good luck & let us know how it goes.

Online Yoga Teacher Training Courses:

200 Hour Online Yoga Teacher Training

200 Hour Online Yoga Teacher Training

300 Hour Online Yoga Teacher Training

300 Hour Online Yoga Teacher Training

500 Hour Online Yoga Teacher Training

500 Hour Online Yoga Teacher Training
Patrick Franco sitting in a cozy chair, looking down on his reflections from the year in a wood cabin with cool art hanging behind him

Reflections

By Yoga

As we approach the new year, it feels like an important time to be reflecting on this past year. Reflections on the previous year usually include the highlights, the struggles and the difficult things we’ve had to overcome. Reflecting around the holidays is a great way to stay grounded and set yourself up for a flourishing year ahead.

What do reflections look like in the yoga world?

Being an ancient practice, yoga has brought us the simple gift of being with your body and breath and the ability to still the fluctuations of the mind. This practice has taught us the importance of presence and in doing so, we can learn to appreciate the residual effects we notice in our own personal practice. By implementing the practices and sentiments put forth in the Yoga Sutras, compiled by ancient sages, we can learn the subtle art of noticing, and in turn, reflecting.

Create a practice that feels reflective

Whether you’re seated on your mat and tending to a breathing practice or you prefer the physical practice of yoga asana, carve out time to commit to a practice that will help you start to tune out and look inward. For many of us, that means moving our bodies, and for the other lot of us, it means just sitting and breathing to notice the breath. We’ll outline some practices below for you to start to tune inward to focus on your reflections:

Nadi Shodhana Breathing Practice

Alternate nostril breathing is one of the many breathwork techniques studied and practiced in Ayurveda (yoga’s sister science) and yoga. The practice is relatively simple and is meant to relax you.

Here’s how:

    1. Start seated in a comfortable seated posture like Sukhasana (easy seat) with your sit bones higher than your knees. Typically with this practice, we start on the left side (left nostril first).
    2. Use your right hand ring finger to close your left nostril, and your right thumb to block your right nostril.
    3. The index and middle finger can rest on your third eye or close in towards your palm.
    4. Close your right nostril, inhale through your left nostril for five counts.
    5. Close the left nostril with ring finger, and exhale through your right nostril for five counts.
    6. Alternate between the two sides open and closing, and add pauses where you feel comfortable. *You can practice retaining the breath for five counts, and gradually increase.

Sukhasana Meditation Practice

Sukhasana, or easy seat, is a posture that allows you to find stillness. Adding in a guided or silent meditation can seem challenging, but will help with your practice of balancing and quieting the mind to reflect.

How to:

  1. Start by sitting with your left shin crossed in front of your right. You can prop yourself up on a block or blanket(s) if you need some extra support.
  2. Let your knees get heavy towards to the floor.
  3. Rest your arms on your thighs or your knees with your palms facing up (inviting in) or down (grounding).
  4. Sit up nice and tall, stacking your heart over your hips.
  5. Leave your eyes open or close them and start to notice your breath. Before you change anything, just sit with your natural pattern of breathing.
  6. Begin to deepen your breaths as you imagine lengthening through the crown of your head while sitting firmly in your seat.
  7. Continue to breathe until you feel calmer. *You can set a timer for 5 or 10 minutes & gradually increase the time increments as you practice more.

Meditative Journaling Practice

Sometimes writing things down about the year that has passed helps us be grateful for 2 things:

  1. Where we are headed
  2. How far we have come

Journaling can greatly reduce stress and add an extra layer of peace of mind as we approach the holidays and a new year. Try this journaling practice out and if you love it, be sure to check out more of our online workshops through Ether.

How to get started:

  1. Find a journal that really speaks to you. Maybe it’s one you’ve had lying around, or perhaps it’s one you’ve used throughout the year; but if you are purchasing a brand new journal, take the time to find one that either embodies the year you’ve had or the upcoming year you plan to have. *This initial intention goes a long way! You’ll be excited to write in it. 🙂
  2. Find the perfect writing utensil. Sourcing the pen or pencil you write with is equally as intentional as sourcing the journal. If you don’t have access to any good pens or pencils or markers, maybe visit a nearby shop or cafe and see if they’ve any extra or old writing utensils lying around.
  3. Perform a 3 Minute Gratitude + Intention Setting Meditation: Close your eyes and deepen your breath. Sit in a comfortable position and invite in any intentions you have for the new year. Also call upon every single thing you’re grateful for from this past year — it can even (especially) be things that have challenged you or forced you to grow beyond your comfort zone that felt a little painful but nonetheless you grew past.
  4. Start writing! Whatever comes to you ~ let it flow. There is no rhyme or reason to what you write and I don’t care what they say, everyone is a writer.

Yoga Asana Practice for Reflection

Ahhh, the physical practice! Typically, the most quieting and reflective of the yoga postures to work with are inversions: Headstand, Forearm Stand, Handstand, and Shoulderstand. Any time your head is over your heart, it quiets the mind and creates space for clarity. When we go upside down, we have no other choice but to be fully in the present moment. Let’s create a yoga class teaching towards inversions…

Example of a yoga class for inversions:

Depending on which pose you choose as your peak and what physical actions you are choosing to focus on, you’ll piece together your class around those gestures and movements. For example, in a headstand class, you may want to incorporate the rounding of the shoulder blades (like a cat pose), stretching and strengthening of the shoulders and straight legs. You could choose a million different ways to approach a class centered around an inversion, so let’s just outline the basics.

Puttering: Give yourself enough of a warmup that you feel strong in supporting yourself by whichever part of the body is your foundation (for headstand, it’s your head and arms, handstand is your arms, wrists, and legs, shoulderstand is your shoulders and the back of the body as well as lengthening of the legs, and forearm stand is your forearms and upper back).

Standing Poses: Emphasize poses for the standing part of class that also mimic actions needed to perform the peak pose, for example: for handstand, have them get long and straight by lengthening and extending their arms and legs.

Balance & Twists: Same rules apply as the standing poses — choose poses that reflect the motions you are trying to commit to for the peak pose.

Perform the peak pose for 5-7 breaths. Let yourself be upside down (heart above your head).

Wind Down: Select postures that either go in the same direction as the peak pose to further support or in the opposite direction to relieve from the peak pose. This means, for handstand, maybe a forward fold like Paschimottanasana will feel good after being extended in both directions, but also mimics the action of straight legs and neutral hips.

Savasana — never skip Savasana.

Reflections & how they inform us

Looking back on the previous year can help us recognize some very important things about ourselves. Sometimes, we don’t even notice how truly peaceful we are until we’ve seen how much adversity we’ve come through. Reflecting also includes looking back on all the positives and things we have in our lives that we are grateful for. Even in challenging times, it’s important to remember that it’s all about the dance. 

As we approach this next year, may you find peace in the sole fact that you are able to reflect back on the year before you and honor all the growth, setbacks, pain and joy that the year delivered, knowing you have the tools necessary (even if just from this tiny blog post) to endure most of what life brings to the table.

Online Yoga Teacher Training Courses:

200 Hour Online Yoga Teacher Training

200 Hour Online Yoga Teacher Training

300 Hour Online Yoga Teacher Training

300 Hour Online Yoga Teacher Training

500 Hour Online Yoga Teacher Training

500 Hour Online Yoga Teacher Training
A photo of Patrick Franco and Jordan taking a mindful walk, carrying their rolled up yoga mats

Living in the Present

By Mindfulness

The very first yoga sutra, atha yoganushasanam, translates to, “now, the discipline of yoga,” which reminds us to be in the present moment. The sutra states that the practice of yoga is beginning now, not in five minutes or ten minutes from now, and it didn’t start before we rolled out the mat… it starts in this exact moment. This is an important sentiment to remember not only for the yoga practice, but for our daily lives as well. It can be a gentle reminder to keep us from worrying about the future or stressing and feeling guilt over the past.

How do we keep revisiting the present moment? How do we allow ourselves to quickly pivot our mindset to taking place only in the moment we’re currently in? It’s easy…

How do I become more present?

1. Roll out your yoga mat — Seriously. There’s a reason I opened with the first yoga sutra. Bringing yourself to a physical practice is a great way to get you out of your head and into your body. By practicing yoga, you’ll not only learn how to be in the present moment, but you’ll find a newfound respect for the physical practice (I’m talking about yoga asana when I say yoga).

2. Find something you can see, hear, touch or smell — Sometimes physical sensations allow us to really take in the things around us at that very moment in time. By naming things or putting a conscious thought to things you can see, hear, touch or smell, you’re signaling to your brain that these are real things creating your environment at the time.

3. Remind yourself to be where your body is — Sounds clichĂŠ, but I bet if you can subtly remind yourself, in your head, where you are physically, it will position your mind to put focus in the present moment. Sometimes I tell myself, “this is where you need to be in this moment, and this is all you need to be doing.” It kind of circles back to atha yoganushasanam, but without the physical practice of rolling out a mat and moving your body. Instead, use your feet as your anchor point to remind yourself where you are and what you’re doing, and that’s all you need to be present for in this exact moment.

Reap the benefits of being more present

There’s a lot of positive psychology centered around living in the present moment and how this can be a major advantage for stress relief and living an overall healthier lifestyle. Psychology, as we know it, is anything centered around the studies of the human mind. In this article by Calm, a mental health app, they state that being more in the present moment can actually boost your emotional intelligence, help you live a more mindful life and even help greatly reduce stress and anxiety.

Mindfulness is also a great way to practice being in the present moment, as the core of the practice is being rooted in the present. Many mindfulness exercises require the practitioner to be conscious of their daily life, the choices they make, and to pay attention to the seemingly small details in life, taking time to pause and reflect. By enrolling in a mindfulness certification course, you can not only help yourself to live more intentionally, but you have the resources and tools necessary to spread that awareness and teach others.

Another major benefit of being more present is lessening the space for worry and doubt to creep in. When you are preoccupied with the present moment, you can’t stress about what came before or what comes next; there is only the very moment you’re in. Many spiritual paths link being in the present moment with true peace. In Buddhism and Taoism, they say that if you live in the past, you can become depressed and if you think too far into the future, you may cause yourself to become anxious.

“If you are depressed you are living in the past.
If you are anxious you are living in the future.
If you are at peace you are living in the present.”
― Lao Tzu

Where can I find tools for living in the present moment?

Find a mindful movement practice — Whether you enroll in a gym, yoga studio, pilates, or just simply find joy in being outside by whatever transportation mode, find a way to incorporate it into your daily life. Being mindful of making the choice to actively move your body will help you be in the present moment.

Download an app — Apps like Calm, Headspace, Ether, and Buddhify allow you to dedicate time to being present through different mental exercises.

Explore meditation practices on YouTube & Spotify — The internet is a vast network of online resources, many of which cater to wellness and more specifically, mindfulness. You can find a plethora of helpful meditation songs and videos to help develop a committed practice to being in the present moment.

Talk to your friends and co-workers — Sometimes the best resources come from word of mouth! If you have friends in the wellness industry, ask around for good recommendations on how to be in the present moment. They may recommend meditations, journaling activities, and other methods of practicing mindfulness throughout your day.

Unlock your fullest potential. Yoga anywhere, any time.

Sign up for Ether — the limitless yoga app.

Become a certified mindfulness coach.

Related Posts:

A photo of Patrick Franco and Jordan taking a mindful walk, carrying their rolled up yoga mats
Mindfulness

Living in the Present

The very first yoga sutra, atha yoganushasanam, translates to, "now, the discipline of yoga," which…
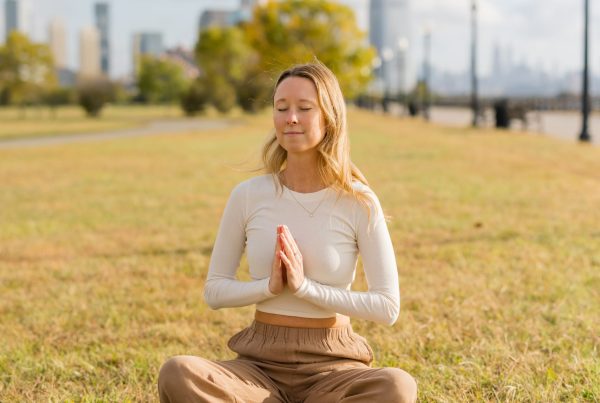
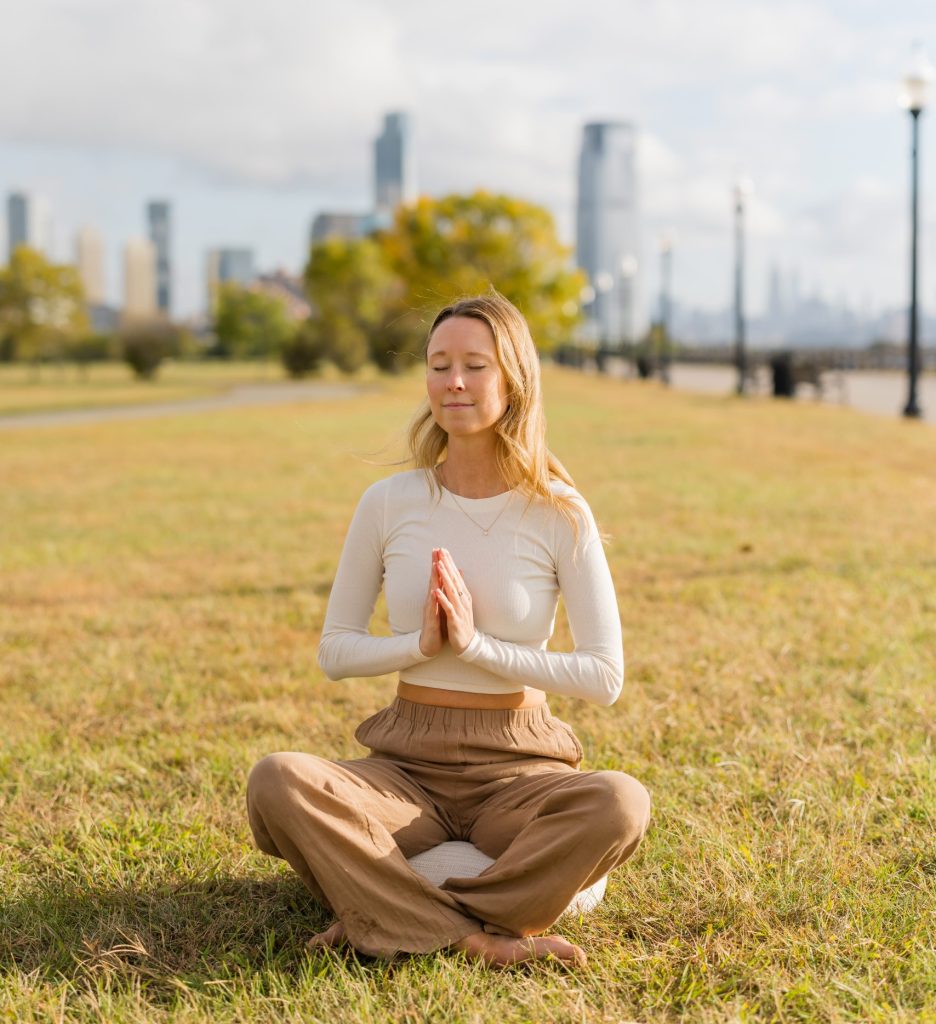
Kate Wall sitting in a meditative pose on the grass in an open park with the NYC city skyline behind her
Mindfulness

How to Become a Mindfulness Coach

Training to become a mindfulness meditation teacher can be a transformative experience, offering a chance…
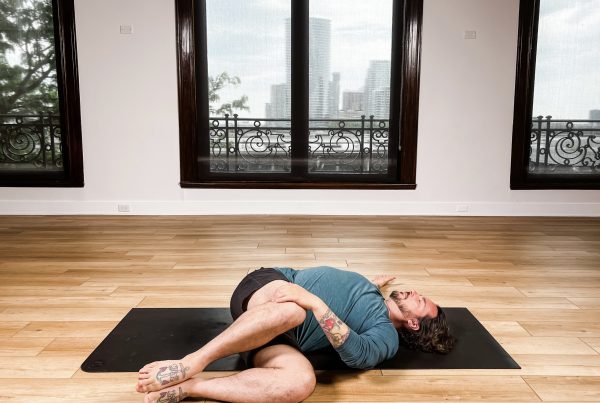
Man in reclined spinal twist
Mindfulness

Live in the Present Moment (Jathara Parivartanasana)

This week's class theme is ✨ living in the present moment ✨ We're moving through life…
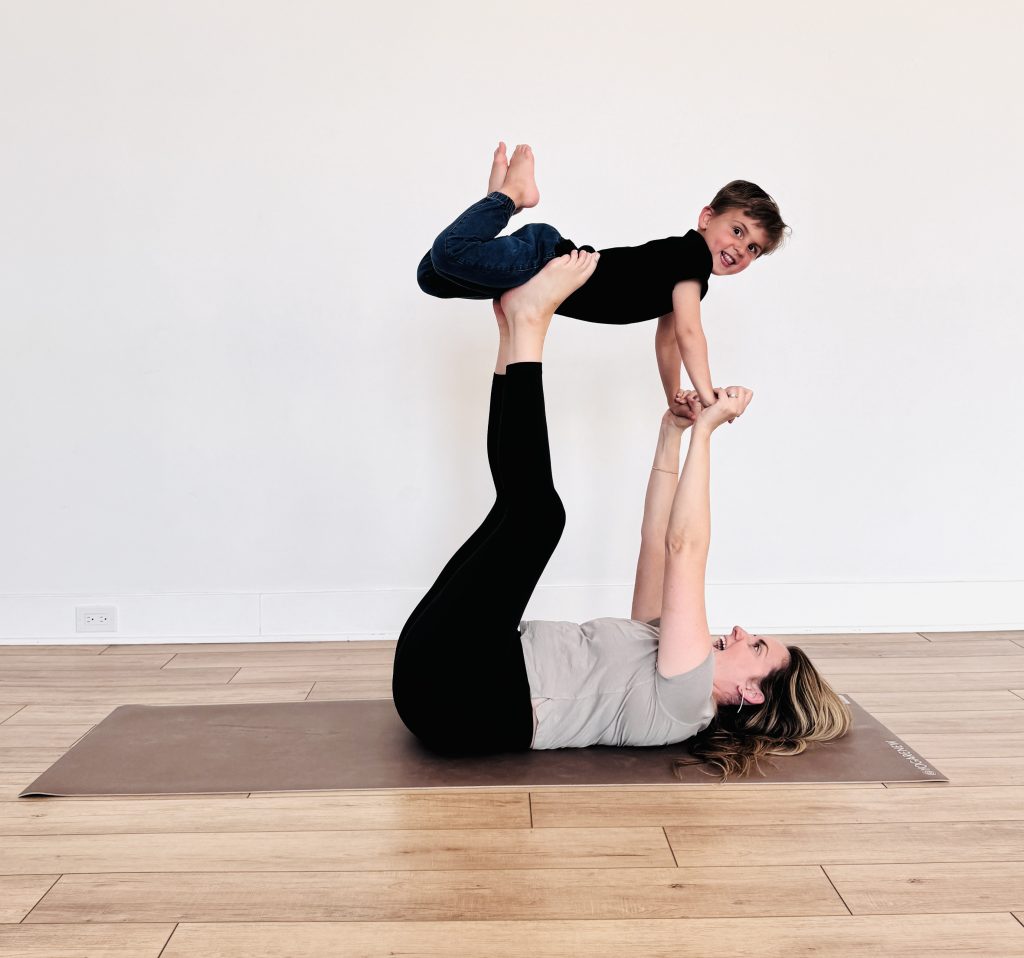
Kids yoga photo of Kate Lombardo with her toddler in flying airplane pose

Yoga Poses for Kids

By Yoga, Yoga Asana

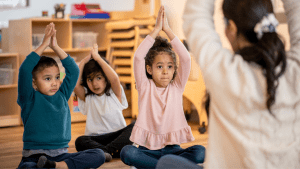
Yoga is such a well-rounded practice involving both the physical movement and the mind. While it is comprised of a plethora of poses, moving the body in different ways, the basic fundamental actions of the poses can be made suitable for children to do. Kids yoga poses are just a simpler, easier version of the modern day yoga poses we know and love today. This makes it a completely accessible movement practice for kids!

Kids yoga is a great way to keep kids balanced and living a healthy lifestyle. While the yoga practice has been developed by ancient yogis and sages up in the caves and mountains, it has since made its way to yoga studios across the west and even inside classrooms. Yoga has multiple benefits and incorporating it into a classroom or even teaching at a nearby studio where kids can come and practice is a great way to promote mindful living in the next generations.

Our very own Julie Pasqual and Trevor Vaughan have been leading the kids yoga teacher training here at YogaRenew and are constantly coming up with creative ways to keep kids engaged and loving yoga. We’ll explore a few yoga poses that are kid friendly and an exciting alternative to keep them focused and get them excited about yoga!

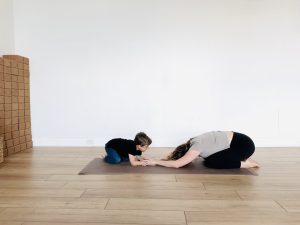
Child’s Pose (Balasana)

Mother and son facing each other in balasana, child's pose

Child’s pose

Kids may not be able to sit their hips all the way back and rest their sit bones on their heels, but they can get themselves into the general shape of a little ball. Here’s how to safely get them to explore Balasana, or Child’s Pose:

  1. Have them start sitting on their shins
  2. Tell them to widen their knees and crawl their palms forward out in front of them
  3. If there’s any discomfort, pad up under their seat with a blanket or bean bag or place a blanket underneath their knees (if there isn’t already a mat beneath them)

Unicorn Pose (Gate Pose, Parighasana)

For kids yoga, we’ll explore a dialed down version of gate pose, or in this case, unicorn pose. Kids will get excited over taking on the shape of such a mystical and fun creature.

Check out this video of Julie doing it: Unicorn Pose on YouTube

  1. Have them start on their shins
  2. Send one leg out to the side
  3. Reach the same arm of the leg that’s extended up overhead with the fingers sticking out as the horn

Cobra Pose (Snake Pose, Bhujangasana)

A young kid in cobra pose, smiling at the camera head on

Cobra pose

Cobra pose is done by lying on your belly on the ground, placing your palms underneath your shoulders and lifting your chest up off of the mat while your pelvis and legs stay heavy on the mat. Cobra is very much a real yoga pose, but if you want to make it kid friendly, you can try calling it “snake pose” and let them slither around on the ground if they can’t quite lift their chest off the ground.

  1. Have them start lying on their belly
  2. They can wiggle around side to side or have them place their hands under their shoulders
  3. Tell them to press through their hands to lift their chest and heads up

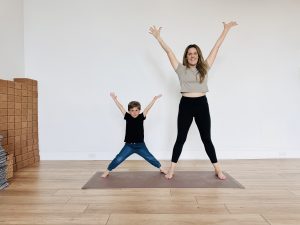
Star Pose (Extended Mountain Pose, Utthita Tadasana)

Kate Lombardo and son Aris in star pose

Star pose

This is a simple and fun pose that will allow kids to learn how to take up space and make room for themselves to grow, both mentally and physically. This kids yoga pose is an extended version of the well-known Tadasana, or Mountain Pose.

  1. Have them start standing up
  2. They can either jump their feet wide or walk them out to the sides until they reach a place they are comfortable
  3. Have them open up their arms wide like a big star shape

Easy Seat (Sukhasana)

Kids in easy seat (sukhasana)

Easy seat

This one is almost too easy… but still has a lot going on! People often think seated poses don’t require much effort because it doesn’t look like anything’s happening. But in easy seat, the chest is open and the idea is to sit as upright as you can. Having kids try to perfect their seat can even be something that they carry over into their regular classroom setting outside of yoga time.

  1. Have them cross one shin in front of the other
  2. Let their knees drop open once the shins are crossed
  3. Hands can rest on the thighs or knees
  4. Switch the crossing of the shins (so that the opposite shin is in front now)
  5. *Bonus: Have them close their eyes and breathe

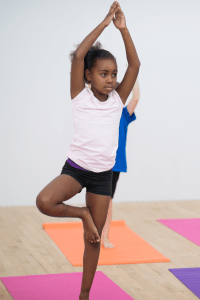
Tree Pose (Vrksasana)

Kid yogi in tree pose on a pink yoga mat

Tree pose

Have your kids grow tall like a tree! This kids yoga pose is a fun way to test their balance and focus.

  1. Start by having them stand on both feet
  2. Have them lift the ball of one foot then the other, getting familiar with bringing all their weight to one side
  3. Have them bring a foot to their shin
  4. If they’re steady & comfortable, have them try to tuck their foot closer to their seat

Taking kids yoga poses outside the classroom

Kids yoga doesn’t always have to be practiced in school, but it is a great way to start! From there, students might want to bring their practices home and show their parents.

Our online kids yoga teacher training program equips you with the skills necessary to lead guided yoga classes for kids in classrooms, neighborhood studios, and other group settings. If you’re looking to practice yoga with your kid at home, let this be the perfect guide! Happy practicing!


Kate Wall sitting in a meditative pose on the grass in an open park with the NYC city skyline behind her

How to Become a Mindfulness Coach

By Mindfulness

Training to become a mindfulness meditation teacher can be a transformative experience, offering a chance to deepen your personal practice while gaining the skills to guide others. By exploring the history, philosophy, science, and practical application of mindfulness meditation, you’ll develop the tools needed to support others on their path to well-being.

A comprehensive mindfulness meditation teacher training will prepare you to inspire and lead, helping to create meaningful change and nurture more mindful communities. In this article, we’ll explore what it means to be a Mindfulness coach and how you can set yourself up for success.

Why Mindfulness Meditation?

Mindfulness meditation has gained significant popularity over the past few decades, largely due to its strong scientific backing in areas such as emotional regulation, stress management, increased focus, and enhanced social connections, among others. As more research highlights its profound benefits, people are increasingly drawn to mindfulness as a powerful tool to enrich their daily lives. By incorporating mindfulness practices, individuals seek to cultivate greater happiness, well-being, and a deeper sense of balance, allowing them to navigate life’s challenges with more clarity and resilience.

What is a Mindfulness Coach?

A Mindfulness coach helps people leverage the benefits of Mindfulness to improve different aspects of their life. The benefits of this practice are vast, so mindfulness coaches can influence many areas of a person’s life including their relationships, contentment, goals, and overall well-being.

Some of the benefits that mindfulness coaches can influence include:

  • Resilience to stress and anxiety
  • Sharper attention and focus
  • Emotional contentment
  • Stronger social and professional relationships
  • Greater Productivity
  • Better self-control
  • Mental clarity and situational awareness
  • Improved confidence and self-esteem

These benefits can ultimately have a positive impact on a person’s relationships, mental and physical health, and personal or professional goals.

Mindfulness coaches are not medical professionals, although many medical professionals may also be mindfulness coaches. They are not counselors, psychologists or psychiatrists although many people in these professions do pursue a mindfulness certification to incorporate its benefits into their practice. A sizable portion of students in my training program are already established in these professions. Other students of mine are looking to build a separate practice or to incorporate mindfulness into an area like yoga. Beyond that, there are quite a lot of students simply looking to gain more insight into mindfulness for their personal benefit.

How to Become a Mindfulness Coach: 3 Simple Steps

  1. Completion of a mindfulness certification
  2. Commitment to a personal formal mindfulness meditation practice
  3. Commitment to ongoing development as a teacher

Mindfulness coaching does not have a clearly defined path, and practitioners may arrive from quite different journeys. This can create a bit of confusion in terms of how to accomplish your goals of building a practice. Education and experience are key, however there are technically no requirements of a formal education in order for somebody to begin calling themselves a ‘mindfulness coach.’ There is no official ‘mindfulness certification’ or accreditation agency in the space. The practice is derived from techniques that have been used for centuries combined with contemporary research and scientific understanding. So the modern concept of an accredited mindfulness institution hasn’t really come to fruition.

While there aren’t any formal requirements to become a mindfulness coach, clients will likely want to see some level of credentials to establish trust. A good mindfulness certification program will help graduates gain insight on the scientific foundation for mindfulness, its techniques, tools and practices.

Outside of knowledge, its important for mindfulness practitioners to have a personal practice. This will help practitioners embody their personal practice in their coaching and show clients the benefits of practice through example.
Having said that, lets explore the three main components that can help you as mindfulness coach.

1. Completion of a Mindfulness Meditation Teacher Training

A mindfulness meditation teacher training is a program designed to equip individuals with the knowledge, skills, and practical experience needed to teach mindfulness meditation to others. These trainings typically include an in-depth exploration of mindfulness practices, covering the following areas:

  • Mindfulness Techniques: Learning various mindfulness meditation methods, including breath awareness, body scanning, loving-kindness, and other forms of mindfulness exercises.
  • Theoretical Foundations: Understanding the history and philosophy behind mindfulness, rooted in Buddhist traditions, as well as contemporary secular approaches.
  • Scientific Research: Gaining insight into the growing body of research on the benefits of mindfulness for mental, emotional, and physical well-being.
  • Practical Application: Developing skills to guide others in mindfulness, including how to lead group meditations and create a safe space for participants.
  • Self-Practice: Emphasizing personal mindfulness practice as the foundation for teaching, ensuring that trainees embody mindfulness before instructing others.

Through this training, individuals not only enhance their own mindfulness practice but also gain the confidence to teach others. Mindfulness Based Stress Reduction (MBSR) is one of the popular training programs for mindfulness practitioners. In my personal mindfulness coach certification, I’ve expanded on the tools in MBSR to developer a broader scope of tools and resources for practitioners. Wherever you choose to study, there are some important considerations that can be helpful in your decision-making process.

How to Choose a Mindfulness Meditation Teacher Training Program

  • Program Format: Consider whether you prefer an in-person or online program based on your lifestyle and schedule. Decide on the training format that fits your needs, whether it’s a short retreat or a longer-term program. If the latter, determine how frequently you’ll meet and for how long. For online programs, assess not only the time commitment but also whether you prefer live sessions for real-time engagement or pre-recorded content that allows you to work at your own pace.
  • Goals: Clarify your personal goals and what you hope to achieve from the program. Look for a course that aligns with these goals and provides the specific tools and knowledge you need to grow as a mindfulness practitioner and teacher.
  • Budget: Be mindful of your budget, and carefully check for any additional fees that might not be included in the listed price. Keep an eye out for seasonal promotions or discounts to find a program that fits within your financial limits without compromising on quality.
  • Credibility: Choose a program from a reputable school with strong ratings and testimonials from past students. Additionally, ensure that the instructors are highly qualified and have the credentials to support their teachings.
  • Real-time Interaction: If you’re opting for an online pre- recorded program but value interaction with teachers and fellow participants, select a school that offers live, weekly sessions to foster a sense of community and allow for real-time engagement.
  • Lifetime Access: For online training, it’s beneficial to choose a program that provides lifetime access to its resources and materials, so you can revisit and deepen your learning at any time.
  • Support: Before enrolling, test the program’s support system. A simple way to do this is by sending an inquiry email and noting how quickly and effectively they respond. This will give you insight into the level of support you can expect throughout the course.

2. Commitment to a Personal Formal Mindfulness Meditation Practice

The teacher should have a clear understanding of the attitudes of mindfulness like patience, non striving and acceptance, and a clear understanding of how the mind works. And you will not get these insights through taking courses nor reading books. An in-depth understanding of mindfulness can only be experienced through the consistent practice of mindfulness meditation. There is no short-cut to learning mindfulness skills.

It is important to have your own personal practice as this will provide an anchor for you when sessions are challenging. When you are aware of your own feelings of anxiety or inadequacy, you can choose to remain present with the needs of the client, instead of being caught up in your own stories or emotions.

A mindfulness practice not only benefits you but also positively impacts your clients. When they witness mindfulness embodied in their teacher, they learn by example. Observing how you handle difficult emotions with kindness, compassion, and curiosity may offer them a new perspective on managing their own stress and challenges.

3. Commitment to Ongoing Development as a Teacher

A commitment to ongoing development as a mindfulness teacher is essential because the journey of learning and teaching mindfulness doesn’t end with completing a teacher training program. While foundational training provides the core principles and techniques, mindfulness is a constantly evolving field. Continued education through advanced courses, workshops, and retreats allows teachers to deepen their understanding, refine their skills, and stay updated with new research and methodologies. This ongoing growth ensures that teachers can offer the most current, relevant, and effective practices to their students.

Moreover, personal development and self-practice are central to embodying the qualities of a mindfulness teacher—compassion, patience, and presence. Engaging in lifelong learning keeps teachers grounded in their own mindfulness practice, helping them to stay authentic and prevent burnout. Regular exposure to different teaching styles and perspectives also fosters adaptability, enabling teachers to meet the diverse needs of their students. Ultimately, continuous learning empowers mindfulness teachers to grow both personally and professionally, enhancing their ability to guide others on their path to greater well-being.

Advantages of YogaRenew’s Mindfulness Meditation Certification

YogaRenew is a renowned school and a beacon for a wide range of teacher training programs, continuing education courses, workshops, and more. Here are just some of the benefits:

  • Internationally recognized
  • No enrollment dates, take the course at your own pace and on your schedule
  • Lifetime access to your student portal and course materials
  • No application fees
  • 30 days full refund guarantee, no questions asked
  • Weekly, live sessions on Zoom for those who wish to interact with the teacher, meditate in group setting and connect with the community
  • A specialized Mindful Eating Teacher Training Program designed for individuals who wish to specialize in the practice of mindful eating

Incorporating Mindfulness in your Business

Whether you are a therapist, a coach or a yoga teacher, or work in any health-related career, you can incorporate the skills of mindfulness in your practice for working with clients to support them in their journey and to create sustainable changes in their physical, mental, and emotional health.

For leaders and business owners, promoting mindfulness also fosters a positive company culture where employees feel valued and supported. Offering mindfulness programs, workshops, or even brief mindfulness breaks during the day can contribute to higher job satisfaction and lower burnout rates.

The general structure for a mindfulness session:

Structuring a mindfulness coaching session involves creating a safe, supportive environment where clients feel comfortable exploring their thoughts, emotions and choices.

Here’s a sample for structuring a group mindfulness session. The format can be adjusted based on the intention of the session, length of the session, if it is one-on one and based on the client’s specific needs, while maintaining a compassionate and flexible approach throughout.

Opening

  • Welcome — Invite participants to introduce themselves and share their intention from attending the session.
  • Introduction — Explain briefly what mindfulness is and what it isn’t, highlight some common misconceptions about the practice, and demonstrate posture options.
  • Explain the Practice — Explain the intention and benefits of the practice session, and what to expect during the session.
  • Trauma-Informed Considerations — Encourage clients to engage only to the extent they feel safe. Remind them they can opt out anytime they need to, ensuring a sense of control throughout the practice.
  • Grounding Practice — Start with a grounding exercise, such as deep breathing and awareness of body. This helps bring participants into the present moment and relaxes them before diving into deeper work.

Main Practice

Guided mindfulness meditation practice based on the intention and goals of the session, and can include:

  • Awareness of Breath — Focusing on the breath to cultivate awareness and focus.
  • Body Scan — Guiding the attention to different body parts to enhance body awareness and cultivate more tolerance towards unpleasant sensations.
  • Mindfulness of Emotions — Identifying and naming emotions without judgment.
  • Loving-Kindness (Metta) Meditation — Cultivating compassion for self and others.
  • Reflection & Discussion — Invite participants to ask questions, share any observations, emotions, or insights from the practice.

Integration & Next Steps

  • Daily Life Application — Suggest ways participants can bring mindfulness into their everyday routine. This could be through mindful eating, mindful walking, or even setting reminders for a few mindful breaths during the day.
  • Set a Personal Practice Goal — Help participants set a realistic goal for their mindfulness practice. You can also suggest readings and resources that can help participants in their practice.

Closing

End the session with gratitude and acknowledgment of participants’ effort.

Finding clients for a mindfulness coaching business

Finding clients requires a mix of authenticity, trust-building, and strategic outreach. Here are some steps to help attract and engage clients who will benefit from your services:

  1. Define Your Niche and Ideal Client — Be specific about who you help (e.g., corporate professionals dealing with stress, individuals looking to cultivate balance in their lives, or those interested in mindful eating).
  2. Clarify the Benefits — Clearly outline what clients will gain from your coaching, like reduced stress, improved emotional regulation..etc. This helps potential clients understand the value of mindfulness in a practical way.
  3. Leverage Social Media Mindfully — Share valuable content that resonates with your ideal clients, such as mindfulness tips, guided meditation snippets, and personal reflections. Authenticity and vulnerability are powerful in this space.
  4. Host Live Sessions or Q&As — Consider hosting live mindfulness sessions or Q&A sessions on platforms like Instagram or LinkedIn to engage potential clients in real time.
  5. Build a Professional Website — Create a resourceful homepage: Highlight who you are, the unique benefits of mindfulness coaching, and the services you offer. Include a clear call-to-action (CTA) for people to book a consultation or download a resource. Blog About Relevant Topics: Write articles on topics your clients care about, like “Mindfulness for Managing Workplace Stress” or “Mindful Techniques for Better Sleep.” This improves SEO and positions you as a knowledgeable resource. Offer Free Resources: Consider adding resources like a free downloadable guided meditation, mindfulness worksheet, or email series on incorporating mindfulness into daily life. This gives potential clients a taste of what you offer and can bring them to your services.

Network with Local Wellness Businesses and Organizations

  • Collaborate with Wellness Centers: Reach out to yoga studios, fitness centers, and wellness clinics. Offer to teach an introductory mindfulness class or partner on a workshop, allowing you to connect with a new audience.
  • Offer Corporate Wellness Programs: Many companies are open to stress management programs for their employees. Contact local businesses to propose a mindfulness workshop or series as part of their wellness initiatives.
  • Attend Wellness Events and Conferences: Participate in local events related to health and wellness, whether as a speaker, exhibitor, or attendee. Networking in person can be a powerful way to gain clients.

Host Free or Low-Cost Workshops

  • Offer Introductory Sessions: Host free or low-cost introductory mindfulness workshops, either online or in person, to introduce people to your approach. Provide a short, impactful experience and share information about how to work with you afterward.
  • Follow Up with Participants: After a workshop, send a thank-you email with an invitation for a one-on-one consultation or a special offer for first-time clients. This gentle follow-up encourages engagement without being too pushy.
  • Offer a Free Initial Consultation: Many potential clients need to feel a personal connection before committing. Offering a free initial consultation allows them to experience your coaching style and see how mindfulness can help them.

Build Trust Through Testimonials and Case Studies

  • Gather Testimonials: Ask past clients for testimonials that highlight specific outcomes, like feeling calmer or more present. This social proof builds credibility and helps future clients envision the benefits.
  • Share Success Stories in Your Content: Without breaching confidentiality, share case studies or general examples of client progress. It’s powerful to show the transformative potential of mindfulness coaching in real-life scenarios.
  • Foster Word-of-Mouth Referrals: Once you have clients who are satisfied with their progress, kindly ask if they would refer others to you. Consider offering a small discount or thank-you gift for successful referrals.
  • Create a Client Referral Program: For existing clients, offer incentives for referrals, like a free session or a small gift, to encourage them to spread the word. These strategies, implemented with consistency, patience, and authenticity, will help attract clients who resonate with your approach to mindfulness coaching and are eager to benefit from it.

Structuring Compensation for Mindfulness Coaching

This involves balancing the value of your services with the accessibility for clients, your own financial goals, and market standards. Here are some key approaches to consider when setting up compensation plans for your mindfulness coaching:

Hourly Rate or Session Fee

  • Determine an Hourly Rate: Research the going rate for mindfulness coaches in your area or niche. Rates can vary widely depending on factors like experience, location, and specialization. Typical rates range from $50 to $200 per hour but may be higher for corporate coaching or specialized trauma-informed sessions.
  • Session Length Options: Standard sessions are often 50–60 minutes, but you might offer shorter (e.g., 30 minutes) or longer (e.g., 90 minutes) sessions. Consider setting different rates for each length to give clients flexibility based on their needs and budget.
  • Consider Package Discounts: To encourage commitment, offer discounted rates for clients who book a set number of sessions upfront (e.g., 5, 10, or 12-session packages).

Sliding Scale or Income-Based Rates

  • Offer Sliding Scale Rates: For accessibility, especially for clients with limited financial means, offer a sliding scale option. For example, clients could choose a rate within a set range (e.g., $75 to $150 per session) based on their financial situation. This approach is often appreciated and attracts clients committed to working with you long-term.
  • Income-Based Tier System: Some coaches use a tiered system where clients are charged based on income brackets. This can be helpful if you work with a range of clients, from students to corporate executives.

Corporate and Group Rates

  • Corporate Coaching Fees: Businesses typically have higher budgets for wellness programs, so rates for corporate mindfulness coaching can be significantly higher than individual sessions. Consider setting an hourly or daily rate for corporate workshops, which can range from $200 to $1,000 per hour, depending on the industry and company size.
  • Group Coaching Sessions: Group sessions are often more affordable for individual clients, which can make mindfulness coaching accessible to a wider audience. You could charge each participant a lower rate than an individual session (e.g., $20–$50 per person per session) while still earning a substantial total.

When structuring your compensation, it’s essential to find a balance between valuing your time and expertise and making your services accessible to the clients you aim to serve. Regularly review your pricing strategy to ensure it aligns with both your professional goals and your clients’ needs.

Enroll in one of our online courses today!

Becoming a mindfulness coach is more than a career choice; it’s a commitment to fostering a more compassionate, resilient, and peaceful world. In a society often driven by stress and division, the role of a mindfulness coach is essential. By guiding others, we’re nurturing communities that value empathy, self-awareness, and understanding. The world needs more mindful individuals to drive this transformation—so if you feel called to this path, know that your efforts contribute not only to individual growth but also to a more harmonious world for all.
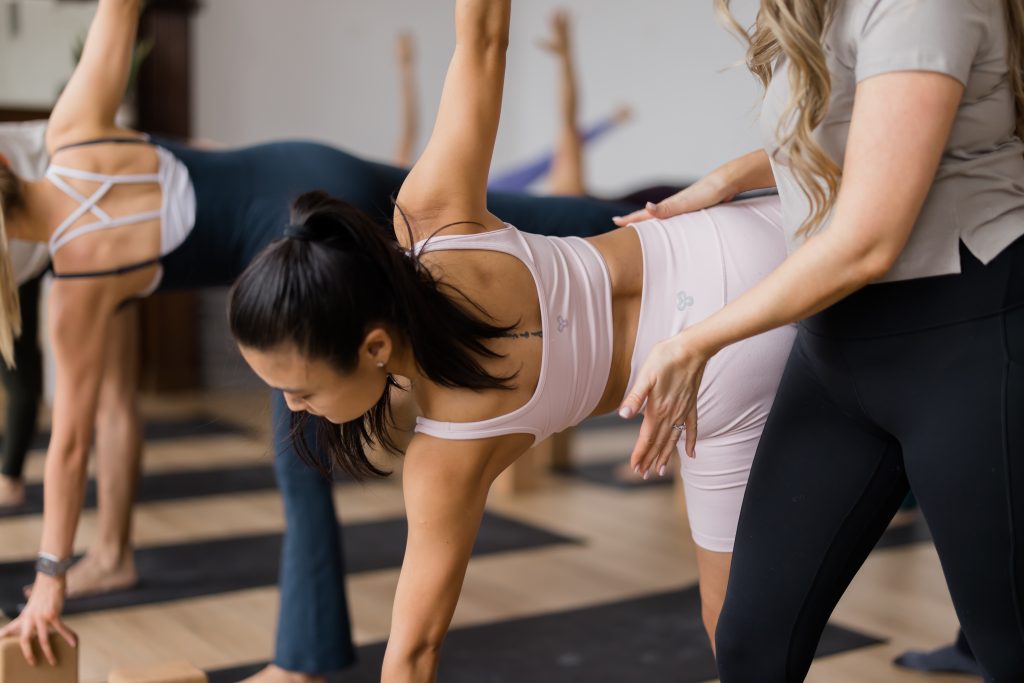
Online Mindfulness Certification

Online Mindfulness Certification

Online Mindful Eating Course

Online Mindful Eating Course
Join the community of +99k students worldwide!
Kate and Patrick of YogaRenew doing triangle pose facing each other outside on the grass in Hoboken, NJ with the NYC skyline in the back

A Yoga Sequence for Mindfulness

By Yoga

There are so many unique ways to create an inclusive, supportive and dynamic yoga class… but the at the root of it all mostly sits the concept of mindfulness. You must first foster a sense of authenticity through being present and tuning into the room (whether in person or giving a class virtually). The energy and intention you set for your students comes from you, and they’ll likely carry it with them long after the class takes place.

Here is a short yoga sequence towards a peak pose that centers around the general theme of mindfulness. Being more mindful throughout your everyday life has numerous benefits, including enhanced awareness and appreciation. We hope that this yoga class sequence fosters that for you!

Dharma talk

In this mini sequence, you are invited to explore what the concept of “mindfulness” means to you or how you incorporate it into your life. Try to keep the discussion pretty neutral and broad, with a general explanation of a way mindfulness has made its way into your life or someone you know. From there, you can tie that into the yoga practice. How does being mindful relate to the practice as a whole and what are some ways to embody mindfulness? A good place to start is the first of the Yoga Sutras, “Atha Yoga Anushasanam.”

Atha Yoga Anushasanam translates to, “Now, the practice of yoga,” meaning right in this moment, being mindful that we came to our mats to practice. This is a great starting point for a dharma talk because not only is it explaining the concept of being mindful, but the students (and you as a teacher) are actively experiencing mindfulness in this exact moment. Encouraging the class to sit down and tune in is a great way to introduce them to the concept of mindfulness.

If you want an in-depth understanding of how to lead a more mindful life, check out our online mindfulness certification program:

Mini mindfulness yoga sequence

Have your students start seated, taking a few mindful breaths. Start with neck rolls, tucking their ear to one shoulder and rolling their head around clockwise and then switch directions. Have them make their way to table top and run through a few rounds of cat/cow. From there, they can walk their palms out in front of them, widen their knees, and come to sit back on their heels for child’s pose, tuck their toes under, send their hips up and back and make their way to downward facing dog. From downward facing dog, here’s the poses they can move through:

  • 3 legged dog, bend the knee, stack the hips
  • Step through to crescent lunge twist
  • Parallel their feet and fold over their legs for prasarita padottansana (have them walk their arms out like downward facing dog arms)
  • Stay low and crawl themselves to the back of their mat for a pigeon pose
  • Send their front leg back, tuck their toes under and send their hips up and back for downward facing dog
  • Roll forward to plank
  • Lower all the way down
  • Press up any amount for cobra
  • Downward facing dog
  • Walk to the top of your spot for sun salutations

They can stop there after sun salutations, or feel free to incorporate some standing poses that make them feel totally present. Such poses can be, but aren’t limited to:

  • Warrior II
  • Triangle
  • Extended side angle
  • Half Moon
  • Warrior I
  • Tree
  • Chair
  • Revolved side angle or chair twist
  • Revolved triangle

You can then direct them to a peak pose that is a twist or seated, twisting pose, allowing them to tune inward. After you’ve demonstrated the peak pose (a twist or seated twist pose), have them take supported bridge with a block under their seat, or legs up the wall and then happy baby… and don’t forget a well-thought-out savasana! At least 6 minutes. This will give your class a well-rounded, mindful feeling. As they lie in savasana, you can circle back on your dharma talk about mindfulness and invite them to utilize the feelings they cultivated in today’s class to practice mindfulness in their daily lives.

Mindfulness practices to try at home

There are so many ways to practice mindfulness at home, including:

Meditation — Meditating, whether in the mornings or at night, can help to clear and calm the mind. Consistent meditation allows the mind to distill down to pure consciousness.

A joyful project — Finding a hobby you love and immersing yourself fully in it is a great way to stay present and be mindful in the moment. Knitting, scrapbooking, painting, reading, writing, singing, playing an instrument, cleaning are some of the many ways to explore a new endeavor that could potentially unlock a lot of joy!

Journaling — Journaling has become such a popular way of processing feelings and emotions throughout the days, thus leading to a deeper understanding of stress and how to relieve it.

Movement — Whether you love lifting weights, going walking or running, enjoy practicing yoga, or just dancing in your living room, movement has been proven to not only enhance your mood, but help you cultivate a sense of body awareness that in turn leads to you being more mindful about yourself. Carving out time to move, in whatever way feels good to you, even in a chair, wheelchair, etc. will greatly benefit your soul and help your brain be more present.

If you are interested in learning more about mindfulness or wish to educate your employees, co-workers, yoga students or other people in your life in mindfulness, consider our online course! Inside this course, Rajaa Azouqa, (Qualified MB-EAT & MBSR Instructor), guides you through a detailed curriculum centered around the psychological and physiological aspects of incorporating mindfulness into your everyday life and teachings. The course is completely online and self-paced and features live Zoom sessions with Rajaa!

Online Mindfulness Certification

Online Mindfulness Certification Program

Mindful Eating Online Course

Mindful Eating Online Course