Girl in revolved chair pose

Weekly Class Theme: Pitta Dosha

By Yoga Asana

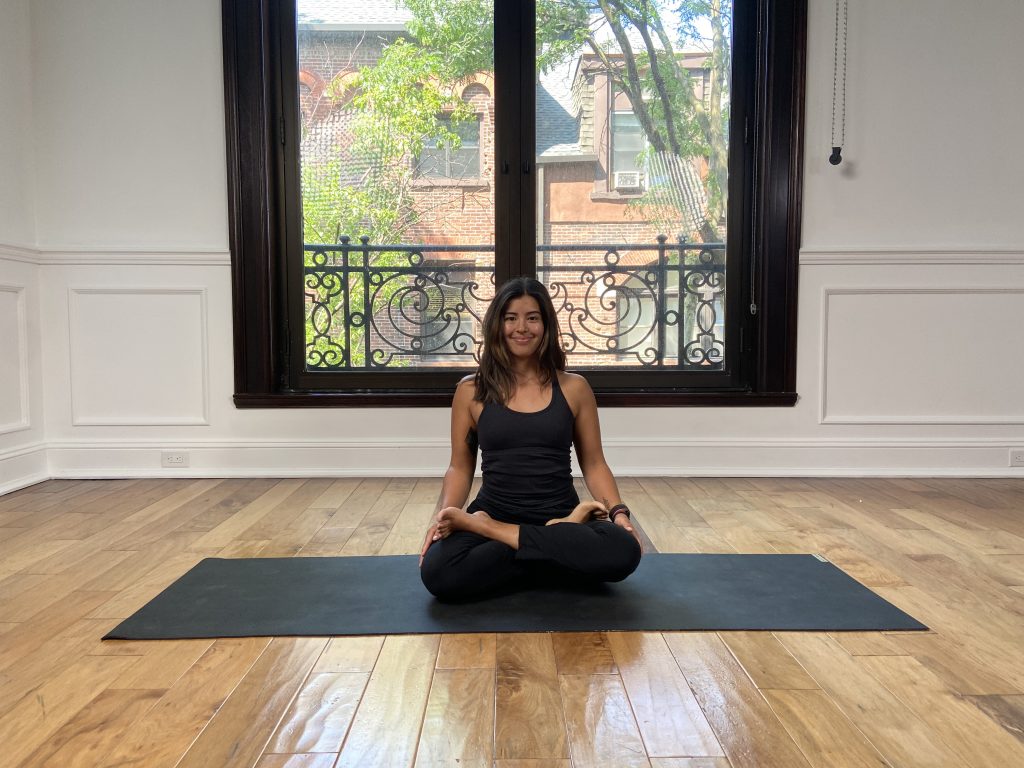
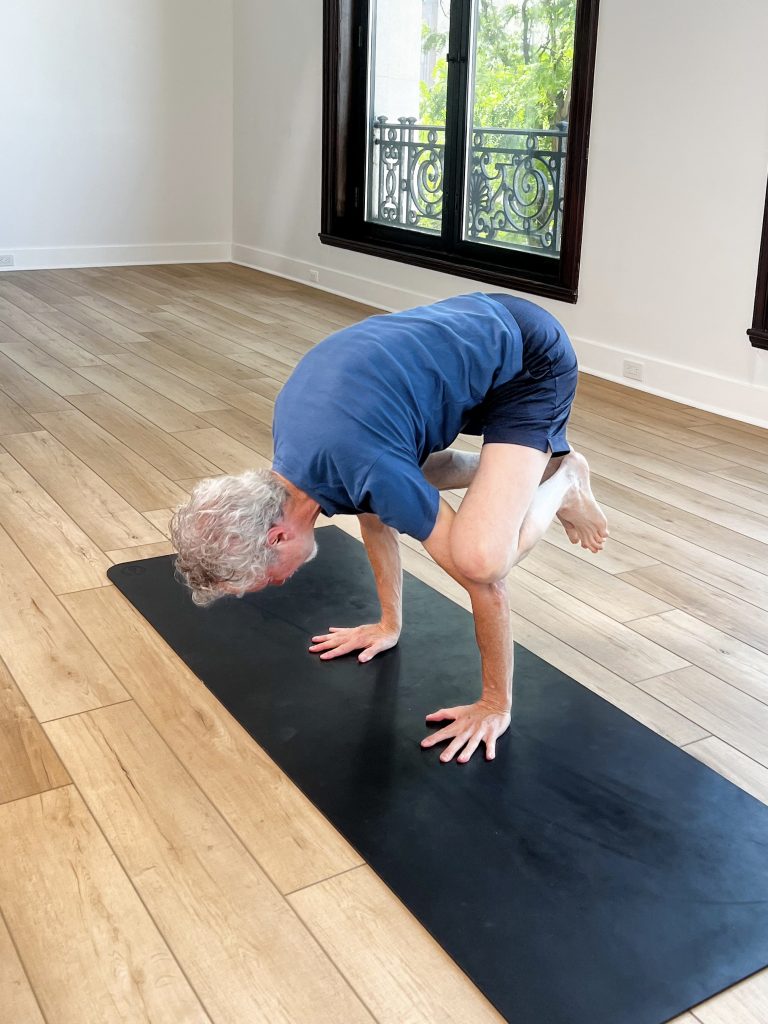
In this week’s class, we’re balancing our pitta dosha! Yoga is known as the sister science of Ayurveda, which teaches us that the doshas are the three main components of a person’s makeup, related to each of the elements. Pitta dosha is comprised of the elements fire and water. Many yoga postures are beneficial to balancing all of the dosha types, but this week we will focus on solely pitta.

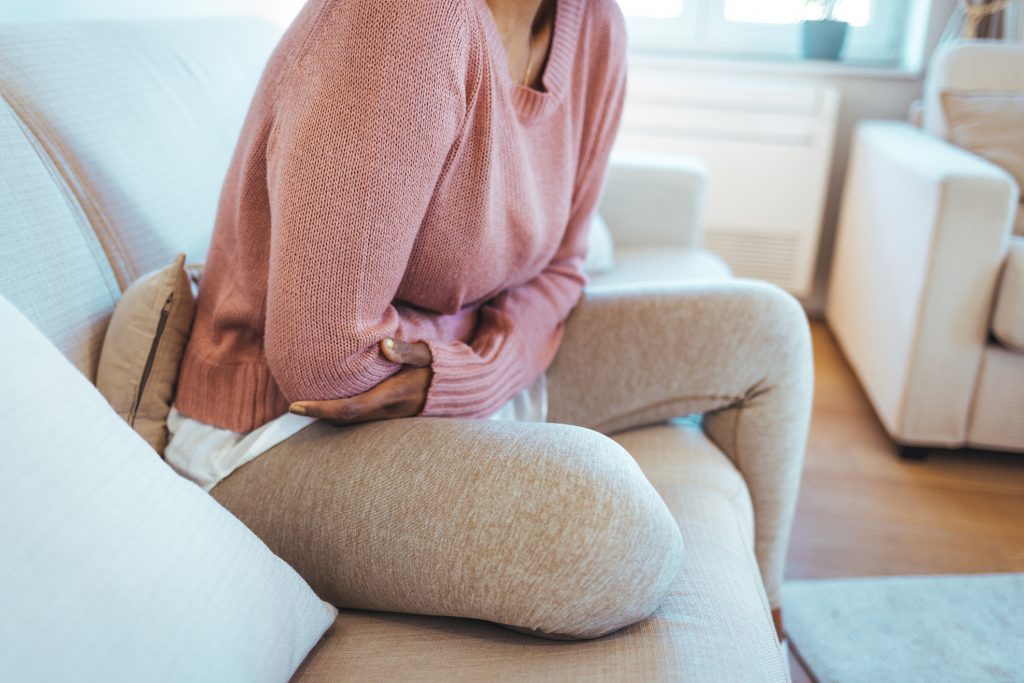
When our pitta dosha is out of balance we may find ourselves getting overheated, irritated, even excessively sweating, and other bodily reactions. Whereas a balanced pitta dosha can offer contentment, good digestion, and passion. While foods and other daily practices contribute to a balanced dosha, a focused yoga practice can assist as well.

“Ayurveda teaches us to cherish our innate-nature – to love and honor who we are, not as what people think or tell us, who we should be.” – Prana Gogia

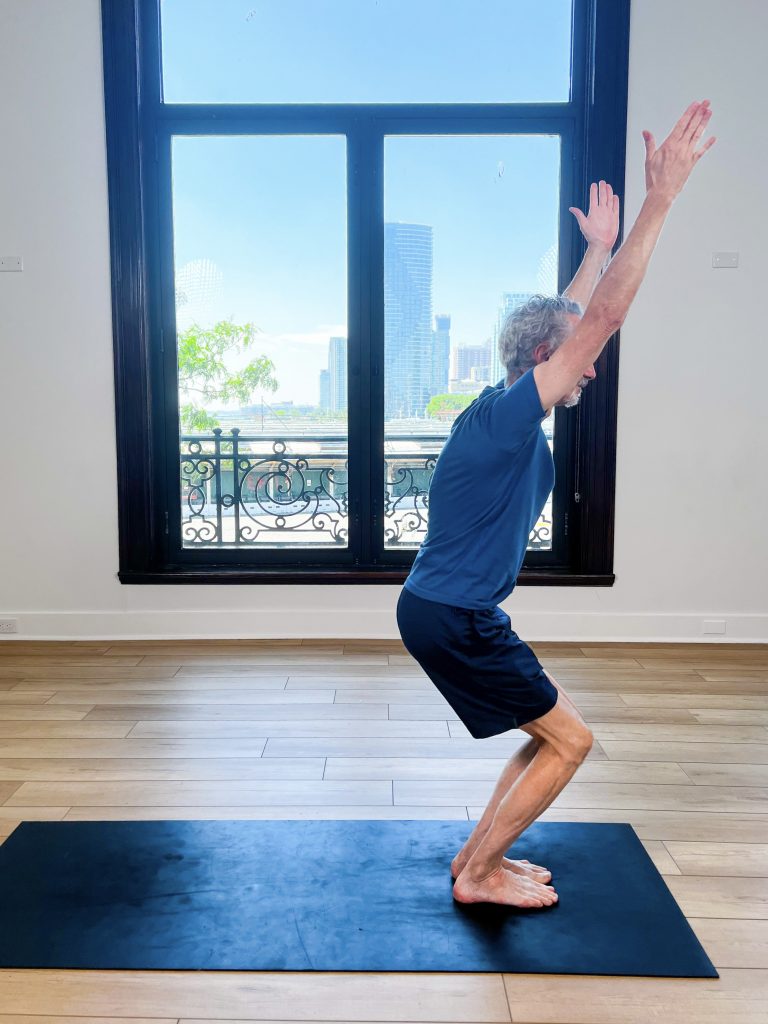
Our peak pose this week will be revolved chair pose and we’ve also listed out other warmup poses to prepare you for revolved chair, or Parivrtta Utkatasana.

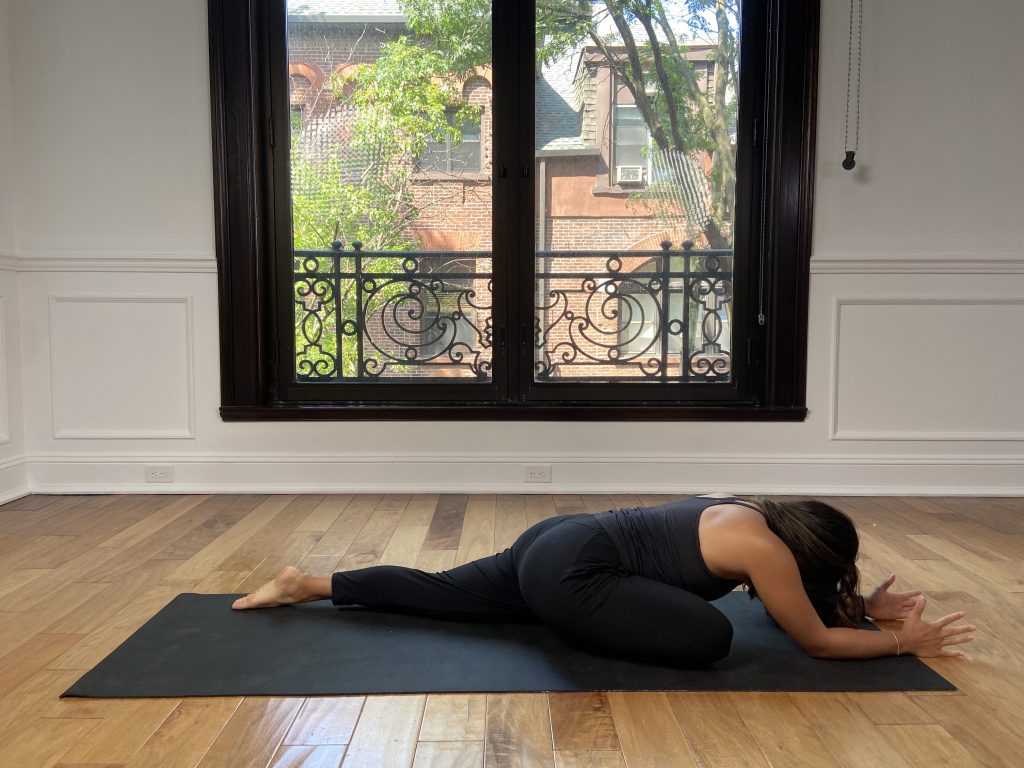
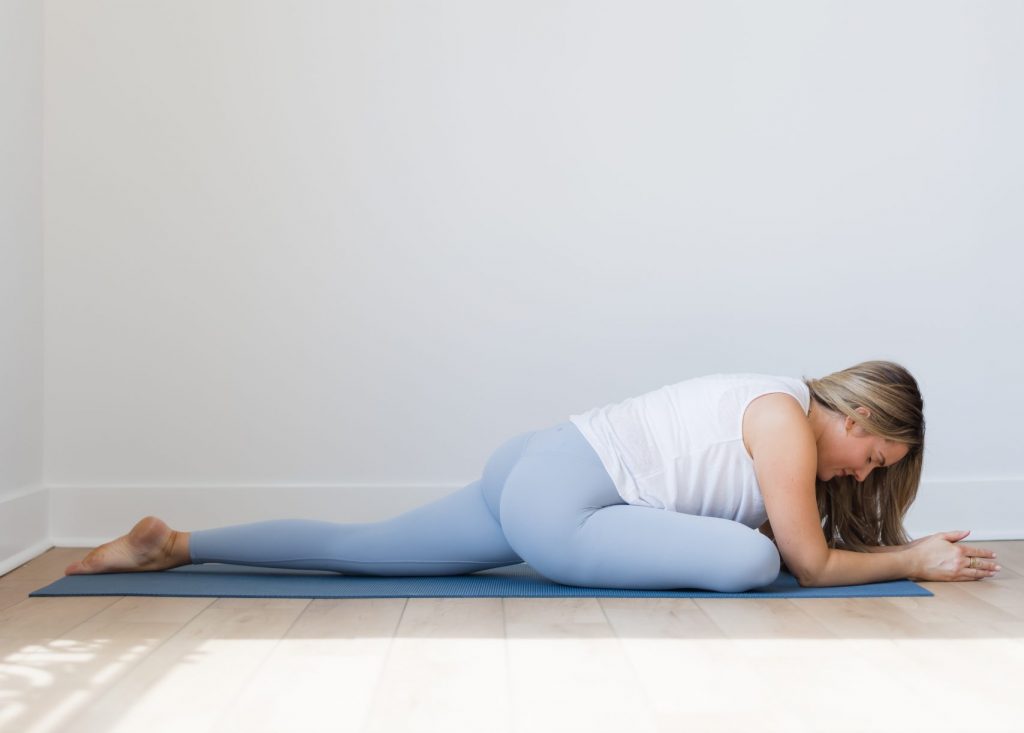
Supine Twists (Supta Matsyendrasana)

Girl in supine twist

How to:

1. Begin by lying down on your back with your knees bent.
2. Bring your arms out wide and allow your shoulders to press into the mat.
3. Draw your knees into your chest and begin to let both knees slowly fall over to the left side. Let them fall comfortably towards the mat.
4. Allow your head to gaze in the opposite direction of your knees. If this is too much, keep your gaze looking up or look in the same direction as your knees.
5. With every exhale focus on deepening into the twist.
6. Hold for several breaths before switching sides.

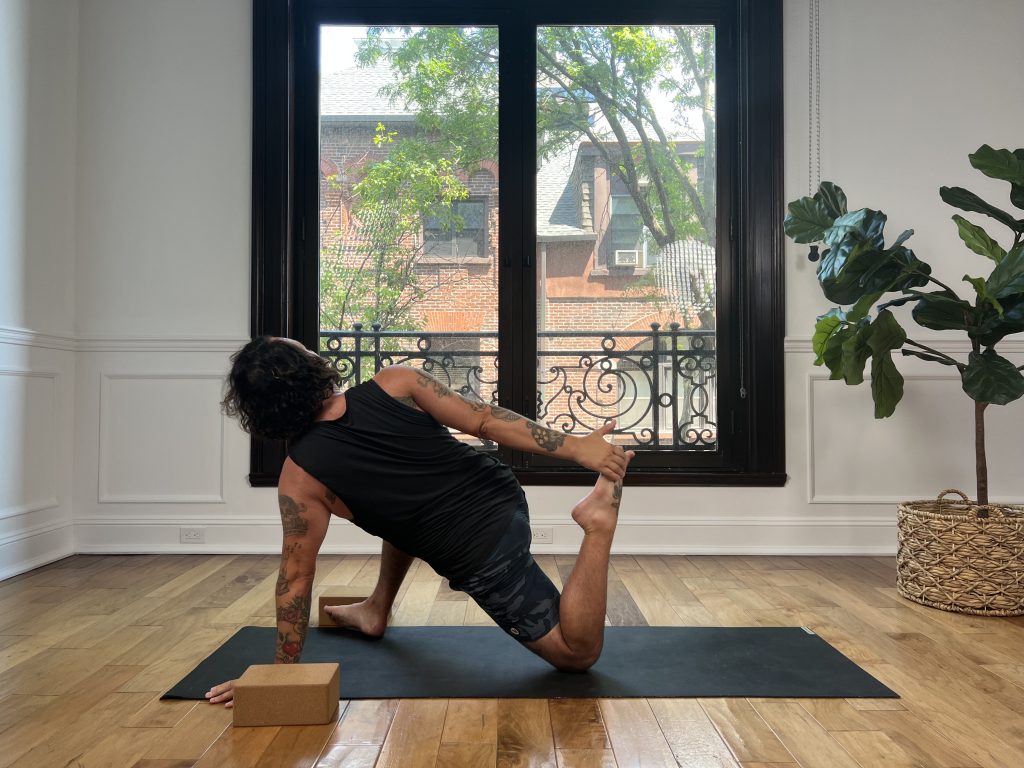
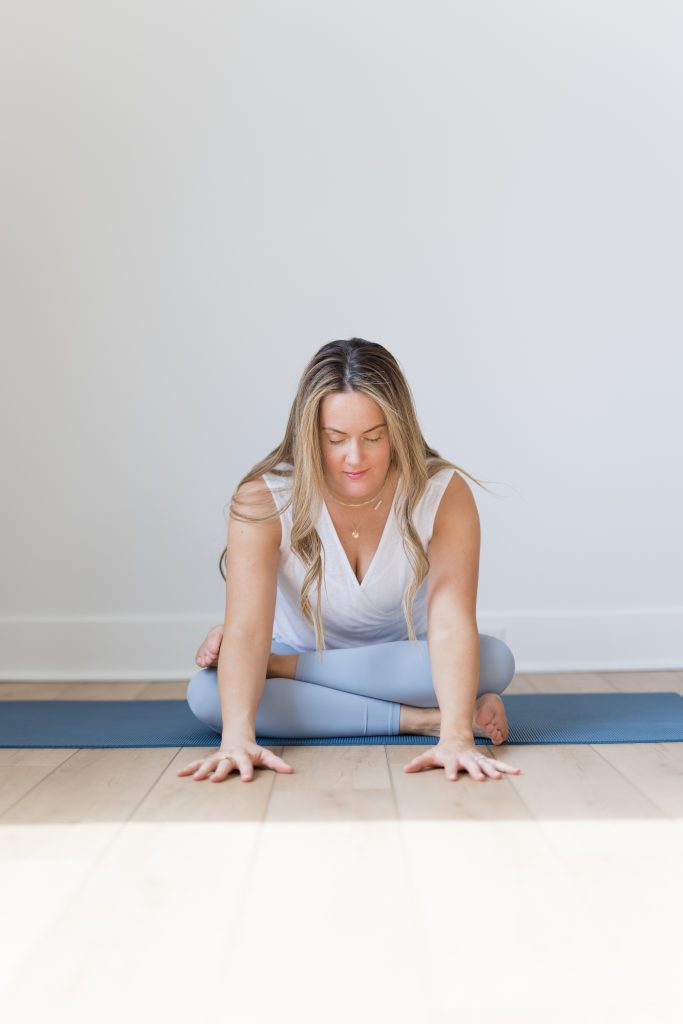
Gate Pose (Parighasana)

Girl in gate pose

How to:

1. Begin by sitting on your knees with your back straight.
2. Straighten your right leg and extend it out to the right side of your body keeping your knee and ankle in line with your hip.
3. Keep your right foot parallel to your mat with your toes pointed forward.
4. Inhale and lift your left arm up over your left ear, extending your arm over your head.
5. Begin to deepen your reach by leaning your torso to the right on your exhale.
6. Gaze up over your extended left arm.
7. Repeat these steps on the other side.

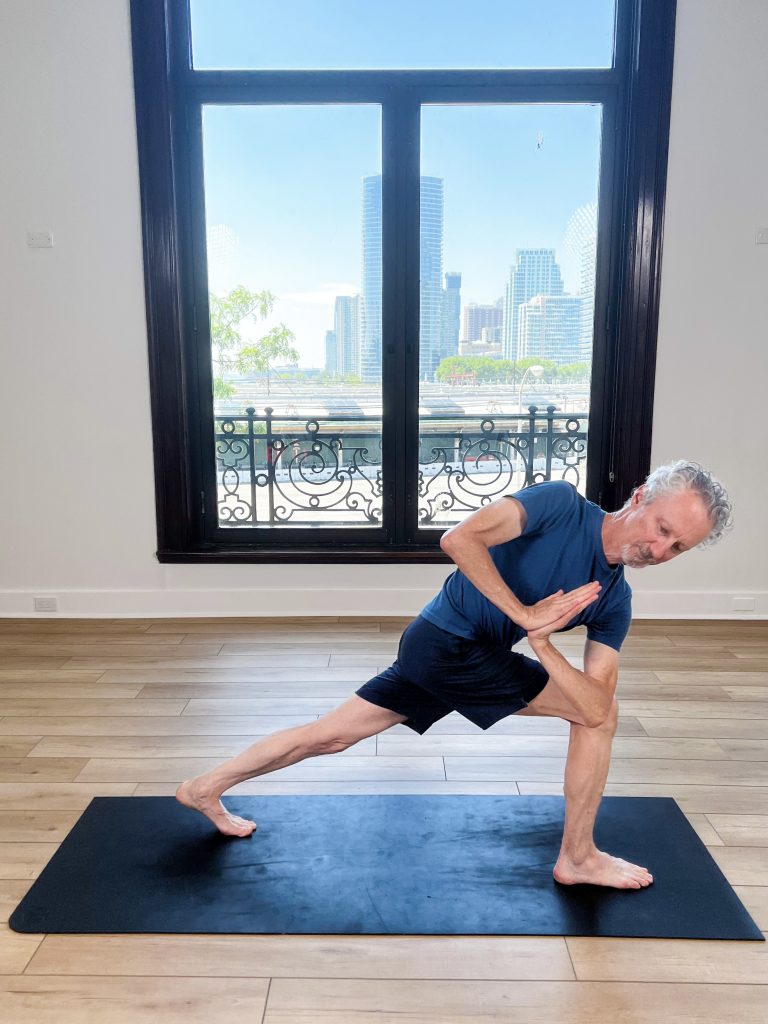
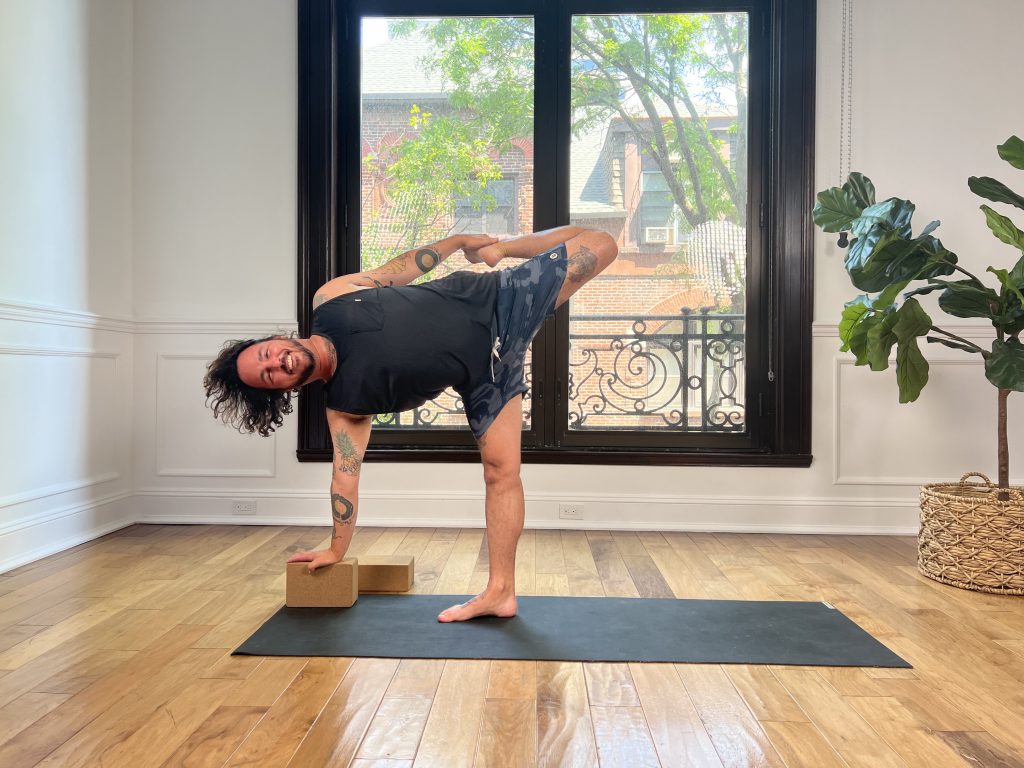
Extended Side Angle (Utthita Parsvakonasana)
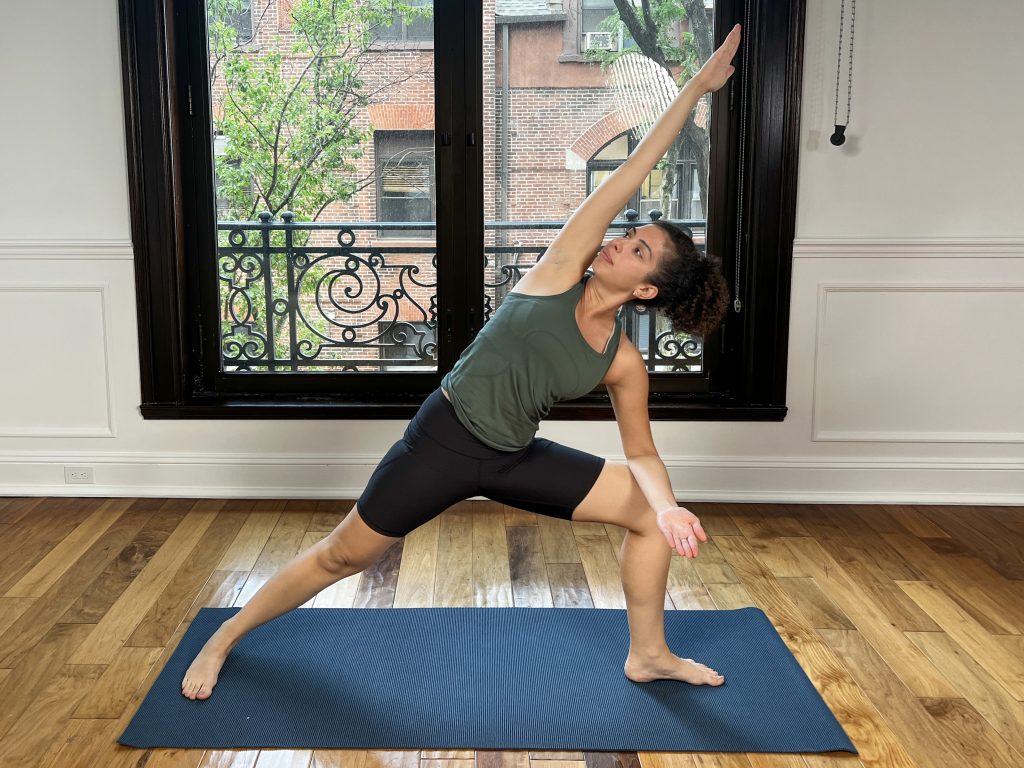
Girl in extended side angle pose

How to:

1. Begin in Warrior II pose.
2. Bring your front forearm onto your front thigh.
3. Extend your opposite arm up toward the sky with your fingers pointing towards the front of your mat.
4. Allow the bicep of your top arm to frame your ear. If this is too much, you can keep the arm lifted straight up towards the sky.
5. Keep your chest rotated upward and root down through the outer edge of your back foot.
6. Lift your head up towards the top arm. If this is too much, keep your gaze towards the ground.
7. To advance the pose, bring your top arm and extend your fingers toward the outside of your front foot. To help with flexibility, you can place a block by your front foot and place your hand on it.
8. To come out of the pose, press into your front thigh and activate your core to lift you back up to Warrior II.

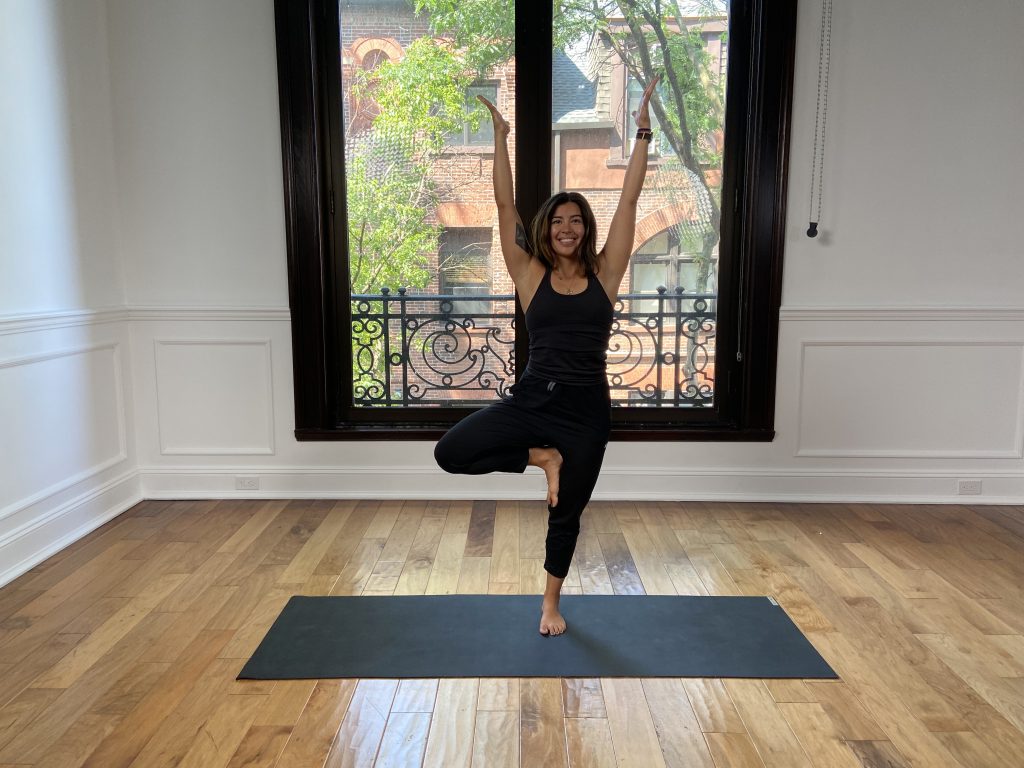
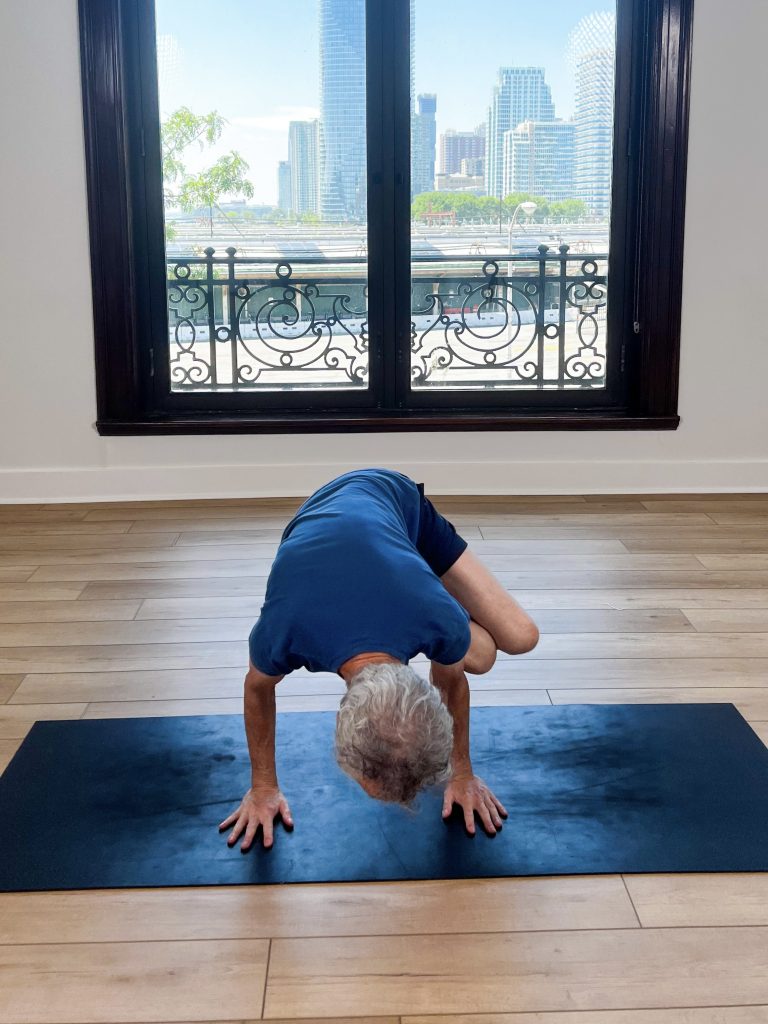
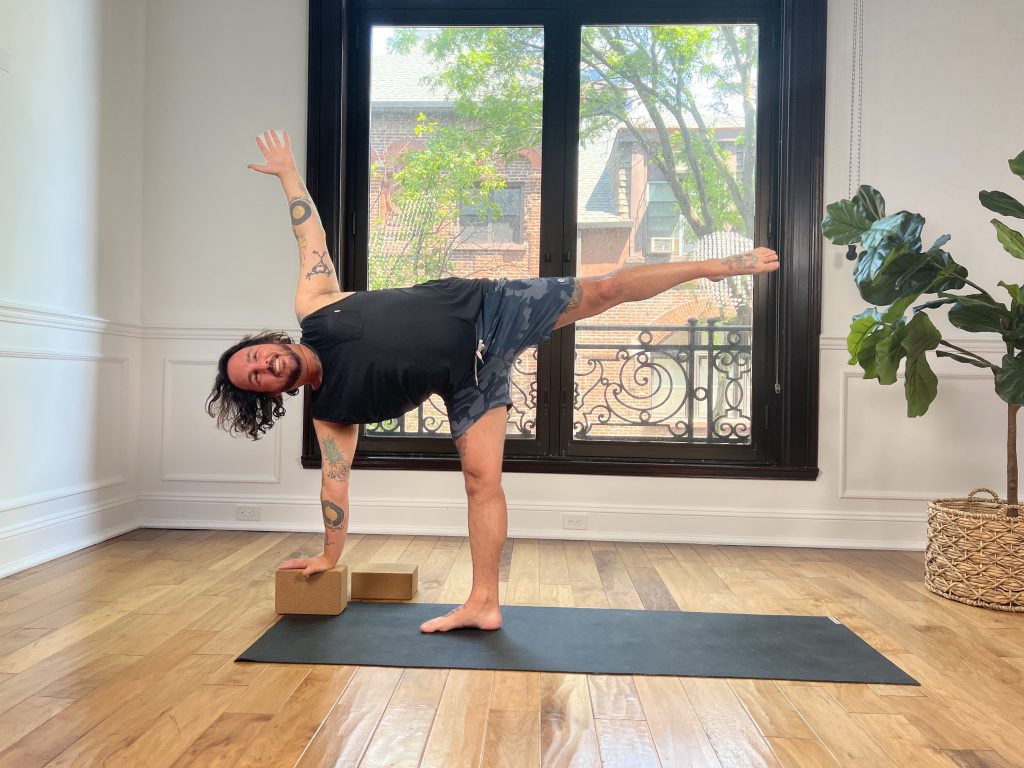
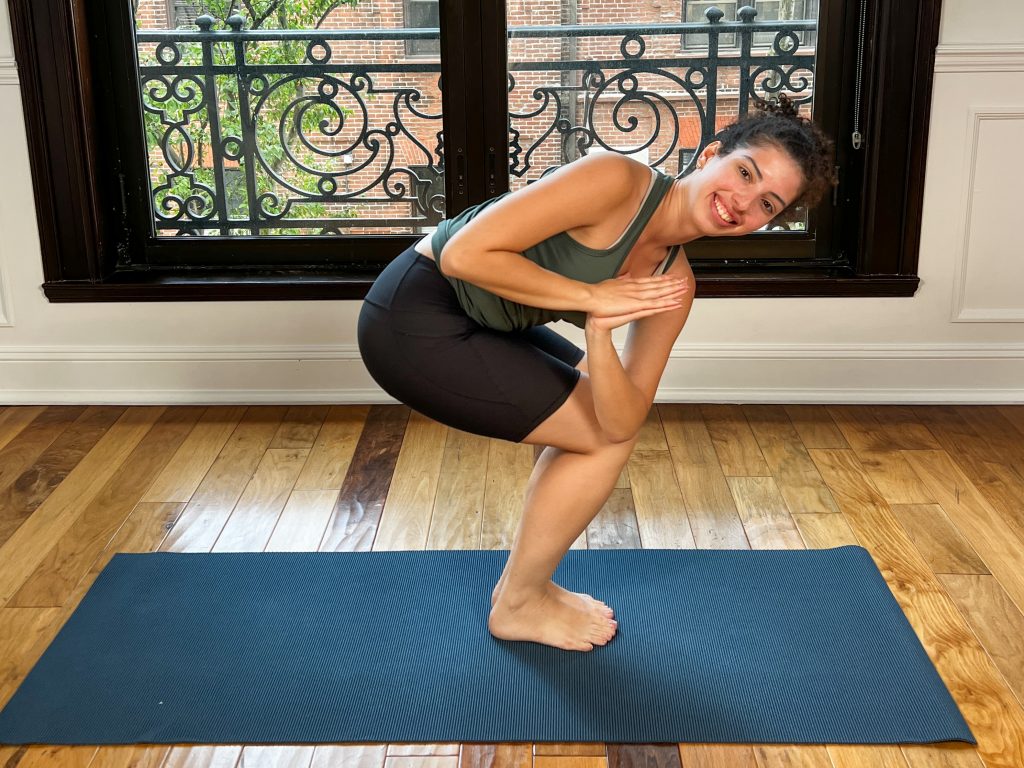
And Finally…Revolved Chair Pose (Parivrtta Utkatasana)

Girl in revolved chair pose

How to:

1. Begin in Chair pose with your hands in prayer at the center of your chest
2. Activate your core and begin to twist towards your left, hooking your right elbow outside of your left thigh.
3. Keep your shoulders stacked as you broaden through your collarbones.
4. If possible, bring your gaze up towards your upper elbow or keep your gaze down towards your mat.
5. Press firmly into the balls of your feet and squeeze your thighs together.
6. To release, engage your core and quads as you twist back to your center.
7. Switch sides.

Woman in pain from menstrual cycle

Ayurveda and PMS

By Lifestyle & Wellness

As a woman, I personally go through a range of ups and downs on a monthly basis and my body doesn’t stay on some consistent path as I move through my life. This is actually a beautiful experience and should be viewed as such. Unfortunately, when I started getting my period, I was taught to either ignore whatever imbalance I was going through or to push through any discomfort I felt.

This was during a time when I was actually very out of balance and instead of figuring out what was causing my imbalances, I would look for a quick fix to stop my stomach cramps and headaches so I could get through the day. PMS was always a problem for me. So many girls and women are confused by their bodies and cannot always connect to the ebb and flow that comes with having the hormones and cycles we have. If you research anything about periods, PMS, or hormones, you’ll get a ton of advice to mask or stop the symptoms… but rarely on how to learn about our bodies and work with them.

How the Doshas play a part in the menstrual cycle

After studying Ayurveda, I’ve learned that PMS is actually an imbalance in the Doshas. These imbalances can be addressed and brought back to balance by understanding the Doshas and by connecting with our body, mind, spirit, and heart. Ayurveda teaches us that when we are out of balance, we need to look at the whole body instead of just one or two symptoms. It asks us to look at the quality of our lifestyle, self-care, our thoughts, yoga practice, relationships, and any spiritual practices we have. It also encourages us to find balance through self exploration and self care. Too often, we run away from what’s happening instead of facing it.

When we change the narrative from, “something is wrong with me” to “something needs my attention and this is important,” it can be incredibly empowering.

Since Vata is the moving force for Doshas (made of ether and air), any acne and mood swings may be Vata’s wind pushing the fires of Pitta’s (fire and water) transformational energy. Any weight gain, low energy, and liquid retention may be vata interacting with Kapha’s (earth and water) more structural energy. Any anxiety, bloating, and low energy may be signs of Vata increasing during this part of the menstrual cycle.

What are the Dhatus and how are they affected by pms?

The deeper we dive into Ayurveda, the more we can also connect with the dhatus. The dhatus are the tissues in the body: plasma, blood, muscle, fat, bone, bone marrow/nerve, and reproductive. The actual menstrual flow is considered to be a byproduct of the first layer, rasa dhatu, the plasma. Plasma is kind of like a carrier for nourishment. When this layer is healthy, it moves freely, which means all nutrients and waste move through and exit the body easily. The second layer, rakta dhatu, the blood, is part of the menstrual flow as well because it releases excess pitta. Both of these dhatus are the quickest to experience changes in quality and in their consistency, so when we can tap into how we’re feeling before, after, and during our periods, we can start to address imbalances before they manifest into something bigger and more severe.

In Ayurveda, we look at any discomfort as an opportunity to ask why we’re not fully balanced and then we have the opportunity to address it and find out what works for us. Ayurveda isn’t a “one size fits all” when it comes to balancing our bodies. Let’s dive deeper into specific imbalances.

The imbalances in any dosha can cause certain side effects

If someone has vata imbalances, they may experience qualities that feel sharp and may have some spasms. This may be felt in the low back and low belly. They may also feel scared, nervous, or have heightened anxiety. The flow may appear thin, dry, light, or dark in color.

Pitta imbalances may manifest as bloating, excess heat, headaches, breast tenderness, acne, and burning. There may be increased irritability or anger and the flow may appear heavier, yellowish-red, or have a bad smell.

If someone has kapha imbalances, they might experience depression, emotional eating, bloating, yeast infections, and overall tiredness. The flow may be longer and heavier.

How do we find balance during PMS?

Overall, we need to focus on the whole body, lifestyle, self care, and the idea of tuning more deeply inward and not running from imbalances that surface. We need to try to stop looking for quick fixes. Ayurveda has taught me to take cravings or disruptions as an opportunity to question as opposed to a way to shame. Whenever I feel like I’m moving out of balance, I stop and try to figure out what’s going on. Am I tired? Am I angry? Am I feeling like I don’t want to get off the couch? Once I address what I’m feeling, I’ll match the qualities of that to the dosha or doshas it’s associated with and then try to balance in some of the following ways:

Vata:

  • Eating warm, cooked, mushy foods
  • Drink lots of water and stay hydrated
  • Bring moisture to tissues with ghee, flaxseed oil, hemp seed oil in food
  • Avoid caffeine
  • Be aware of, and enjoy every moment

Pitta:

  • Avoid spicy and oily foods (but not to the point to upset vata)
  • Cultivate more calmness and ease to lifestyle
  • Incorporate Nasya (nasal oil)
  • Incorporate yoga practices that open the heart and pranayama that cools

Kapha:

  • Stay warm either by moving or with warm clothing
  • Cook with spices like ginger, cinnamon, cardamom
  • Stay active and move (go for walks after meals)
  • Bhastrika and Kapalbhati pranayama daily

When your body is balanced, you can actually eliminate PMS symptoms

According to Ayurveda, women can move through their cycles and their different phases of life with grace, ease, and also a sense of empowerment. We aren’t supposed to feel bad at specific times of the month or during specific changes in life. When we understand nature, our bodies, and our rhythms, we can embrace what’s happening and celebrate everything our beautiful bodies are capable of and all that they do for us.

If you want to learn more about Ayurveda and women’s health, check out my mini course, or invest in the entire Ayurveda bundle to empower yourself, friends, family, and your students and clients.

*I want to acknowledge the intentional use of gendered language in this article. While the topic in this article may be experienced across the gender binary, this content specifically focuses on Ayurveda’s take on cis-women who experience PMS. This is not an intentional effacement of the men and nonbinary people who experience this. I am always learning and seeking ways to make these teachings as accessible as possible.

Girl in lotus pose on a yoga mat

Weekly Class Theme: Inner Strength

By Yoga Asana

When the word “strength” comes to mind, it’s easy to think about how strong our physical bodies are. We may think about how much weight we can squat or the maximum amount of weight we can put overhead. In a yoga asana sense, we might think of how long we can hold a pose until our muscles fatigue or how well we can do chaturanga dandasana or bakasana (or any arm balance). While physical, or outer strength is highly important it’s also important that we work on and grow our inner strength. Seeing as inner strength isn’t tangible, sometimes it’s quite easy to overlook this force within ourselves.

Our inner strength encompasses a wide variety of mental and emotional aspects, including how we view ourselves, our mindset, our self-esteem, resiliency, adaptability, vulnerability, etc. Our physical strength helps us get into a good physical state so that we can work on the deeper layers of our being. It is ultimately these deeper layers that can lead to everlasting contentment, joy, and satisfaction. It’s also our inner strength that can carry us through more physical challenges which increases our capacity for inner strength and so on and so forth. It’s a cycle that doesn’t have to end!

“You have power over your mind―not outside events. Realize this, and you will find strength.” – Marcus Aurelius

Let’s explore some warmup poses for our peak pose, lotus.

Happy Baby (Ananda Balasana)

Girl in happy baby pose on a yoga mat

  1. From a supine (on your back) position, draw your knees in towards your arm pits.
  2. Start by holding your shins and folding your legs so that your lower leg is connected to your upper leg like you’re in child’s pose on your back.
  3. Progress by taking the soles of the feet up towards the ceiling.
  4. Thread your arms along the inner leg and bring your hands to cross the front of the ankle to grab the outer edges of your feet.
  5. Use your breath to continuously guide the knees towards the armpits while you press your sacrum towards the floor.

Pigeon (Kapotasana)

Girl in pigeon pose on a yoga mat

  1. From downward facing dog, extend the right leg up for a 3-leg downward facing dog.
  2. Open your hips so both hip points face the right side of the room and fold your leg in half so that your lower leg connects to your upper leg. KEEP THIS FOLDED LEG.
  3. Bring your folded leg forward so the knee comes towards your nose. Keep the folded leg. Yes, this might be challenging.
  4. Externally rotate your right hip so that your right knee tracks towards the right side of the mat and your right foot tracks towards the left side of your mat. Note: this is a movement of your hip, the knee remains in the same position due to the folded leg.
  5. Place the folded leg down and slide your hips back (only a little) so that your pelvis can settle to the ground behind your foot.
  6. Check that your navel is aiming forward as opposed to the left side wall. If you notice your off center, place a blanket beneath your right hip. Then fold forward.
  7. Exit carefully into downward facing dog and repeat on the left side.

Tree (Vrikshasana)

Girl in tree pose on a yoga mat

  1. Stand in tadasana.
  2. Lift your right leg up so that your thigh is parallel to the ground.
  3. Bring your hands to the front of your shin and walk your hands down towards your ankle to fold your leg.
  4. With the assistance of your right hand, externally rotate the right hip and guide your foot to connect with the inner left thigh.
  5. Do your best to maintain the folded leg shape as you extend the arms to the ceiling.
  6. To exit, bring your right knee forward, remove the foot from your leg, lower the foot and repeat on the other side.

Peak Pose: Lotus (Padmasana)

Girl in lotus pose on a yoga mat

There are many poses (practically all of them) that in some way assist in enlivening your inner strength. However, when I think of how to truly build up your fortress of self-love, awareness, resiliency, courage, etc., I think of lotus because this is the pose which is traditionally meant for one’s meditation practice. Really, the entire asana practice is geared to allow one to find an “easy seat” so that meditation can be achieved. That’s not to downplay the importance of our flowing, vinyasa class at all, but the magic really does lie in one’s ability to sit still and quietly.

Other options: Sukhasana or Siddhasana

  1. Lie on your back with your knees bent and soles of the feet flat on the floor.
  2. Bring your right knee in towards your chest and immediately walk your hands down the shin to fold your leg.
  3. Externally rotate the right hip and place your right foot into the left hip crease. Note: keep the folded leg.
  4. Bring your left knee in towards your chest, like a figure 4 stretch on your back. Fold your left leg as you did the right leg.
  5. Roll to your back and then to your right hand side and use the assistance of gravity to externally rotate your left hip to bring your left foot towards your right knee. Note: being on your back will allow the postural muscles to relax and then you can really focus on the positioning of the legs.
  6. Using your hands, gently guide your left foot around the right knee and towards the inner right groin. Do your best to create as little movement around the left knee as possible.
  7. Once your legs are locked into place, gently press yourself up to a tall seated position. If you need support beneath your pelvis, it would be best to ensure those things are nearby before you get into this pose.
  8. To exit, reverse the steps and focus on moving gently first from your hips and then towards your knees to straighten your legs and repeat on the other side.

5 Tips for Safe Alignment

By Yoga Asana

Refine your Alignment in your Yoga Practice

Joe and Alex walk us through helpful tips on how to align your body properly without straining your body. These tips will not only help you with your own yoga practice, but can also be fundamental guidelines when it comes time to lead your own class.

1. Start from the foundation

This is incredibly important as a teacher. When asking, “how can I help this student?” you must first look at their foundation.

For example, in Warrior I, many students will struggle getting that back heel to the ground. How can we modify the foundation so they feel secure? We can do this in one of two ways, or both:

  • Reduce the stance a bit
  • Take the stance wider (from side to side)

2. Stabilize your pelvis to help with balance

When you’re standing on two legs, you have support. However, when you’re standing on one leg, like in tree pose, the tendency is the side where there isn’t as much support (the side where the leg is lifted) will sink down.

The gluteus medius (muscles located in the sides of the hips) muscles stabilize the pelvis when you stand on one leg. Knowing the anatomy of those muscles can help you to stabilize students. Two ways to offer help with stabilizing the pelvis when in tree pose are:

  • Engage the right outer hip
  • Press the foot of the lifted leg into the opposite leg to create stability

3. Distribute the pose through as many joints as possible

For example, in triangle pose, one of the things we must be able to do is rotate the ribcage and head to be able to look up towards the top hand. We want to distribute the action of the pose through more parts of the body

Many students will turn their chest towards the floor and if they can’t rotate their thoracic spine, the only place they’ll be able to rotate is in their neck. They’re not finding the turn lower down in the body. When they learn to rotate from as many joints as possible, there is less strain on the neck when gazing up at the hand that’s lifted.

4. Let go of the idea, “the deeper the pose, the better”

Oftentimes, we have this idea that yoga is about building more flexibility but that doesn’t mean that the point of the pose is to get as deeply into the pose as possible.

The sacrum has effect on the spine because it’s part of it. When not engaging the sacrum, the back tends to be rounded, but if we distribute the action through as many parts of the body as possible, we can create more space eliminating that strain.

Pro tip: Blocks are always a great assist to help the stretch of the body!

5. Muscles need to be able to relax + contract to work effectively

A muscle that we keep contracted all the time isn’t a muscle that can do its job properly. For example, going from plank to downward facing dog. Downward facing dog distributes the weight of the pelvis, so the stomach is able to relax and the student can breathe more easily when the abdominal muscles aren’t engaged/contracted.

Related courses:


Practicing alignment safely can greatly enhance your yoga practice.

Man on a mat doing crow pose

Weekly Class Theme: Detox

By Yoga Asana

This week in class, we’re focusing on twists. With twists comes detoxification. As we work towards our peak pose of side crow, let’s explore how twists and detoxification actually work together.

“To keep the body in good health is a duty… otherwise we shall not be able to keep our mind strong and clear.”– Buddha

The body naturally detoxifies itself through the process of deep breathing. When we breathe deeply, it fills our bodies with oxygen, helping our cells to move freely. Pranayama practice is a great way to naturally detoxify the body because it boosts oxygen intake, bringing circulation to our cells and organs. It also stimulates our lymphatic system, which aids in elimination of toxins. Yoga and pranayama, along with a healthy diet and good water intake, can reverse the effects of daily stressors by increasing our immunity, circulation, and oxygen levels.

Chair Pose (Utkatasana)

Man on a yoga mat doing chair pose

How to:

  1. From Mountain, bring your feet and thighs together.
  2. Bend the knees, sit back on the hips – trying to bring your thighs parallel to the mat. 
  3. The knees maybe slightly over your ankles but should not go over your toes to protect from knee injury. If your knees do go over the toes, gently sit back on your hips to adjust.
  4. Lift your arms to the sky so that your palms face each other. To advance the pose, bring your palms to touch overhead. Students can also keep their hands in prayer at heart center or bring arms directly in front of them so that they are parallel to the mat. 
  5. Draw your shoulders down away from the ears and keep the chest open.
  6. Bring most of your body weight on your heels so that you can comfortably lift your toes off the mat.
  7. Draw your abs into the spine and lengthen down the tailbone.
  8. Hold for several breaths before releasing and coming back into Mountain pose.

Revolved Extended Side Angle (Parivrtta Parsvakonasana)

Man on a yoga mat doing revolved extended side angle

How to:

  1. Start in high lunge.
  2. Bend forward, lifting your heart. 
  3. Take your hands up and over to the right side of your body, leaning into your right leg.
  4. Twist your body so that your left elbow rests gently on your right knee.
  5. Draw your shoulders down away from the ears and keep the chest open.
  6. Continue to breathe as you deepen your twist.
  7. Lift your chest.
  8. Hold for several breaths before releasing and coming back into high lunge.

Crow Pose (Kakasana)

Man on a mat doing crow pose

How to:

  1. From Mountain pose, come into a squat with your knees slightly wider than the torso. Allow your palms to come flat onto the mat with your fingers spread wide. Palms should be about shoulder-width apart.
  2. Bring your feet closer together.
  3. Begin to slightly rock the torso forward. Press the knees into the backs of your arms (slightly above the elbow on the triceps).
  4. Engage your core. Slowly lean forward as you lift your feet off of the ground.
  5. Round the back slightly.
  6. Keep the elbows and wrists in line to avoid elbows splaying out.
  7. Press the knees and shins tightly into your triceps.
  8. Keep your gaze forward towards the mat.
  9. Hold for several breaths.

Peak Pose: Side Crow (Parsva Bakasana)

Man in side crow on a yoga mat

How to:

  1. Start in a squatting position.
  2. Press your palms firmly into the mat.
  3. Bend your arms so they create a place for your hips and legs to balance on.
  4. Lean forward, keeping your head lifted.
  5. Rest your hips on one of your arm shelves and your knees on the opposite arm.
  6. Find a place of balance while you breathe.
  7. Lift your legs off of the floor, making them face one side of the room.
  8. Hold for a breath and when it comes time to release, make your arms straight again, lowering your feet to the floor.

Yoga Anatomy Teacher: Joe Miller

By Yoga Teacher Training

Who is the man on the mat?

If you live in the NYC area, you may have first seen Joe leading classes at New York City’s OM Center, where he completed his yoga teacher training. Since then, you may have also seen Joe teaching at Now Yoga and Sacred Sounds Yoga in NYC. Aside from teaching yoga, Joe also attended Columbia University where he obtained his masters in applied physiology.

Nowadays, Joe is putting his expertise of anatomy and physiology to use in a completely virtual class for us in our Yoga Anatomy Course. Established on the basic principles of anatomy and how it pertains to yoga, this course will give yoga teachers and practitioners a deeper understanding of the human body and healthy movement.

Get your free ‘Anatomy of Sun Salutations’ guide

We love providing our students with as many resources as possible. That being said, we created this downloadable PDF guide on the anatomy of sun salutations. Signing up will not only grant you access to this guide, but you’ll receive tons of free content in the future, including yoga sequencing tips, class videos and other educational online yoga teacher training resources.

[convertkit form=3418904]

Related courses:

Man in half moon bow pose using one block for the arm reaching to the floor

Weekly Class Theme: Moksha

By Yoga Teacher Training, Yoga Teachers

Moksha, in English, represents liberation and freedom; the salvation of a soul from the cycle of life and death. Even though we’re practicing binds, we can still cultivate an energy of freedom in our breath and bodies.

“The cause of bandha and moksha (bondage and liberation) is our own minds. If we think we are bound, we are bound. If we think we are liberated, we are liberated. . . . It is only when we transcend the mind that we are free from all these troubles.” ― Sri S. Satchidananda, The Yoga Sutras of Pantanjali

When we think of what it means to apply liberation to our practice, often times we turn to poses that crack us open and spread our bodies open wide. Opening up your heart, body and mind is the ultimate freedom, and Ardha Chandra Chapasana embodies that freedom.

Let’s move into three warmup poses for Ardha Chandra Chapasana, or Half Moon (Sugarcane) Bow Pose.

Crescent Lunge (Ashta Chandrasana)

Man on a yoga mat in crescent lunge with two blocks

How to:

1. Starting in a tabletop position, plant your right foot forward in between your hands.
2. Align your right knee over the ankle. Students who are not as flexible or beginners may have their front knee slightly behind their ankle. This is okay as long as their front knee doesn’t go over the toes or ankles to protect the knee from injury.
3. Inhale and bring your hands to the top of your right thigh. Opt to bring your hands to heart center in a prayer position at your chest. Another option is to sweep your arms overhead and draw the shoulders away from the ears.
4. Keep your palms facing each other or together to touch.
5. Tuck your tailbone down towards the mat and allow your gaze to come either in front of you or if hands are overhead, towards the fingertips.
6. As you inhale, lengthen up through your crown and as you exhale, deepen the stretch.

Lizard with Quad Opener (Utthan Pristhasana)

Man in lizard with quad opener on yoga mat

How to:

1. Begin in Plank pose. Step your right foot outside of your right hand.
2. Align your front knee with your front ankle.
3. Place your left knee down on the floor.
4. Bring both of your hands on the inside of your right foot and begin to move your right foot closer to the edge of the right side of your mat.
5. Engage and activate your core and back leg muscles to keep you balanced.
6. Grab your left foot with your right hand and gaze over your right shoulder.
7. Stay here for several breaths. Release out of the pose gently and switch sides.

Half Moon Pose (Ardha Chandrasana)

Man in half moon pose supported by one block

How to:

1. From a Standing Forward Fold, bring your fingertips about 8 – 12 inches away from your feet.
2. Gaze forward and begin to shift your weight into your right leg.
3. Begin to lift your left leg up back towards the sky behind you – bringing it parallel to the mat or higher depending on flexibility.
4. Keep a soft bend in your standing knee to avoid locking it.
5. Lift your left arm up towards the sky as you keep your shoulders stacked over each other.
6. Keep your top hip stacked over the bottom hip and open your torso up to the left side of your mat.
6. To advance the pose, bring your gaze up towards the top fingers. If this is too much, keep your gaze softly towards the ground about 2-3 feet away from your toes.
7. To come out of the pose, release your hand and foot back down towards the mat coming back into Standing Forward Fold.

Peak Pose: Half Moon (Sugarcane) Bow Pose (Ardha Chandra Chapasana)

Man in half moon bow pose using one block for the arm reaching to the floor

How to:

1. Starting in Half Moon, take your top hand, reach it to your back mat as if you were going to shake someone’s hand.
2. Bend the knee of your lifted leg, bringing your heel to your seat.
3. Grab hold of your foot with your top hand.
4. Inhale to firm your top shoulder down your back and open up your chest.

Anatomy of Sun Salutations

By Yoga Asana

Surya Namaskar means Sun Salutation

Surya = Sun
Namaskar = “to bow down to,” or “to honor”

Sun Salutations were traditionally meant as a way to honor the sun, the energizer of all life. These sequences were typically practiced during the early morning hours during prayer or worship.

In these modern times, sun salutations are still a viable way to honor the sun through the Yoga practice but it’s also used to create heat within the body. If you’ve ever taken a Hatha or Vinyasa Yoga class, you’ve probably completed some sun salutations!

Sun salutations serve to warm up + prepare the body, to unite the breath and body, and to move in a meditative state to ready oneself for practice.

Sun salutations are very common sequences for a yoga practice. Understanding the anatomy behind it can not only enhance your teaching if you’re a yoga teacher, but can also strengthen your own personal practice.

If you’ve ever been interested in anatomy from a yogic perspective, now may be the perfect time to explore that itch. We hope that you found this video helpful and for a deeper look inside yoga anatomy, take a peek at Joe’s course.

Related courses: Yoga Anatomy with Joe Miller


Looking for even more details on how you can bring this knowledge into your classes?

Check out the free guide we put together on the Anatomy of Sun Salutations. We’ve made it easy for you and broken down, step by step, the breath cues, Sanskrit names, and anatomical position of every major joint in the body for each pose in Surya Namaskar A!

Join our mailing list for incredible weekly content!

Hip Mobility: Joe Miller in a spinal twist lying down

7 Ways Learning Anatomy Can Enhance Your Yoga Practice

By Miscellaneous

Anatomy can seem intimidating as a yoga teacher, or even a yoga practitioner, but it doesn’t have to be. Let’s explore some of the common ways anatomy can enhance your yoga practice. While this article mainly focuses on yoga practice, other movement professionals, such as personal trainers, may find the info helpful.

1. A deeper understanding of the skeleton

Understanding how your skeleton works in yoga practice can help you keep your bones and connective tissues healthy. Most people know that the bones support the body and provide a framework for movement. However, many people may not be aware that bones are living tissues. They continually rebuild themselves throughout life in response to the stresses we put on them. This is why weight bearing exercise helps to strengthen bones.

The skeletal system doesn’t just include bones, though. Joints and the connective tissues that support them, including cartilage and ligaments, are also considered part of the skeletal system. Loading your joints through a full range of motion helps strengthen those tissues, which is why yoga practice can also help maintain healthy joints.

2. A deeper understanding of the muscles

Muscles provide the power to move the body. Yoga involves movements of all of the major joints of the body, meaning many muscles are activated during yoga practice. Researchers at the University of Miami studied how 14 muscle groups were activated during the Surya Namaskar A and B sequences. These muscles included upper body, mid body and lower body muscle groups, indicating how much of the body’s musculature is involved in these sequences.

Learning where the major muscles are located and how they work will help you understand which poses target particular muscles, and how to tailor a practice to strengthen or stretch those muscles. Plus, as a teacher, you’ll be better at sequencing and cuing your classes.

3. Why/How the spine supports all movement

The spine not only supports the trunk, shoulder girdle and head, it’s integral to almost every movement we make and it protects the spinal cord. Understanding the structure of the vertebrae and how it affects the way the spine moves will help you teach and practice poses from forward bends to backbends to twists with more confidence.

Joe Miller is our anatomy course instructor and he has an extensive background in anatomy along with a passion for yoga. Here is a series Joe developed to focus on the spine.

4. A newfound respect for your body

The human body is extraordinary! The more you learn about it, the more impressed you will be with how well it works and moves. And as a teacher, the more you can inspire your students to realize how unique and absolutely their mind-blowing bodies are, in all the shapes, sizes and frames that they come in, the more they will be empowered in their own practice.

5. Understanding how body parts work together

Nothing in the body works in isolation. The movement of one body part affects another, and then another, like links in a chain. As both a practitioner and teacher, understanding these chains of movement will help you see the “why” behind common alignment instructions and how to modify those cues for individuals.

6. The natural ways our bodies move

Yoga originated in the Eastern hemisphere and has been around for over 5,000 years. It is one of the oldest forms of physical movement, although it has transformed in many ways since its inception.

Yoga embodied many natural movements and incorporated them into a practice that also focuses on the spiritual aspect of our lives, transforming what ‘exercise’ means for people all over the world. One of the ways yoga differs from other forms of exercise is its emphasis on the importance of developing awareness, including body awareness. The clearer your image of the anatomy of your body and how it works and moves, the more accurate and subtle your awareness during your practice will be.

7. What yoga does to our bodies

Yoga incorporates both the body and mind, tied together through attention to the breath. Most of the time we breathe unconsciously, but we can also breathe with conscious awareness. The breath can serve as a way to indirectly affect unconscious aspects of the nervous system, and is a powerful tool to help us cope with stress with more flexibility and resilience.

In addition to a comprehensive overview of the skeletal and muscular systems, our yoga anatomy course covers the respiratory and nervous systems to help you better understand the links between the body, breath and mind. The course also features quizzes at the end of each lesson so you can test your knowledge.

Recommended Readings:

Yoga Anatomy – Leslie Kaminoff and Amy Matthews
Anatomy of Movement – Blandine Calais-Germain
The Body in Motion: Its Evolution and Design – Theodore Dimon

Recommended Courses:

Kate Lombardo in Pigeon Pose

Weekly Class Theme: Flexibility

By Yoga Asana, Yoga Teachers

This week’s class theme is Flexibility!

Flexibility is often one of the goals that people have for attending a yoga class, and as a theme it can help students understand how to increase flexibility in asanas and in life. By moving and stretching our bodies, we can increase blood circulation, reduce the risk of injuries, and improve balance. When flexibility is present in the mind and spirit, it allows us to be calmer, more centered, and less reactive to daily issues. As we move through life with a flexible attitude, small everyday obstacles don’t bother us as much. We can be resourceful and find creative solutions to anything that comes our way.

It has been said that physical ailments can often arise from blocked emotion. By stretching and stimulating our connective tissue and fascia, we can release old energy that’s holding us back. Stretching also helps to energize the body as it improves circulation and relaxes the mind.

“Notice that the stiffest tree is most easily cracked, while the bamboo or willow survives by bending with the wind.” – Bruce Lee

The peak pose is Eka Pada Rajakapotasana, or One Legged Pigeon Pose

Pigeon is a highly emotional pose as it allows us to stretch deep into our hips and open them up. Most of our daily stress resides in the hips. This pose is perfect for finding that flexibility to release a lot of stored emotion. Below are three poses that are appropriate for building up to One-Legged Pigeon.

Fire Log

Kate Lombardo in Fire Log pose

How to:

1. Find a seated position on your mat with legs spread apart.
2. Bring your right leg out in front of you, bending it to create just about a 90 degree angle.
3. Bring your left foot over your right knee, stacking your legs on top of one another.
4. Take a couple of breaths, finding more space in your hips as you ground down into your mat.
5. Bring your arms out beside you and press your fingertips into the floor.

Low Lunge

Lisa Bermudez in Low Lunge

How to:

1. Start in Downward Facing Dog.
2. Inhale and on the exhale, lift your right leg up and back.
3. Exhale and bring your right leg through your arms, placing your right foot in between your hands.
4. Drop your back (left) knee down onto the mat with the top of your foot facing down.
5. Make sure your right knee is over your right ankle.
6. Lift your torso and tuck your tailbone, drawing your navel to your spine.

Seated Leg Cradle

How to:

1. Find a seated position on your mat, cross-legged.
2. Lift your right leg, hooking your right arm under.
3. Continue to breathe and left your leg, using the support of your hands to deepen your stretch.
4. Repeat with the left leg lifted.

And finally… Pigeon Pose

How to:

1. Begin in Downward Facing Dog or a tabletop position.
2. Bring the right foot in and place it down on the mat behind the left wrist.
3. Adjust your shin so that it is comfortable for you. The more parallel your shin is to the front edge of the mat, the deeper the stretch will be. You can gently adjust your shin with your hands to make it more comfortable.
3. Extend the left leg back on the mat with the top of the left foot resting on the mat.
4. Come up onto your fingertips and walk the torso slightly up with the chest lifting and broadening.
5. Draw the shoulder blades down the back and lengthen the tailbone down to the mat.
6. Stay here or to deepen the pose, begin to fold towards the mat keeping the spine lengthened. Come onto your forearms or rest your head on your palms. To further deepen the stretch, bring the forehead all the way down to the mat and extend the arms out in front of you with palms facing down.
7. Take several breaths here. As you inhale, lengthen up through the spine and crown of the head and as you exhale, gently deepen into the stretch more.
8. To come out of the pose, gently walk the hands and chest back up. Lift the right leg up and back slowly coming back into Downward Facing Dog or move intuitively!