A diagram of the chakras

A Complete Overview of the Chakras

By Lifestyle & Wellness, Meditation, Yoga Asana

The chakra system is a system that’s discussed both in and out of yoga studios, amongst therapists, psychologists, doctors, nurses, bodyworkers, and anyone else with an interest in the process of their emotional and psychological development. You may also stumble upon chakra discussion in high schools, colleges, coffee shops, restaurants and bars. It’s definitely a topic that’s both accessible and incredibly scholarly.

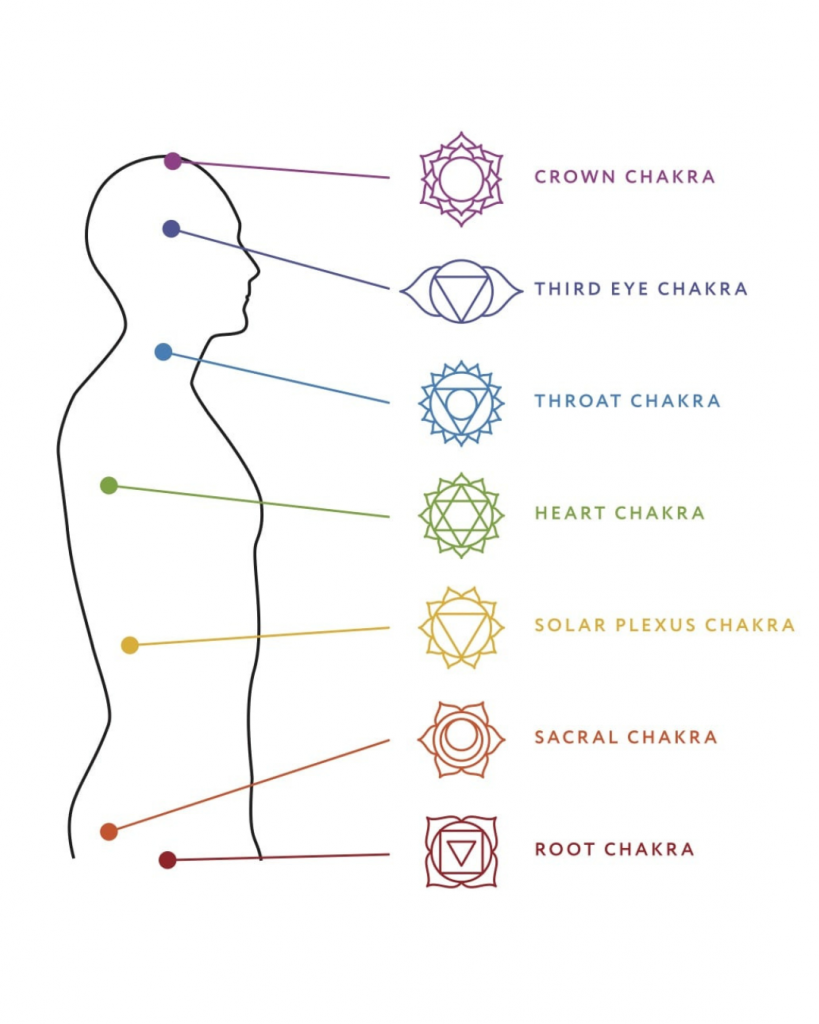
According to Anodea Judith, author of Eastern Body Western Mind, “The Chakra system is a seven-leveled philosophical model of the universe.” and “A chakra is a center of organization that receives, assimilates, and expresses life force energy.” As a human being existing here on planet earth, you have seven main chakras that are stacked like a column from the base of your spine to the crown of your head.

There are other minor chakras, but you’ll usually see books, classes, and workshops on the seven major ones. The chakra system is a beautiful system to study and use in your own yoga practice, meditation practice, or as a way to navigate your thought patterns, tendencies, places of excess, deficiencies, and a path to discovering better balance.

Table of Contents:

  1. What exactly are chakras and how is the word pronounced?
  2. What are the seven chakras?
  3. First chakra: Muladhara (Root)
  4. Second chakra: Svadhisthana (Sacral)
  5. Third chakra: Manipura (Solar Plexus)
  6. Fourth chakra: Anahata (Heart)
  7. Fifth chakra: Vishuddha (Throat)
  8. Sixth chakra: Ajna (Third Eye)
  9. Seventh chakra: Sahasrara (Crown)
  10. How do I incorporate the chakras into my practice or my classes?

1. What exactly are chakras and how is the word pronounced?

Your body is full of energy and has many centers and pathways that hold or move that energy. All of these function from the three main areas that are known as nadis.

Three specific energy channels (of the nadis) in your body are:

  • Ida (left)
  • Pingala (right)
  • Sushumna (center)

Sushumna is an energy channel in line with your spine while ida and pingala meet at the base of your spine, separate, meet again, separate, meet again, and so on. The meeting points of ida and pingala are where your chakras are located. A chakra may be understood as an energetic center that’s possibly spinning like a wheel.

The pronunciation of the word “chakra”

You can pronounce the “ch” in “chakra” like the “ch” sound in the word “patch” or “chocolate.” It’s often mispronounced like the sound the “sh” makes in “shoe.”

2. What are the seven chakras?

The first chakra begins to develop while you’re still in the womb and then the next six chakras develop as you grow up and move through your life. Once a chakra is developed, it doesn’t mean it’s perfected. As you grow and learn, your chakras will also come in and out of balance along with your life experiences. Balancing the chakras is an ongoing process and even once you feel balanced, you may come out of balance again. It’s kind of like how one day you can come into tree pose effortlessly and then on another day, you constantly fall out of it.

Each chakra is associated with a color, a location, and also physical and emotional ways to spot imbalances.

3. First chakra: Muladhara (Root)

The first chakra is called Muladhara, or The Root Chakra. It develops from the time you’re in the womb through about twelve months old. This is the chakra responsible for trust, grounding, feeling at home, and security. Its color is red and it’s located at the base of your spine.

When in balance:  Good health, a sense of being grounded, healthy boundaries, and an ability to feel safe

When out of balance: Issues with boundaries, emotional eating, weight changes, and overall feelings of sluggishness

Healing practices to balance the first chakra:

  1. Receiving massages and other bodywork
  2. Grounding yoga asana
  3. Using essential oils such as: clove, copaiba, and cedarwood into your life

4. Second chakra: Svadhisthana (Sacral)

The second chakra is called Svadhisthana, or The Sacral Chakra. It develops from about six months to two years old. This is the chakra responsible for movement, sensation, emotion, pleasure, and needs. Its color is orange and it’s located at the lower abdominals.

When in balance: Healthy relationship to experiencing pleasure, the ability to adapt to changes, strong boundaries, a visible grace as you move

When out of balance: Pleasure addiction or a fear of pleasure, poor boundaries, obsessive attachment, an inability to feel

Healing practices to balance the second chakra:

  1. Working on boundaries
  2. Therapies that support healthy pleasure alignment or emotional release
  3. Using essential oils such as: cypress, clary sage, and cinnamon

5. Third chakra: Manipura (Solar Plexus)

The third chakra is called Manipura, or Solar Plexus. It develops from about eighteen months to four years old. This is the chakra responsible for power, energy, and self esteem. Its color is yellow and it’s located at the solar plexus.

When in balance: An ability to be a strong leader, confidence, healthy self esteem, and a sense of playfulness

When out of balance: Shaming behavior, physical abuse, or controlling behavior

Healing practices to balance the third chakra:

  1. Taking risks
  2. Incorporating a more vigorous yoga practice
  3. Using essential oils such as: blue tansy, rosemary, and lemon

6. Fourth chakra: Anahata (Heart)

The fourth chakra is called Anahata, or Heart Chakra. It develops from about four to seven years old. This is the chakra responsible for love, relationships, the ability to take things in and also the ability to reach out. Its color is green and it’s located at the center of the chest.

When in balance: Sense of compassion, lots of self love, good immunity, and an overall peaceful presence

When out of balance: Jealousy, fear of intimacy, loneliness, and lack of empathy

Healing practices to balance the fourth chakra:

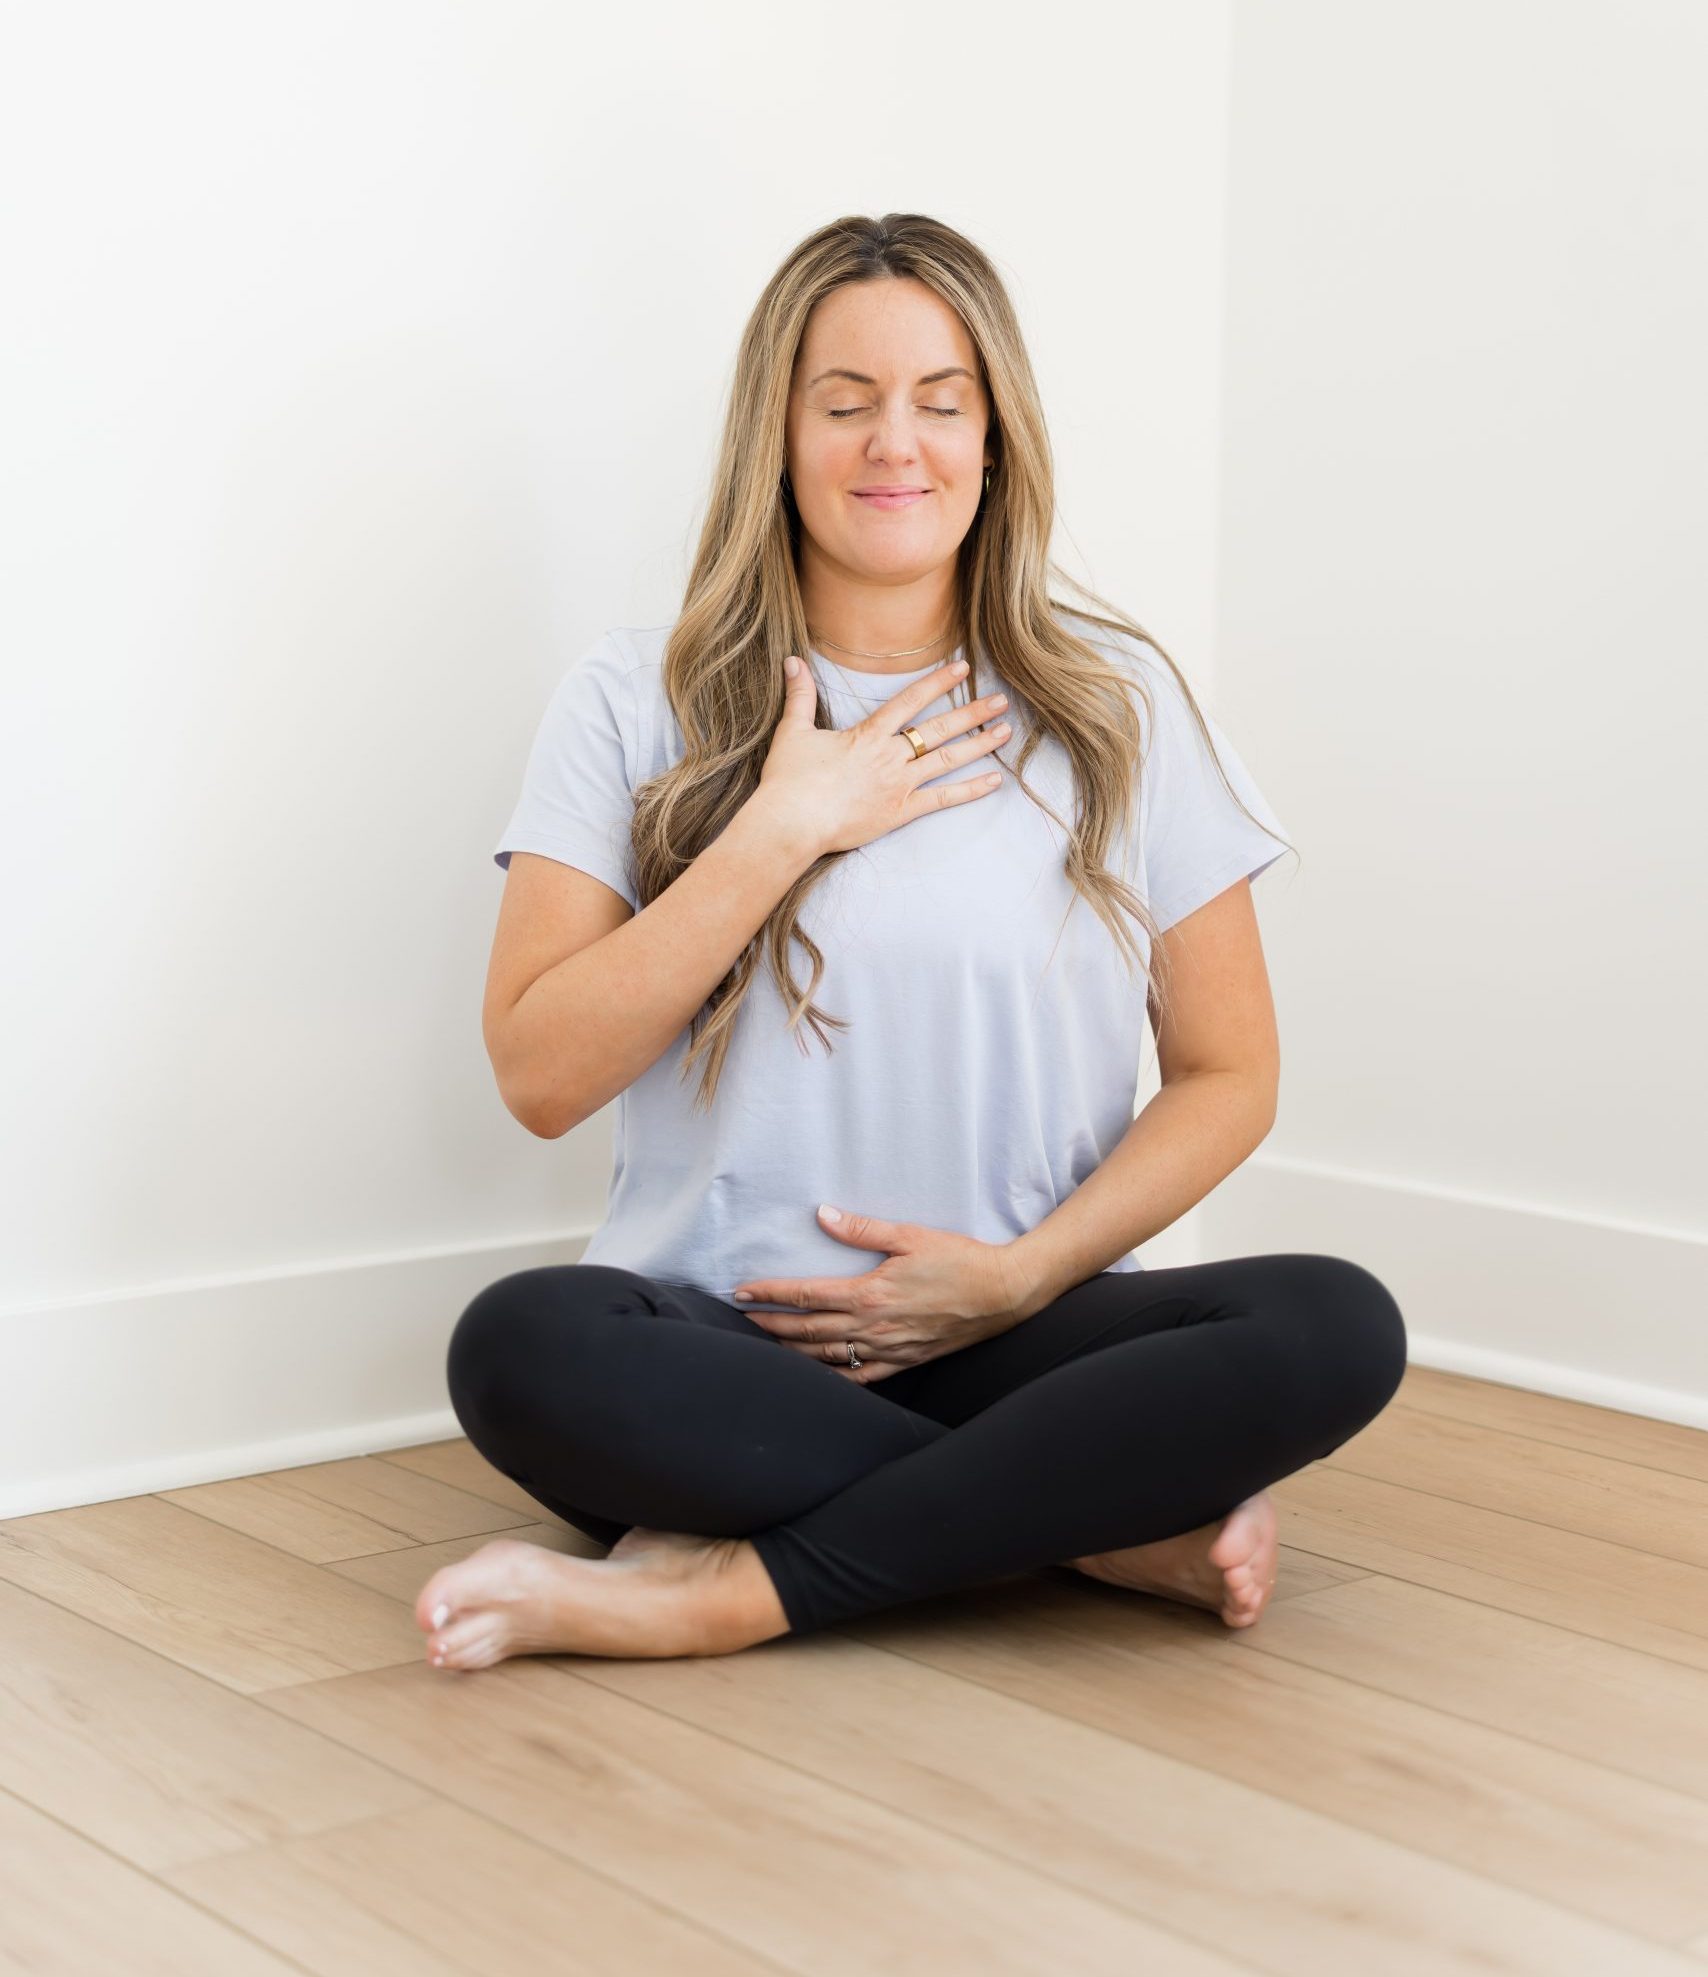
  1. Breathwork (pranayama)
  2. Journaling
  3. Looking into existing assumptions about relationships
  4. Using essential oils such as: rose, ylang ylang, and peppermint

7. Fifth chakra: Vishuddha (Throat)

The fifth chakra is called Vishuddha, or Throat Chakra. It develops from about seven to twelve years old. This is the chakra responsible for communication, the ability to listen, and finding your voice. Its color is blue and it’s located at the throat.

When in balance: Clarity through self expression, the ability to speak with a purpose, and embodying the qualities of a good listener

When out of balance: Fear of talking or a tendency to talk incessantly, gossiping, and difficulty expressing emotional verbally

Healing practices to balance the fifth chakra include:

  1. Bodywork on the neck and shoulders
  2. Singing
  3. Chanting
  4. Telling stories
  5. Using essential oils such as: birch and lavender

8. Sixth chakra: Ajna (Third Eye)

The fifth chakra is called Ajna. It develops during adolescence. This is the chakra responsible for intuition, dreaming, and imagination. Its color is indigo and it’s located at the third eye.

When in balance: Good dream recall, strong intuition, and good perception

When out of balance: Nightmares, poor memory, difficulty envisioning the future, obsessions, and insensitivity

Healing practices to balance the sixth chakra include:

  1. Meditation
  2. Creative visual art
  3. Guided visualization
  4. Using essential oils such as: rosemary, clary sage, and lemongrass

9. Seventh chakra: Sahasrara (Crown)

The fifth chakra is called Sahasrara. It develops during early adulthood and beyond. This is the chakra responsible for belief systems, understanding, and connection to the divine. Its color is violet and it’s located at the crown of the head.

When in balance: General awareness, compassion, a feeling of being spiritually connected, and open-minded

When out of balance: Signs of confusion, over-intellectualization, learning difficulties, greed, and disassociation from the body

Healing practices to balance the seventh chakra include:

  1. Discipline in a spiritual practice like committing to prayers or japa
  2. Understanding your physical and emotional connection
  3. Using essential oils such as: frankincense, sandalwood, and roman chamomile
The chakras on an image of a woman
1
Root Chakra (Muladhara)
2
Sacral Chakra (Svadhishthana)
3
Solar Plexus Chakra (Manipura)
4
Heart Chakra (Anahata)
5
Throat Chakra (Vishuddha)
6
Third Eye Chakra (Ajna)
7
Crown Chakra (Sahasrara)

10. How do I incorporate the chakras into my yoga practice/classes?

The chakra system can be incorporated into yoga classes for kids, adults, and also used in your own offerings to individual clients. The chakras make great class themes, projects, and also meditation topics. You may also choose one chakra a week and try to incorporate some of the balancing practices into your self care while also noticing when the qualities of that chakra show up.

If you enjoy working with essential oils, you can also incorporate the essential oils associated with each chakra into your daily routine by adding them to your diffuser or into your body oils and lotions.

There are tons of yoga classes that may even have physical chakra themes like focusing on the heart chakra during a class that’s focused on back bends!

Learn more through our online courses:

SOURCES:

Eastern Body, Western Mind by Anodea Judith

Bridge Pose

Weekly Class Theme: Throat Chakra

By Yoga Teachers

We officially enter into the more ✨ ethereal ✨ realms of the chakra system. As mentioned in previous posts, there are 7 total chakras. The first 3 (Root, Sacral, Solar Plexus) are considered the earthly chakras while the last 3 (Throat, Third-eye, Crown) are considered the ethereal/airy chakras with the middle chakra, or the heart chakra, being the bridge to tie them together.

Our fifth chakra is our throat chakra, or Vissudha chakra. Once we’ve left fourth chakra, our heart, we are now asked to take what is within the heart center and express it to the world.

The main concerns of fifth chakra are:

  • Voice
  • Vibrations
  • Communication
  • Truth and lies
  • Creativity

Symbols in the form of words, images, and thoughts are also a major component of fifth chakra.

Everything vibrates with a particular frequency which can be intentionally affected. Have you ever felt like you’re on the same wavelength as another person? Or have you ever experienced something that you referred to as a coincidence? This type of synchronization, or being in resonance with another or the universe, is the work of fifth chakra. We tend to resonate most profoundly when we ourselves are in alignment and when we are living in full expression.

A solid foundation, understanding of one’s emotions, a sense of self, balance, and intimacy are all required in order to freely express oneself creatively and effectively. And once this happens, we start to prepare to not only express ourselves but to really trust ourselves which is the work of fifth chakra.

Supporting Pose #1: Supported Fish (Matsyasana)

Supported Fish

Firming the upper back in is important for bridge pose. It’s important to remember that our upper back should have movement so that there is not too much pressure on the lower spine.

How to:

  1. Set up your blocks with one block on the horizontal medium height and the next block on the vertical high height.
  2. Lie down so that the horizontal block is going across the upper/mid back (around where a bra strap would fall) and the skull resting on the vertical block. The head should be in a more or less neutral position with the chin slightly tucked.
  3. Reach the legs long towards the front of the mat and stay for ~2 minutes.

Supporting Pose #2: Crescent Lunge with Clasped Hands (Anjaneyasana)

Crescent Lunge with Hands Clasped Behind Back

Crescent lunge is an appropriate pose for backbend prep as it helps to open the front of the hip. Hands clasped behind the back is an appropriate variation as the hands are behind the back in the peak pose.

How to:

  1. From low lunge with the right leg forward, place the back knee to the ground.
  2. Press the sacrum forward and roll to the top of the left kneecap.
  3. Reach the arms behind the lower back and clasp your hands.
  4. Press your knuckles down and back to firm the upper back in and lift the chest.

Supporting Pose #3: Half Moon Bow Pose (Ardha Chandrasana Chapasana)

Half Moon Bow Pose

Half moon can teach the practitioner to open the front body by pressing the sacrum forward. The bow pose variation is perfect as it teaches all necessary elements of a backbend with the arm behind the back.

How to:

  1. From triangle pose with the right leg forward, go forward to take the weight of the body onto the right leg and stretch the chest forward.
  2. Straighten both legs so that the standing leg is straight and the top leg is straight and aiming towards the back of the room.
  3. Take the bottom hand to the ground or to a block. I like using a block because it helps me to take the chest forward as opposed to down towards the floor.
  4. Reach the top left arm behind the lower back and simultaneously bend the left knee to catch the left foot with the left hand.
  5. Kick the left foot into the hand, firm the left shoulder blade in, and press the sacrum forward to come into the backbend.

Peak Pose: Bridge Pose (Setu Bandhasana)

Bridge Pose

Bridge pose is a wonderful pose to tend to fifth chakra. The compressing of the throat area almost massages the area bringing fluid to the throat to lubricate the muscles and surrounding tissues in order to support healthy expression.

How to:

  1. Lie on your back with the knees bent and soles of the feet flat on the ground.
  2. Press the backs of the shoulders into the ground to widen your collarbones. It might help/feel good to bend your elbows at 90 degrees to press the backs of the arms/backs of the shoulders into the ground.
  3. On an inhale, lift your pelvis off the ground. Try to keep your toes moving directly forward.
  4. Straighten your arms along the floor and then walk your shoulder blades together on the back. You can interlace your hands along the ground under your lower back if that feels okay for you.
  5. Ensure the only places touching the floor are your feet, shoulders and arms, and back of the skull. *The neck should not be flat to the ground. The natural curve of the cervical spine should be present.
Patrick from YogaRenew looking up yoga classes online

Can ChatGPT Sequence a Vinyasa Class?

By Yoga Asana

If you aren’t aware – ChatGPT is a piece of artificial intelligence that has been getting a ton of buzz lately. Students have been using it to do their homework, or write essays for school. It has been able to pass university level exams, and complete some pretty neat tasks.

But when it comes to sequencing a 60-minute vinyasa class, there’s still a lot to be desired. Lets take a look at what it did well, and what it didn’t do so well….

What did ChatGPT do well?

The sequence itself was organized in a pretty typical format. It starts off with a seated meditation and then goes into a cat/cow movements… Your pretty typical start to a class – so far, so good!

From there, it starts to move into some Sun Salutations to build a little heat and rhythm. Downward facing dog, low lunge and upward facing dog…. Still looking okay, a pretty standard vanilla looking class but not that bad for a computer!

Next up, we start to move through some standing poses before it gets into seated poses. Warrior 1, Warrior 2, Triangle Pose and Extended Side Angle… Again – structurally it looks okay…

After the standing poses, we go into seated forward folds…. Specifically we see Pigeon pose, then a seated forward fold.

From there we go into some spinal twists. First a seated spinal twist and then a reclined spinal twist. Probably wouldn’t want to do those two poses back to back, but overall the sequence has been okay so far.

It closes a final relaxation in savasana and then a seated meditation.

Here’s what the full sequence looks like in order:

  1. Seated Meditation
  2. Cat/Cow
  3. Downward Facing Dog
  4. Low Lunge
  5. Upward Facing Dog
  6. Warrior 1
  7. Warrior 2
  8. Triangle Pose
  9. Extended Side Angle
  10. Pigeon Pose
  11. Seated Forward Fold
  12. Seated Spinal Twist
  13. Reclined Spinal Twist
  14. Savasana
  15. Seated Meditation

It was definitely a little better than we thought it would’ve been but there are some glaring issues here as well.

What did ChatGPT do “not-so-well”?

ChatGPT was able to put together a fairly good outline for a Vinyasa sequence, but it was really just a good starting point. There are some pretty big gaps in the sequence’s structure and organization so lets take a look at some of those…

First and foremost, there’s a disclaimer within the sequence that mentions the importance of using this sequence alongside a yoga teacher who’s qualified to deliver the class in a safe and effective way. This really highlights the importance of having the human touch in class.

The sequence doesn’t provide any guidance on modifications or how to accommodate injuries. It also doesn’t provide any guidance or cues on how to move between poses safely.

In terms of structure, it isn’t really practical to make it through a 60 minute Vinyasa yoga class with 15 poses. ChatGPT asks us to stay in each pose for 5 minutes – can you imagine?! Staying in Triangle pose for 5 minutes? Yin or Restorative classes will stay in postures for a long time to get deep into Connective Tissue, or activate restorative processes in the body however these postures are done on the floor with little to no muscle involvement.

In a Vinyasa class, we match the movement to the breath. One movement: one breath. One movement: one breath. Each breath brings a new movement, so holding a posture for 5 minutes is definitely not something we’ll be looking to incorporate into our classes anytime soon.

What can we takeaway from this?

ChatGPT is a pretty neat piece of technology, but it still has a lot to learn when it comes to building a 60 minute Vinyasa yoga sequence. Lacking the human element, we don’t get any insight or guidance on transitions, how to accommodate injuries, any information on modifications. Structurally, it isn’t realistic to hold these poses for 5 minutes or to have 15 poses in a 60 minute Vinyasa class. These are some of the reasons you shouldn’t use ChatGPT to sequence your vinyasa classes.

Looks like a point for the humans today!

Humans: 1

Machines: 0

Yoga bolster resting on two blocks on top of a yoga mat

A Beginner’s Guide To Yoga Props: 4 Essential Yoga Props

By Yoga Asana, Yoga Teacher Training

What props do I need for yoga?

While props aren’t necessary for a yoga practice, they do come in handy. Props can be used for additional support, steadier balance and even a deeper stretch when settling into yoga poses. The type of props you will need also vary depending on the type of yoga class it is. For example, a restorative practice is probably going to use more blankets and bolsters, whereas a vinyasa flow may be reliant on blocks and straps. The utilization of props isn’t dependent on ability but rather the purpose of the pose. People in very advanced yoga classes will often use blocks when they feel they need added support to perfect their alignment in a pose, or use straps to provide a wider opening of parts of the body that may not be as flexible.

1. Blocks

Yoga Blocks

women using wooden block as help with her yoga practice pose
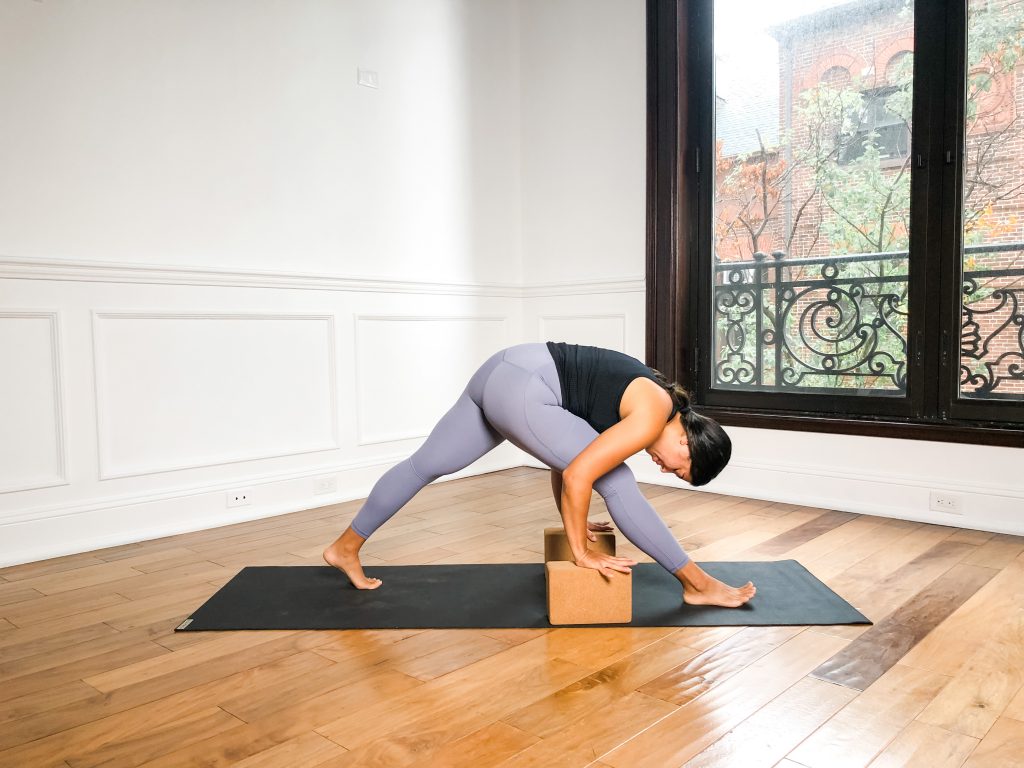
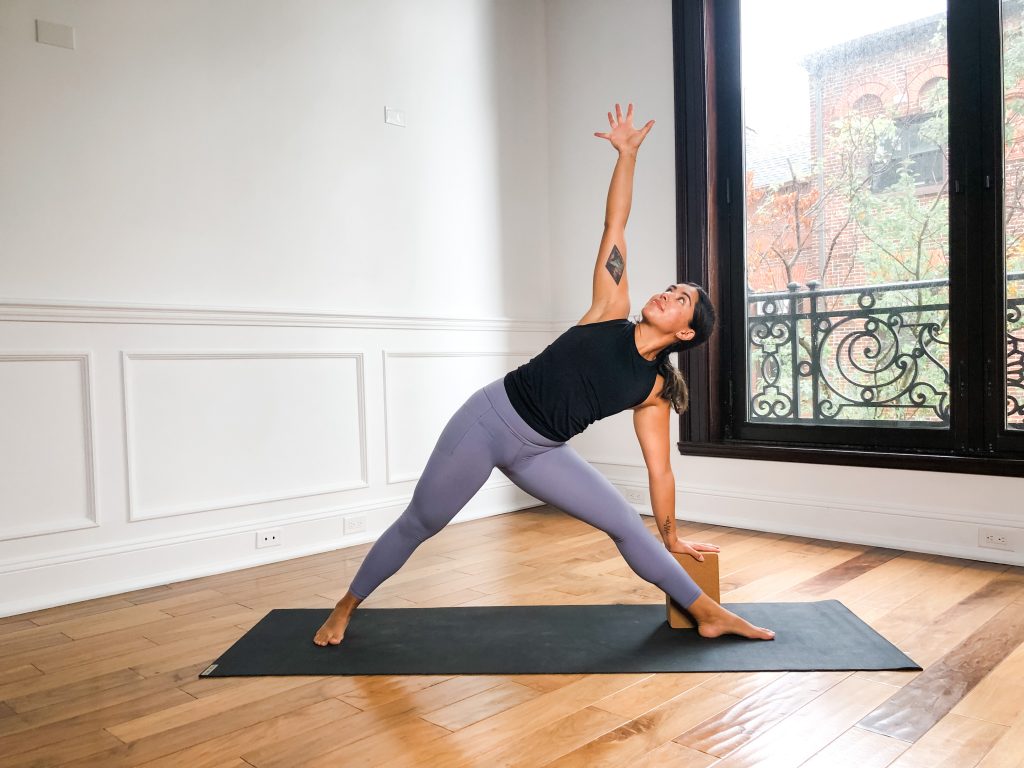
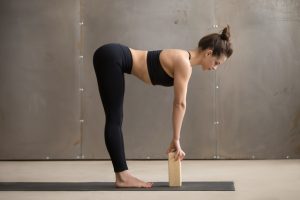
B.K.S. Iyengar first introduced yoga blocks into his practice to better assist himself and his students’ alignment in the asanas. Iyengar would use wooden blocks, but over the years other materials have taken the place of wood. Blocks have since then been heavily incorporated into almost every style of yoga. They also come in different dimensions, with the most common being 4 x 6 x 9 inches. They have different weights as well, with the standard being around 12-13 ounces. 

Common materials of yoga blocks: 

  • Cork
  • Foam
  • Wood

When to use blocks:

Any pose that makes you wish the floor would come to meet you halfway is a good pose to use a block. For example, in Triangle pose, place a block on the outside of your front leg and rest your bottom hand on the block. Try starting with the block at its tallest, then in time work on getting it to the middle, or lowest height before being able to reach the floor with your bottom hand. You can also use blocks to help with balance, such as placing a block under one or both hands for support in Warrior III if you are unable to balance with your arms outstretched in front of you.

You can also use blocks as support under the back or legs. For example, under the sacrum in Bridge Pose, or under each leg in Cobbler’s Pose. Adding extra support allows the muscles to relax into the pose more easily.

A few more of the many options for using blocks include:

  • Placing blocks under both hands in Camel Pose or Wide-Angle Forward Fold
  • Use the lowest height under both hands in Upward Facing Dog to take strain off the wrists
  • Use as a foot stand for balance in Eagle Pose, or place under your seat in Pigeon Pose.

A yoga block is probably the most versatile of all the yoga props, so it’s usually wise to purchase them first.

2. Pillows/Bolsters

Pillows/Bolsters

women laying on ground with pillow doing yoga poses
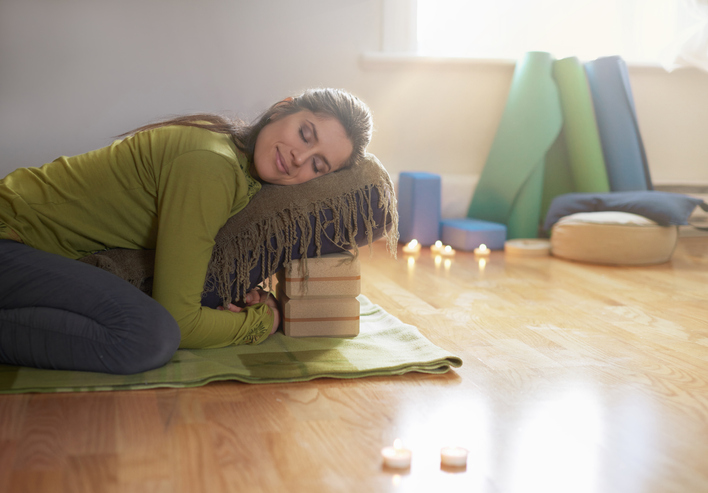
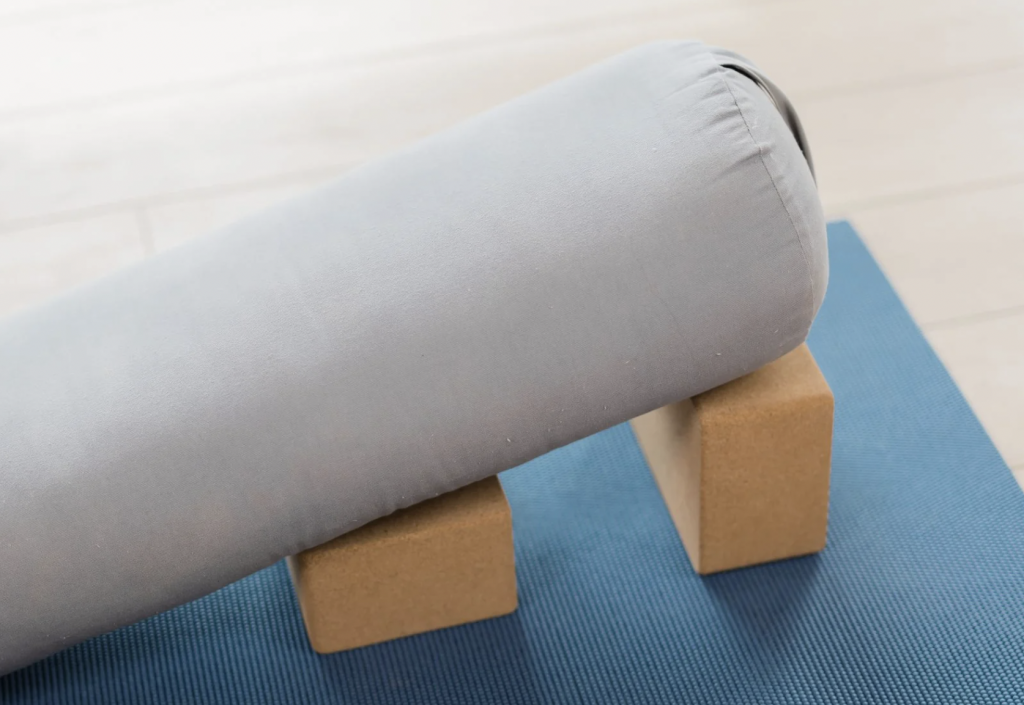
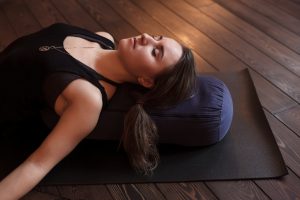
Pillows and bolsters are a great way to find comfort when you need a soft, cushiony space for yourself in a pose. Bolsters are ideal for restorative and yin poses, as they add the extra support often needed in deep, restful poses. Pillows are a great addition for teachers and students to sit on when a block is just a bit too hard or rough.

When to use pillows and bolsters:

Pillows can provide extra cushion or space that can make many poses more accessible or more comfortable. In some poses, you may find you need more support from a bolster if your pillows are too flat or small.

Here are a couple ways to incorporate bolsters and/or pillows into your practice:

  • Tuck a bolster under your back in Reclined Goddess Pose
  • Place under your seat in Hero Pose or under a leg in Pigeon Pose
  • Rest your legs on pillows in Reclined Supine Twist
  • You can also use bolsters and pillows when doing Legs up the Wall or lying in Savasana

3. Straps

Straps

women using band to help with her stretching
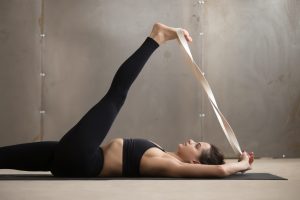
Straps come in a wide variety of lengths and styles for purchase. Straps will help you deepen stretches without compromising the position of your back and can be used in many poses.

When to use straps:

Straps are beneficial for muscle tension, such as tight hamstrings, or when you need some extra length in stretching the shoulders or legs.

Here are a couple ways to utilize a yoga strap:

  1. In Seated Forward Fold, you can wrap a strap around the balls of your feet and hold one side of the strap in each hand; gently pull yourself toward your feet with the straps, keeping a straight back rather than hunching over to force the pose.
  2. In Cow Face Pose, if you are unable to bind your arms behind your back, hold one end of the strap in each hand and slowly wrap the strap around your wrist to bring the hands closer together with time.
  3. Use a strap to modify King Pigeon or Dancer Pose by looping it around the front of your foot, just below the toes and holding the other end with your hands to slowly bring your bent leg closer.

4. Blanket(s)

Yoga Props Essentials Beginners Guide Blanket

Blanket(s)

Folded blankets is are easy yoga props to have on hand and can be used in more ways than you might think. They are the perfect addition to savasana for added comfort and warmth.

When to use a blanket/blankets:

  • Use a folded blanket as support under the knees in any pose with the knee on the mat such as Low Lunge, Cat/Cow, or Gate Pose.
  • Use a folded blanket under the wrists, (with the wrists being higher than the fingertips), to reduce wrist pain.
  • Use a folded blanket under the wrists in Upward Facing Dog, Downward Dog, Cat/Cow, or any pose where you put weight into the hands.
  • A folded blanket under your seat in Hero Pose or Child’s Pose will work if a pillow is unavailable or too large.
  • And of course, (as mentioned above), use a blanket to be warm and cozy during Savasana.

Practical prop substitutions

If you are unable to come in contact with yoga props, household items will usually do. Books, boxes, canned goods, or other sturdy, square-shaped items can work in place of the yoga blocks. A towel or even a cozy blanket can substitute for an actual yoga blanket. Belts, towels, or rolled up t-shirts can step in for the use of yoga straps and bed pillows can make a great substitution for legitimate yoga pillows.

All of these substitutions will come in handy when practicing specific types of yoga. For example, if you are more inclined to attend or lead a restorative yoga class, you may be more inclined to keep blankets, bolsters and blocks on hand. If you’re attending or leading a vinyasa class, blocks and straps are probably more appropriate. Below are a list of the common props needed for each practice based on the movements and alignment of the poses practiced in each style.

Props for Yin Yoga

  • Bolsters
  • Blocks
  • Blankets

Props for Restorative Yoga

  • Bolsters
  • Blocks
  • Blankets

Props for a Vinyasa flow

  • Blocks
  • Straps
  • Blankets

Props for Iyengar Yoga

  • Blocks
  • Straps

Additional props you can use

Beyond these basic prop suggestions comes a multitude of additional props you can use to enhance your practice. Most of the time, it will depend on what type of class you are teaching. For example, sand bags, eye pillows, wheels, wedges, gripping gloves and socks, are all items utilized in a yoga practice to enhance the comfort, mobility and versatility of a class. Whatever yoga props you use, use them with confidence, and know that they are great tools to further your yoga practice.

Supported fish with bound angle pose

Weekly Class Theme: Heart Chakra

By Yoga Teachers

This week we’re exploring the fourth chakra, the heart chakra or Anahata. The rainbow bridge, as Anodea Judith refers to it, is connected by the heart chakra — connecting the lower (earth) and the upper (ethereal) chakras.

Within the chakra system there are two directions of flow:

  1. The path of liberation — starts at the first (root) chakra and works up to the seventh (crown).
  2. The path of manifestation  — starts at the seventh (crown) chakra and works down to the first (root). The balance of both are what contributes to our wholeness.

The heart chakra encapsulates:

  • Balance
  • Love
  • Self-reflection
  • Self-acceptance
  • Relationships
  • Intimacy
  • Grief
  • Devotion.

In first chakra, we took the time to ground ourselves and to acknowledge our roots and our physical form. In second chakra we connected with our emotional realm giving us the ability to perceive pleasurable vs. not pleasurable. In third chakra we stepped into our sense of self and began to develop our personal willpower. Now imagine taking all of that and throwing some love into the mix.

Love for oneself and love for others (our relationships) set the groundwork for massive growth, transformation, and expression. Love brings magic into our lives and widens our perspective. Think about how your perspective shifts when you are in a romantic relationship. You might see things differently and try to intentionally understand another because of love.

It’s not just the bright side of love that presents the opportunity to shift, but with true love may come grief. The loss of love of oneself or another whether it be through a breakup or death presents an opportunity to grow through pain (if we allow it of course). The matters of the heart are surely no joke, but the heart is strong. With self-compassion, reflection, acceptance, and trust in time, things work their way back into balance.

Supporting Pose #1: Lizard (Utthan Pristhasana)

Lizard pose

The lower body portion of our peak pose definitely requires an opening of the groin muscles. Lizard is a nice choice to begin opening in that direction. It’s also relatively accessible for practitioners as there’s many ways to use props (or not) to serve each body.

How to:

  1. From downward facing dog, step the right foot to the outside of the right hand.
  2. Lower the left knee to floor.
  3. Options to have the palms on the ground or blocks, or to lower the forearms down to the ground.

*It’s okay to let the right hip open to widen the knee further and perhaps come to the outer blade of the foot, especially with this week’s peak pose.

Supporting Pose #2: Warrior 2 (Virabhadrasana II)

Warrior II

Warrior 2 is another great pose for widening the groin and the chest (two focuses of our peak pose).

  1. From downward facing dog, step the right foot forward for low lunge.
  2. Swivel the left heel down so the left foot is more or less parallel to the short side of the mat.
  3. Bend the right knee at 90 degrees and bring the torso upright so the crown of the head is aiming towards the ceiling.
  4. Widen the right knee over the second and third toe so the inner thigh can lengthen.
  5. Spread the arms towards the front and back of the room and take the gaze over the front middle finger.

Supporting Pose #3: Pyramid with Reverse Prayer (Parsvottanasana)

Pyramid pose with reverse prayer hands

The legs in the split position as found in pyramid contribute to the lengthening of the groin muscles (just be careful to not shorten the stance too much). The reverse prayer portion of this pose to help to firm the upper back in and draw the shoulder blades together in service of widening the chest.

How to:

  1. From warrior I, swim the arms behind the back and join the palms together with the fingers aiming up towards the head. It helps to hinge forward a bit and “crawl” the hands towards the upper back.
  2. Straighten the legs and lift the kneecaps.
  3. Press the left heel down and draw the right hip back as the torso hinges forward.
  4. As the upper body dives down, ensure to pull the shoulder blades towards one another to keep widening the chest.
  5. Work the nose in the direction of the knee.

Peak Pose: Supported Fish + Reclined Bound Angle (Matsyasana + Supta Baddha Konasana)

Supported fish + bound angle pose

This pose may be intense for some and for others it may feel more relaxing. But in terms of really tending to the heart, I feel like this is a great pose. It opens up the front body which creates optimal space for the lungs and presents the opportunity for the practitioner’s nervous system to settle so the heart can be offered in a really compassionate way.

How to:

  1. Set up the blocks for supported fish so that one block is set up on the low/medium setting horizontally and the other is on the medium/high setting (respectively) vertically.
  2. Lie down so that the horizontal block is supporting the shoulder blades and the vertical block is supporting the head. There may be some discomfort here, but generally speaking this should feel supportive and like it can be sustained for at least a couple minutes.
  3. Bring the soles of the feet together and widen the knees. Depending on how long you are here, you can support the legs with blocks or a blanket.
  4. Allow the arms to stretch out towards the side in a comfortable manner. If the arms feel unsupported, you can place blankets or pillows under the forearms.

Sources: Eastern Body, Western Mind by Anodea Judith

Alex Plante in Triangle Pose

3 Reasons to Enroll in a 200 Hour Yoga Teacher Training

By Yoga Teachers

What brings anyone to do anything? Usually, general interest, right? Or is it that we seek fulfillment? Maybe it’s for the sheer fact that something random piqued our interest and it seemed attainable… 

Usually when people decide to step into their 200 hour yoga teacher training, it’s by some random bit of fate — literally the right place at the right time.

Whatever your reason, here are the top three reasons (in our opinion):

1. You’ll Reap Immense Benefits On and Off the Mat

The things you learn in a yoga teacher training course stretch beyond the mat and into everyday life. You’ll not only learn all the major poses, but you’ll also learns what it actually means to be living in the present moment (and how to be conscious of it).

Your learnings inside your training can span beyond just the physical practice, creating space for you to find peace within yourself (a feat that not too many feel comfortable coming to terms with). Some of these teachings may even spill onto the relationships you’ve cultivated in a healthy way; a more patient you can make for a more patient and peaceful circle of people around you. They say,

“If you want to change the world, you must start with yourself.”

Woman kicking foot up to prep for forearm stand

2. You’ll Get Regular Exercise + Peace of Mind

On a basic level, yoga serves as an excellent form of exercise. A lot of times, this is what initially brings people to at least try yoga — they want to be more flexible, they want to touch their toes, they want to have more mobility in their shoulders to crush it on the tennis courts, etc.

One of the most transformative benefits of practicing yoga is the fact that it bridges the connection between the body and the mind, fluidly. You may have never thought of it this way before, but the breath is the one thing we do actively when we are awake and subconsciously when we are asleep. It is the one thing that we do both consciously and unconsciously and plays an integral role in the yoga practice.

Yoga Teachers sitting in window

3. You’ll Build Honest + Life-changing Connections

A 200 hour yoga certification can also lead to valuable personal and professional connections. Regardless of whether you’re looking for new friends or are interested in networking opportunities, yoga training is an excellent setting to form such connections. There are many tales of yogis who go on to make lifelong connections from their teacher trainings, remembering their teachers/mentors along the way and the knowledge they provided them with.

It’s hard to encapsulate the feeling and speak on behalf of everyone who embarks in their 200 hour journey, but this much we know is true: the experience is more delightful than it is painful and the enlightenment that we achieve brings us that much closer to existential bliss.


You may just change your life…

A 200 hour yoga teacher training is the first step toward a journey inward. While you’ll meet some incredible people along the way, it is always for you. We always encourage yogis to do their research before deciding where to enroll in their YTT, and usually it tends to be at a studio they are loyal to. However, in recent years, it’s become increasingly popular to enroll in a yoga teacher training online. Both options will provide you with all the information necessary and any good online platform will offer the support, look and feel of an in-studio teacher training.

Here at YogaRenew, we adhered to the qualifications necessary to be a Registered Yoga School (RYSÂŽ) with Yoga Alliance. This means that if you choose to enroll in any of our trainings or courses, you will receive Yoga Alliance accreditation. Be mindful when deciding where to complete your yoga teacher training as this extra layer of accreditation can help speak to the validity of the information you’re learning and teaching.


“Yoga Saved My Life.”

By Lifestyle & Wellness, Yoga Teachers

You never really know what you’re getting into when you ask someone about their life when they make a statement that powerful (something saving their life). For me, I knew the outline (more or less) of Trevor’s life, but never in the capacity in which he was able to explain it.

Trevor Vaughan, Founder and CEO of HudsonSeed and the Director of the Children’s Yoga Online Teacher Training program at YogaRenew, has lived nine lives… truly. His journey towards becoming a certified yoga instructor is a heavy one, and his path now, an enlightened one. The knowledge he learned along the way is usually only accumulated by that of someone at least 20 years older than him. But that didn’t make the wisdom any less inspiring.

Here is the story of how yoga, quite literally, saved his life…

The beginning

Trevor knew from an early age that he would want to go fast and push his luck far. Ever since he can remember, he’s always felt like somewhat of an outcast and was never really able to pinpoint what made him feel so different. He lived a perfectly normal life with two, loving Irish-American parents growing up in Queens. It just so happened he ended up with a natural affinity for booze that would eventually lead him down a path so muddy, you almost wouldn’t believe it.

Feeling like an outsider for most of his life, forced this inclination for Trevor to become something…and that something was to be a distinctive person in a room full of other humans. This longing to be accepted in social settings and his eagerness to try things (knowing he longed for a deeper jolt in life going beyond basketball at the local park or riding bikes with the neighborhood kids), pushed Trevor to make his way to one of the most fast-paced, substance abusing, free-for-all environments there is: Wall Street.

Having never really succeeded in a college setting because of his relationship with booze, despite being wicked intelligent and intellectually capable beyond his physical years, he was more interested in running an internship that eventually led him to a lengthy battle with screaming and shouting on the trading floor. This led to long nights out, battling the demons he eventually had no control over.

“For some reason, I never felt safe, or that cool or good enough…like everyone else was in on it but I wasn’t in on it…the second I had that cocktail, then I felt like I was it,” he said.

Trevor explained to me that he later learned the feeling of warmth and connection he so desperately sought was that same exact feeling you search for in yoga.

“Bliss and annihilation are kindred spirits, you know…”

As he tells me all about his journey finding his way into interning with someone on Wall Street. With his college grades suffering, he knew he had to take another route, and he decided jumping straight into work could be something better for him.

During his first few weeks, as soon as he enters the trading floor, he sees the papers flying around, numbers everywhere, and feels the high-energy of everything around him, he immediately feels a sense of being home.

Things were jelling for a while — money came easy, Trevor was able to juggle the precarious balance of his chaotic existence. Until eventually, he started getting anxiety while drinking and the drinking didn’t alleviate the anxiety…and then he found himself suffering.

“I don’t remember much of my 30s…” he went on to say.

The middle

Dear friend & fellow yogi, Lindsey Rozmes, Trevor, and other dear friend and mentor, Patrick Franco sitting in lotus pose together

First, let me paint the picture – 39 years old, taking pills in the morning to help him get through the day, after work drinking and all the other accouterments – this was Trevor’s reality…even worse, this was his life.

He starts losing a tremendous amount of weight and starts getting really sick. One day, he gets pulled off the trading floor on a stretcher (this would go on to happen more than once). He ended up spending a couple months in the ICU.

“We don’t have a time machine and now I get to experience karma,” Trevor says, as he speaks of the complete rebirth he had.

He eventually gets out of the hospital, and starts his recovery journey. Trevor starts getting real involved in service. The steps in yoga, he says, are very much tied together to what he experienced in recovery.

It was November of 2013, Trevor was still working on Wall Street, his body in immense pain, on fifteen medications a day. A friend in recovery suggested yoga.

Trevor immediately rejected the idea that his macho, money-making, party-starting, fast-paced lifestyle would do well in a yoga setting… even if his booze-riddled and arthritis-prone body would be able to handle it. He remembers thinking to himself, “You want me, a Wall Street dude, to go in and do yoga?”

But… he tried it anyway.

When Trevor first arrived at the studio, he had to walk up two flights of stairs and could barely do it. Suffering from Rheumatoid arthritis, being severely scared of people, only sharing intimate interactions with his dog (who also remains by his side to this day), Poochie, he tried his hardest to go through with taking the class.

He had to borrow a mat, he was wearing socks, thinking everyone in the room was staring at him.

And then she spoke.

“Everyone stand in Mountain Pose… and breathe,” the teacher led the class with.

There’s a song called Everyday in its Right Place, by Radiohead, that Trevor said he’s “tripped so hard to this song,” coincidentally was playing during that first class. The breathing. The movement. The song. He started crying and thought to himself, “I do believe in the universe.”

In recovery, turning it over to a higher power, resonated in Trevor’s head as he flowed through class.

“THIS WAS MEANT TO BE,” he thought.

He got into his Downward Dog. This was meant to be. He breathed in, he breathed out, it was very difficult, but he was able to get into the flow state until eventually he felt “locked into flow.”

“In Savasana I decided, this is what I’m going to do everyday for the rest of my life.”

Patrick Franco, one of the teachers at Devotion where Trevor first started practicing, eventually ended up leaving and starting his own practice known as Hudson Yoga Project (HYP) where Trevor would take his newly found love, admiration, and lifestyle.

Biological, mental and spiritual anxiety dissipating post sobriety through the power of yoga, he decided he would stay loyal to the practice.

And he did.

The end…and the beginning

Trevor and dear friend and partner for Children’s Yoga at YogaRenew, Julie Pasqual

Living, breathing, and loving yoga, he would then go on to partner with YogaRenew to create the Children’s Yoga Teacher Training. Trevor couldn’t stress the importance of service enough, and what better way to serve, he feels, than educating and interacting with the youth.

Trevor’s world-renowned program teaches kids yoga and helps yoga instructors become certified in the specific art of leading kids yoga classes. He goes to schools all around New Jersey, signing them on board to instruct and lead yoga classes for kids in different time slots throughout the day. Known as Mister Trevor, the work he does with these children keeps Trevor on a path of peace and service…and he couldn’t imagine his life any other way.

He continues to practice yoga at the YogaRenew headquarters in Hoboken and can also be found frequenting rock concerts of only the raddest of bands with fellow yogis and friends.

Trevor’s recommended reading:

The Creative Act: A Way of Being

A New Look at the Science of Yoga and How It Can Transform Your Life

Person in Twisted Chair with Open Arms

Weekly Class Theme: Solar Plexus

By Yoga Teachers

Our journey through the chakras continues with our third chakra, otherwise known as Manipura Chakra. Manipura chakra is located in the solar plexus (aka the belly right around the naval). This is the home of our personal power, will, self-esteem, and autonomy. At this point in the chakra system, we’ve created a steady ground and experienced movement, change, and flow with emotions which builds energy. As we enter manipura, we have the opportunity to turn this energy into action.

Third chakra encourages enthusiasm and enjoyment about life as we develop our sense of self in this world. This is necessary for making decisions that are most in alignment with who we are and where we are going, for taking full responsibility for our actions, and for taking risks, which can lead to deep transformation.

When I think of third chakra, I think POWERHOUSE — A healthy third chakra allows us to stand strong and tall in who we are and to arrive to our lives knowing that we hold the key to the life we truly desire.

Peak Pose: Twisted Chair with Open Arms (Parivrtta Utkatasana)

Any deep twisting posture is going to require a turning of the belly, which requires effort combined with a softness of the tissues around the belly. A blanket roll for the belly and Kapalabhati pranayama can be good ideas to accompany this practice.

Supporting Pose 1: Extended Child’s Pose with Side Stretch (Utthita Balasana)

Seeing that twisting postures require the torso to turn from one side to the other, it’s important that the side body has length to allow space for the twist to occur. Child’s pose has both legs bent, like in chair pose and by adding in a side stretch this pose really helps the practitioner prepare for the peak pose.

How to:

  1. Come into child’s pose with the big toes together and knees wide.
  2. Keep the sit bones towards the heels and reach the arms towards the front of the mat.
  3. Walk the hands over to the left side of the room to stretch the right side of the body. You can walk the right hand farther out or cross the right hand on top of the left to intensify the stretch.
  4. After ~5 breaths, walk the hands through center and repeat in the other direction.

Supporting Pose 2: Side Angle (Parsvakonasana)

Side angle helps the practitioner come into a pose with a twisting element and arms spread. This pose can really teach the importance of twisting the whole torso, chest included, and highlights the role the arms can play in such a pose. Notice below how the left side of the chest comes through to twist? This allows the shoulder to be in a good position to spread the arms.

How to:

  1. From warrior II (left foot forward), bring the left hand down to the ground on the inside of the left foot. Inside meaning along the edge of the big toe side.
  2. Turn the belly from right to left and press the left arm against the inner left knee to bring the left side of the chest through.
  3. Reach the right arm up to the ceiling and draw the shoulder blades towards one another to spread the collarbones.
  4. Lean the chest back and take the gaze towards the top hand.

Supporting Pose 3: Low Lunge Twist

Low lunge twist is similar to chair twist in that it’s a closed twist, meaning the belly is turning towards the leg. This combined with the open arms makes it a great prep pose for the peak!

How to:

  1. From low lunge (with right leg forward), take the left hand down to the ground on the inside of the right foot.
  2. Press the left side of the rib cage and torso to the right and up to the ceiling.
  3. Reach the right arm up to the ceiling and lean the chest back as you draw the shoulder blades towards one another.
  4. Gaze up towards the top hand.

And Finally, Twisted Chair with Arms Extended (Parivrtta Utkatasana)

How to:

  1. Come into chair pose with the feet together and legs as close as you can manage.
  2. Take the hands into a prayer at the center of the chest.
  3. On your exhale, turn your belly to the right and hook the left elbow to the outside of the right knee.
  4. Use the elbow and knee connection to help turn the belly and the chest. Really try to bring the left side of the chest up towards the sky.
  5. Reach the arms away from the chest and as you do this, bring the shoulder blades towards one another to broaden the chest.
  6. Take the gaze either to the side wall or up to the top hand.
  7. Come back to a neutral chair and then repeat on the other side. You can always come to mountain pose in between to be able to fully enter on the other side.

*If the lower back and/or hips feel restricted, let the hips and knees come out of alignment. Meaning, it’s okay to let the one of the knees drift forward to serve the twist. If all feels okay, try to keep the hips and knees in line with one another.

Student & teacher in 300 hour ytt

How a 300 Hour YTT Can Enhance Your Practice

By Yoga Teacher Training

If you’ve completed a 200 hour yoga teacher training, you already know how everything about the experience can enhance your own yoga practice, your quality of life, and the way you begin to experience your relationship with yourself and with everyone around you. It’s one of the most fulfilling, intense, and beautiful experiences that may have left you with the desire to learn more about all of the topics you’ve discovered.

A 200 hour teacher training is kind of like a 101 or an introduction-level course in college. You get an understanding of the subject, but you are often left wanting more information about something specific that sparked your interest. When it comes to yoga, perhaps you really wanted to know more about pranayama, mudras, philosophy, or maybe even sequencing your own yoga classes.

Committing to a 300 hour yoga teacher training will automatically take you through a deeper learning experience into everything that your 200 hour only touched on. Your 200 hour gave you an understanding of yoga and a general introduction to how transformative the practice actually is. When you move onto your 300 hour, you will already have a strong foundation to build on and your practice will be enhanced in so many ways!

You will be driven to continue your own yoga asana practice

A 300 hour yoga teacher training teaches you how to sequence a class around the yoga poses that can be a little more challenging and a little more fun to try. In order to understand this process, you will need to practice on your own and take classes with the teachers you admire. This means you’ll be even more motivated to get on your mat, head to the studio, or press play on your computer.

When you sign up for a teacher training you will experience a sense of accountability that you probably wouldn’t have otherwise experienced. You will enter into the mode of learning and will find yourself getting excited to seek out what inspires you.

Your struggles will become your best friends

While we’re on the topic of taking classes, I have to be honest with you about something. When I first started taking yoga classes, I used to have a really hard time understanding how I was supposed to inhale and exhale, where I should be looking, and which way my toes were supposed to be facing in almost every pose. There were so many little things to be aware of in a yoga class and struggling with them became a practice in itself.

The good news is that it always got better! The more I committed to the practice, the better I felt. Eventually, I started to actually enjoy the small details that once frustrated me. When I took my 300 hour teacher training, I understood why these details mattered so much and I also learned how my own thoughts and feelings were what was getting in the way. If you’ve had a similar experience, I’m confident that it will also get better as your practice deepens.

You’ll understand your mind and your emotions

A more advanced teacher training, like a 300 hour, will always help you investigate why you think a certain way and what makes you feel the way you do. You’ll study philosophical yogic texts that cover the nature of the mind and you’ll learn how to control the way you respond to situations before your emotions get the best of you.

All of the topics that you study will have a positive effect on your response to stress, anger, and sadness. Everyone experiences lower emotions and everyone goes through hard times, but the yoga practice teaches you how to respond instead of react. This can create an overall feeling of wellbeing both on and off your yoga mat.

Modifications start to get fun

The more you come back to your training and your practice, the more you might start to realize that not every yoga pose works for you. A 300 hour yoga teacher training helps you dissect the more intricate anatomy of the yoga poses and understand why the full expression of the pose looks the way it does in some of the books. Once you grasp this understanding, modifying yoga poses to work for you is actually really enjoyable.

Being in the body that you’re in is a celebratory experience and learning how to modify your practice to work for you is so exciting. If you’re working with any injuries or limitations, you learn to embrace your practice even more and find different ways to love the body you’re in.

The subtle body becomes a little less subtle

You’ve already learned about some of the subtle energies in yoga. A 300 hour yoga teacher training will help you really understand why they’re so important and also how to fully experience them even better. Your body is so much more than muscle, blood, and bone. It’s full of energetic channels, intricate layers, and the amazing life force that makes you who you are.

The subtle energies are something that you don’t learn too much about when you first begin to study yoga, but once you’re committed to a more advanced training, you will learn even more about them and why they’re so important to your practice. This understanding will elevate your own practice and also influence the way you move and breathe throughout your life.

Meditation and pranayama will make more sense

Even if you already have a solid meditation or pranayama practice, a 300 hour yoga teacher training will still take you to new levels with these practices. Your training will have a focus on why we teach these and also how to teach them to beginners and advanced practitioners. When you learn how to teach something to someone new, your own experience will be elevated.

If you’re still new to meditation and pranayama, you’ll gain an understanding as to why practices that focus on controlling the mind and the breathing are so important to your yoga practice. You’ll learn how these are connected to the asana practice and why it’s so important to practice them.

The New York Times posted a helpful article, “How to Meditate” to get you started if you’re new at this!

Your self care and overall quality of life will be heightened

A 300 hour yoga teacher training has a strong focus on taking care of yourself so you can teach others. Even if you decide not to teach yoga, you will learn how important it is to love yourself first. The yoga practice asks you to examine yourself in a way that you otherwise wouldn’t and to figure out what you need and why you need it. When you turn inward in such an intentional way, you can become much kinder to yourself and give back to yourself.

A person who has a strong sense of self love can be such a positive influence on everyone around them. As your own practice is enhanced through your teacher training, you’ll most likely inspire the people in your life to make kinder decisions too.

Creativity will show up when you least expect it

Whether you consider yourself a creative person or not, you will notice yourself tapping into your own creativity more than ever. If your job depends on you coming up with new and unique ideas, you may find that everything flows a little easier. If your livelihood doesn’t depend on creativity, you may find that you’re more inspired to come up with different recipes or things to do on your days off.

A 300 hour yoga teacher training may help you remove certain blockages that were preventing you from living life to its fullest. There will probably be a newfound excitement in the way you see the world and your overall love for the people and things around you. This is ultimately one of the goals of yoga.
Enhance your practice.

Lots of people think that they can only take a 300 hour teacher training if they’re a yoga teacher. This isn’t true at all! Although it’s a really important step in becoming a more experienced teacher, it’s also a really helpful way to continue your own yoga studies and learn more about the practice. A teacher training is both a doorway and a pathway. You enter into something that is also simultaneously a journey that keeps you connected to yourself.

The more you learn, the more you can enjoy your own practice and your overall experience of life. A 300 hour teacher training will take you deeper into the topics that you’ve only begun to learn about and will help you understand topics that may have been a bit confusing at first.

If you’re thinking about taking a 300 hour teacher training, we hope you can join us! We’re always enthusiastic to share what we love and to teach other people how to do the same.

If you’re inspired to take the next step, we invite you with open arms to join us in our 300 hour yoga teacher training. The topics covered are always inspiring, exciting, and helpful.

Weekly Class Theme: Sacral Chakra

By Yoga Teachers

For this week’s class theme we’ll be focusing on second chakra, or the sacral chakra. In Sanskrit, second chakra is known as Svadhisthana and is located at the sacrum.

The body parts encompassed within second chakra are the lower back, lower abdomen, and the genitals.

Before we talk about the basic issues of second chakra, let’s review briefly what the chakras are. Chakra is translated to “wheel” or “disk.” The chakras are spinning energy centers in the body going from the tailbone up to the crown of the head. The chakras all rotate at a particular and different frequency allowing the proper flow of prana throughout the body. If any of the chakras are damaged, this can cause misalignments in various aspects of one’s life.

The Svadisthana chakra is all about movement, change, and emotions. In first chakra, one’s roots are grounded to build a strong foundation which supports one’s safety, security, and survival. After establishing safety, one can start to interact with the world through the senses and move towards pleasure, which requires the introduction of emotions.

The root chakra’s element is earth, while sacral chakra’s element is water.

Movement that flows like water incites change and change is what stimulates awareness. The combination of sensing life through our eyes, mouth, nose, ears, and skin and being aware of feelings which arise to change and stimulation around us is what allows us to live a truly rich life.

Movement, rhythm, and flow are some great elements to focus on if you wish to create an asana class around this sweet, flowing chakra.

Peak Pose: Extended Hand to Big Toe Variation C (Utthita Hasta Padangusthasana C)

Utthita Hasta Padangusthasana C (UHC) requires setting a strong foundation of the feet and legs and then using that foundation to twist open wide. There’s an element of twisting (and balancing) which requires steady focus and a softness of awareness and body to achieve a state of balance.

Supporting Pose 1: Wide Pyramid (Parsvottanasana)

Wide Pyramid (aka Pyramid with the back heel lifted), puts practitioners in an optimal position to focus on straightening both legs, which of course is seen in our peak pose. There’s also an element of twisting here in this posture so the belly can fold over the front leg.

How to:

  1. From low lunge (right leg forward), straighten both legs. Blocks are a great tool here!
  2. Lift the kneecaps and press the root of the right thigh back. You can also lift the front toes as pictured to emphasize the ball of the big toe pressing down and to invite integrity through the leg.
  3. Lift the sit bones up as you fold your belly over the right leg. This requires a slight twist from left to right.
  4. Lower the nose towards the knee.

Supporting Pose 2: Triangle (Utthita Trikonasana)

Like Pyramid, Triangle gives practitioners the opportunity to straighten the legs in an open hip manner which can be more accessible for many people. It also separates the hands and stretches the chest similar to UHC.

How to:

  1. From Warrior II (right leg forward), straighten the legs. Emphasize the four corners of each foot and lift the inner arches.
  2. Side bend over the right leg by pressing the root of the right thigh back and leaning the torso to the side.
  3. Bring the right hand down to a block on the outside of the leg (to the outside of the pinky toe).
  4. Stretch your left arm up to the ceiling to spread the chest.
  5. Your gaze can be towards the side wall or up to the ceiling.

Supporting Pose 3: Extended Hand to Big Toe Variation A (Utthita Hasta Padangusthasana A)

Once setting the foundation by having both feet on the ground and straight, we can progress by lifting one leg off the ground before we start to revolve. You can do Utthita Hasta Padangusthasana A (UHA) by wrapping the thumb, pointer finger, and middle finger around the big toe or another great variation is to take the sole of the lifted foot to a wall or chair.

How to:

  1. From mountain pose, lift the right leg off the ground with the knee bent and the thigh parallel to the floor.
  2. Slip the right arm along the inside of the right leg to wrap the thumb under the big toe and the pointer finger and middle finger around the top of the big toe.
  3. Press the four corners of the left foot down into the ground and do your best to straighten the leg by pressing the left thigh back. Ensure the pelvis stays in line though so firm the left glute slightly forward.
  4. Start to kick the right foot forward to straighten the right leg and reach the ball of the foot forward. If you’re using a wall, press the sole of the foot into the wall. If you’re using a chair, rest the heel of the seat or back of the chair and reach through the ball of the foot.
  5. Lift the kneecaps to create clear, straight legs.
  6. Spread the chest by engaging the right shoulder blade towards the spine and reach the left arm to the ceiling alongside the ear.

Extended Hand to Big Toe Variation C (Utthita Hasta Padangusthasana C)

How to:

  1. From UHA, cross your left arm under your right arm to take the left hand to the outside of the right foot (aka to the pinky toe edge). If the knee bends, it is ok! Try to maintain good alignment in the pelvis and chest.
  2. Reach the ball of the right foot forward into your hand and use that as an anchor to lean back and keep the chest lifted.
  3. Twist your torso towards the right, bringing the left side of your rib basket and left side of your chest towards the right. Try to let your belly be soft as you breathe and twist.
  4. Stretch the right arm towards the back of the room with the thumb facing the sky to spread the chest and the inner line of the arm.
  5. Try to follow your gaze to your right thumb.